


Are you tired of seeing your microwave taking up valuable counter space in your kitchen? Do you wish there was a way to hide it or incorporate it into your kitchen design seamlessly? You’re not alone.
How to hide microwave in kitchen can enhance the aesthetic appeal of the space and create a more streamlined look.
While microwaves are a convenient kitchen appliance, their bulky design can disrupt the flow of a well-decorated kitchen.
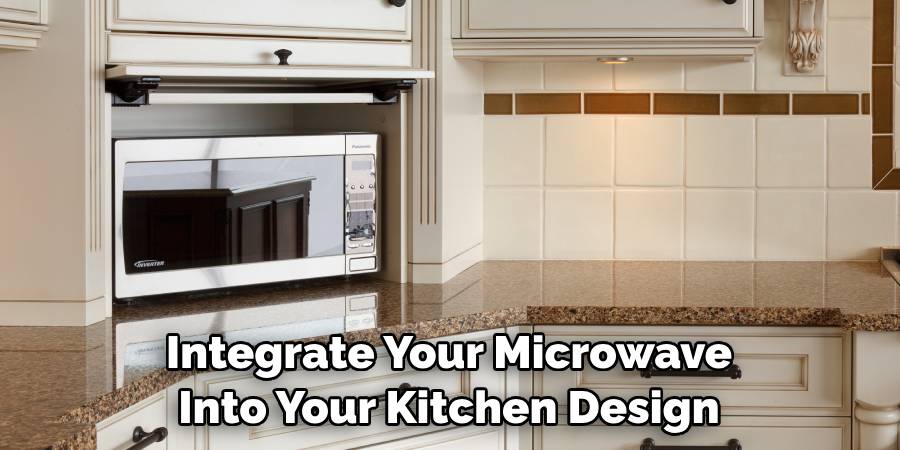
By employing clever design strategies and utilizing available space efficiently, you can seamlessly integrate your microwave into cabinetry or other areas, keeping it out of sight when not in use.
This guide will explore various techniques for concealing your microwave, from cabinetry solutions to innovative decorative ideas. These techniques allow you to maintain functionality without compromising on style.
What Will You Need?
Before diving into the different methods of hiding your microwave, let’s quickly cover the materials you may need for these projects:
- A measuring tape
- Screwdriver
- Drill
- Saw (if building custom cabinetry)
- Hinges and cabinet door hardware (if incorporating microwave into existing cabinetry)
Of course, the specific tools needed will vary depending on the method chosen. It’s always a good idea to consult with a professional or do thorough research before beginning any project.
10 Easy Steps on How to Hide Microwave in Kitchen
Step 1. Measure Your Microwave
Before you begin, it’s essential to measure your microwave’s dimensions, including its height, width, and depth.
Knowing these measurements will help you determine the best location for hiding it within your kitchen cabinetry or designing a custom solution.
Be sure also to consider any additional space required for ventilation, as microwaves need proper airflow to function efficiently.
Step 2. Choose the Right Location
Once you’ve measured your microwave, the next step is to decide where to place it. Look for a location that is both convenient and discreet.
Popular options include inside a kitchen cabinet, under the countertop, or in a dedicated microwave drawer. Consider the kitchen layout and how frequently you’ll need to access the appliance.
Keeping it within easy reach will enhance functionality while still maintaining a cleaner aesthetic. Additionally, ensure that the chosen location has access to power outlets and allows for adequate ventilation to prevent overheating.
Step 3. Select Your Concealment Method
After choosing the right location, it’s time to decide on the best method for concealing your microwave.
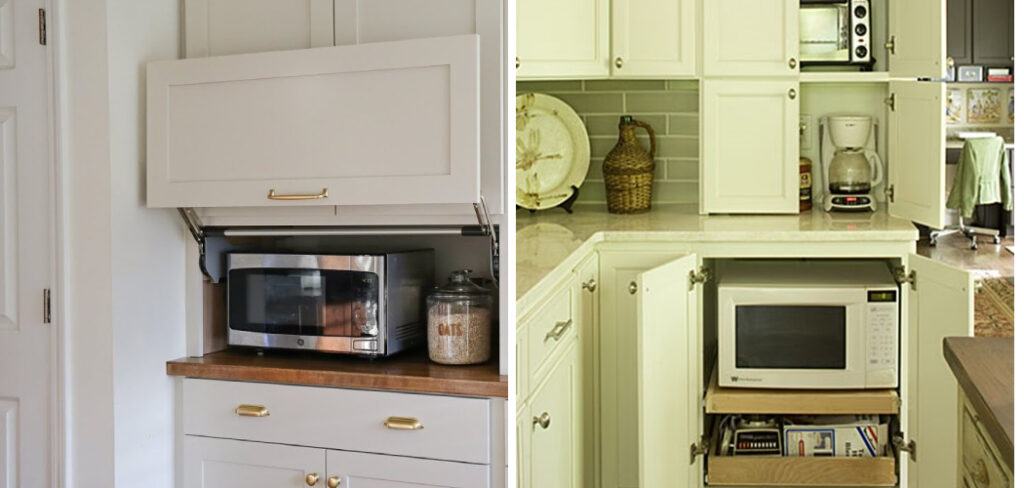
There are several options, each with its own set of benefits. You might opt for cabinetry solutions, such as installing a cabinet designed explicitly for microwaves or using a pull-out shelf.
Alternatively, a decorative door can be added to an existing cabinet to hide the microwave when not in use.
Another popular choice is the microwave drawer, which saves space and maintains a sleek look. Whichever method you choose, ensure that it aligns with your kitchen style and meets practical needs for accessibility and airflow.
Step 4. Prepare the Space
Once you’ve selected your concealment method, preparing the designated space for your microwave is essential.
This may involve removing existing shelves or altering the cabinetry to accommodate the microwave’s dimensions. If you’re installing a cabinet or a pull-out shelf, ensure the area is clean and clear of any obstructions.
If necessary, consider reinforcing shelves to handle the weight of the microwave and ensure that the location maintains proper airflow.
Proper preparation will facilitate a smoother installation process and help ensure your microwave is functional and stylishly integrated into your kitchen design.
Step 5. Install the Microwave
Now that the space is prepared installing your microwave is time. If placing it inside a cabinet, carefully lift the microwave into position, ensuring it sits securely on a stable surface.
For built-in models or kitchen drawers, follow the manufacturer’s installation instructions closely, making adjustments as needed to ensure a snug fit.
Use a level to confirm that the microwave is even, ensuring proper operation and contributing to a polished look. If your microwave requires ventilation, verify that the venting is unobstructed and adheres to the manufacturer’s guidelines.

Step 6. Conceal with Cabinet Doors
If you’ve chosen a cabinetry solution for your microwave, the next step is to add cabinet doors to conceal it when not in use. You can opt for traditional hinged or contemporary sliding doors depending on your preference. Measure and cut the doors to fit your opening, attaching them using the appropriate hinges or mounting hardware.
Ensure that the doors open smoothly without obstructing any adjacent cabinets or appliances.
This not only maintains a sleek look but also allows for easy access to your microwave whenever needed. A stylish finish to the doors, such as paint or stain to match the rest of your cabinetry, will further enhance the overall aesthetic of your kitchen.
Step 7. Ensure Proper Ventilation
Once your microwave is concealed, it’s crucial to ensure that it has proper ventilation. Most microwaves come with specific requirements for air circulation to function efficiently and avoid overheating.
If your microwave is built into cabinetry, ensure ventilation holes or gaps allow heat to escape. Consider using venting kits or adding grille inserts to achieve this.
Double-check that nothing blocks the microwave’s vents, and refer to the manufacturer’s guidelines to ensure compliance with any specific ventilation standards. Proper airflow is essential for your appliance’s longevity and your kitchen environment’s safety.
Step 8. Test the Microwave
After installation and ensuring proper ventilation, it’s time to test your microwave to confirm it functions correctly in its new location.
Plug in the microwave and perform a quick cooking test with a cup of water or a microwave-safe item. Check that the microwave heats evenly and operates without unusual sounds, ensuring all functions work correctly.
If you notice any issues, review your installation steps and refer to the manufacturer’s troubleshooting guide. This step will help you identify any adjustments needed and ensure your new setup meets your cooking needs effectively.
Step 9. Organize the Surrounding Area
With your microwave in place and functioning well, take a moment to organize the surrounding area. Ensure easy access to utensils, ingredients, and containers you frequently use when operating the microwave.
Consider adding a small basket or tray to hold microwave-safe dishes or accessories, which can help keep the space tidy and efficient.
A well-organised environment enhances functionality and contributes to a streamlined kitchen aesthetic.
Step 10. Final Touches and Enjoy
Finally, add any decorative elements or final touches to harmonize your microwave’s concealment with your kitchen décor. This might include decorative drawer pulls, cabinet finishes, or a subtle backsplash that complements your cabinetry.
Once everything is complete, step back and admire your handiwork.
Enjoy the seamless integration of your microwave into your kitchen space, providing both convenience and a clean aesthetic without compromising on functionality.
By following these steps and using the concealment methods discussed, you can successfully integrate your microwave into your kitchen design, making it a functional and stylish addition to your culinary space.
5 Things You Should Avoid
- Blocking Vents: Ensure any covering or cabinetry around the microwave does not obstruct ventilation. Proper airflow is essential for the appliance to function safely and efficiently.
- Ignoring Accessibility: Avoid placing the microwave in an area that makes it difficult to reach. It should be easily accessible daily, particularly for those with mobility challenges.
- Using Inflammable Materials: Avoid using materials that can easily catch fire, especially near heat sources. Choose heat-resistant materials that can withstand the microwave’s operational environment.
- Overcomplicating the Design: When hiding the microwave, avoid creating overly complex designs. Simple and practical solutions often blend seamlessly with your kitchen decor.
- Neglecting Electrical Requirements: Avoid hiding your microwave in a location without access to a power outlet. Ensure that any hiding solution maintains safe and convenient access to electricity for the appliance.
By avoiding these common mistakes, you can ensure your hidden microwave remains safe and functional for everyday use.
5 Different Style Ideas for Hidden Microwaves
- Minimalist Cabinet Solution: Conceal your microwave behind flat-panel cabinet doors with minimal hardware to create a sleek and seamless look. This minimalist design is perfect for modern kitchen spaces.
- Traditional Built-in Design: Build your microwave into cabinetry using matching materials and finishes for a more conventional look. This will create a cohesive and polished look in your kitchen.
- Contemporary Sliding Doors: Try adding contemporary sliding doors to conceal the microwave. They provide easy access while still maintaining a clean aesthetic when closed.
- Floating Shelves: Use floating shelves above or beside the microwave to hold frequently used dishes or cooking ingredients. This adds functionality to the space while also keeping the microwave hidden from view.
- Under-counter Placement: To hide your microwave, use a lower cabinet or a designated kitchen island section. This is an excellent solution for smaller kitchens with limited counter space.
These style ideas provide various options for concealing your microwave, allowing you to choose one that best fits your kitchen design and needs.

Conclusion
How to hide microwave in kitchen can enhance the overall aesthetic while maintaining functionality. By carefully considering its location, ensuring accessibility, and adhering to safety guidelines, you can create a seamless integration that complements your kitchen design.
Simple solutions, such as cabinetry or dedicated nooks, allow the microwave to remain an essential appliance without becoming an eyesore. Ultimately, planning and execution are key—keeping safety, efficiency, and style in mind will lead to a successful concealment that meets your needs and elevates your space.
Hopefully, this guide has provided valuable insights and considerations for hiding your microwave in the kitchen. So enjoy a clutter-free, streamlined kitchen with your hidden microwave. Happy designing!
Professional Focus
Angela Ervin, a former interior designer turned blogger, specializes in kitchen design and renovations. Through her website, she blends her passion for cooking with design expertise, sharing practical and creative ideas. Known for balancing functionality and beauty, Angela’s insightful content has made her a trusted voice in home design and lifestyle.
About the Author
Angela Ervin, an experienced interior designer and blogger, combines her passion for kitchen renovations with storytelling. Living in Petersburg with her family, she enjoys cooking and testing her projects firsthand. Known for her humor and relatable style, Angela shares creative, functional design insights through her content, making her a trusted voice in home design.
Education History
University: Virginia Commonwealth University
Degree: Bachelor of Fine Arts (BFA) in Interior Design
- Angela’s education at VCU focused on mastering core interior design principles, including spatial planning, color theory, materials selection, and sustainable design practices.
- She gained hands-on experience through studio projects and collaborative design exercises, which honed her ability to create functional and aesthetically pleasing environments.
- Her coursework also emphasized problem-solving and practical applications of design, preparing her for real-world projects like her self-directed kitchen renovations.
- The program’s strong foundation in both technical skills and creative expression shaped Angela’s ability to seamlessly integrate form and function in her work.