


Installing mirrors on a kitchen backsplash is a stylish and functional way to enhance the space. Not only do mirrors create the illusion of a larger kitchen by reflecting light and space, but they also add a touch of modern elegance.
This guide on how to install mirrors on kitchen backsplash will walk you through the process of selecting the appropriate mirror type, preparing the surface for installation, and properly installing the mirrors to ensure a smooth, durable, and safe finish. Whether you’re looking to update your kitchen with a sleek, contemporary look or aiming to maximize light and openness, mirrored backsplashes are an excellent choice.
What is a Backsplash?
A backsplash is a vertical extension to a kitchen or bathroom countertop typically made from various materials like tile, glass, metal, or stone. It serves both an aesthetic and functional purpose. In design, a backsplash can enhance the overall aesthetic of a kitchen, offering opportunities for unique and personal style through colors, patterns, and textures.
Functionally, it acts as a protective barrier, safeguarding the walls from splashes, stains, and moisture damage that occurs during cooking and washing. Backsplashes can range from a small strip behind the sink to an expansive area covering the entire wall, providing both decorative flair and practical protection.
Why Choose Mirrors for a Kitchen Backsplash?
While tile and stone are popular choices for kitchen backsplashes, mirrors offer unique benefits that make them an attractive alternative. Some of the reasons to consider using mirrors as a backsplash include:
Reflective Surface:
Mirrors reflect light, making the space appear brighter and more open. This is especially beneficial for small, dimly lit kitchens, as mirrors can create the illusion of increased space and natural light.
Easy to Clean:
Mirrors are smooth, non-porous surfaces that make them effortless to clean. Unlike porous materials like grout or stone, mirrors do not absorb liquid or grease, making them ideal for backsplashes in areas prone to spills and splashes.
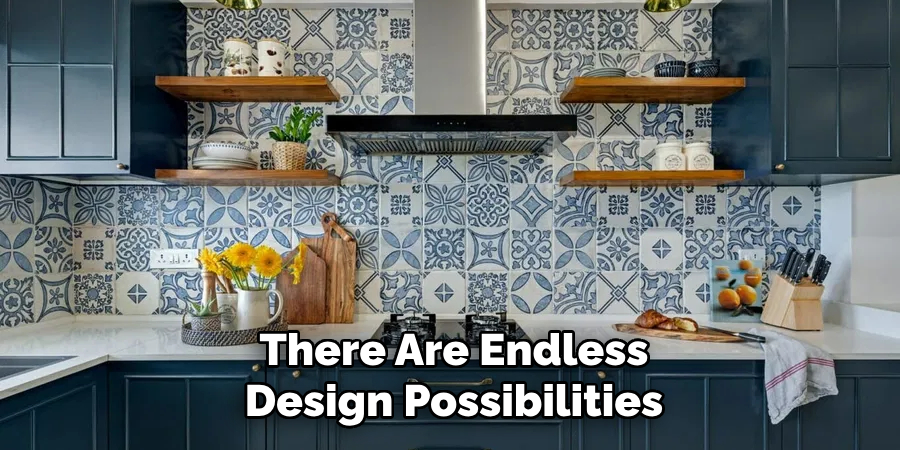
Versatile Design Options:
With a wide range of mirror types and styles available on the market, there are endless design possibilities for a mirrored backsplash. From classic framed mirrors to modern frameless designs, you can choose a style that complements your kitchen’s overall aesthetic.
Needed Materials
Before beginning the installation process, gather the necessary materials to ensure a smooth and successful project. These include:
Mirrors:
Choose the type of mirror that best suits your needs and style preferences. Consider factors like size, shape, thickness, and finish. Common mirror types used for backsplashes include framed, frameless, and antique mirrors.
Adhesive:
Select a strong adhesive specifically designed for mirrors. Some options include construction adhesives, mirror mastic, or silicone adhesives. Be sure to read the manufacturer’s instructions carefully before use.
Tools:
You will need various tools to complete the installation process, including a measuring tape, level, utility knife, caulking gun, and notched trowel.
Protective Gear:
Safety should always be a top priority when handling glass. Make sure to wear protective gloves and safety glasses while installing the mirrors.
8 Step-by-step Guidelines on How to Install Mirrors on Kitchen Backsplash
Step 1: Measure and Purchase Mirrors
Begin by measuring the area where you want to install the mirrors. Take accurate measurements to ensure that you purchase enough mirrors to cover the desired space. Be sure to account for any outlets or obstacles that may require cutting of the mirrors.

It is always best to purchase extra mirrors in case of any mistakes or breakage during the installation process.
Step 2: Prepare the Surface
Before installing the mirrors, it is crucial to prepare the surface to ensure a smooth and secure attachment. Start by cleaning the backsplash area thoroughly to remove any grease, dirt, or residues that might affect the adhesion. Use a mild detergent and a clean cloth to wipe the entire surface, then allow it to dry completely.
Next, examine the wall for any uneven areas or imperfections. If you notice any rough patches or inconsistencies, use a sandpaper to lightly smooth the surface. Additionally, if your walls are newly painted, it is advisable to wait several days for the paint to cure before proceeding with the mirror installation. Proper surface preparation is essential for achieving a long-lasting and professional-looking mirrored backsplash.
Step 3: Cut the Mirrors to Size
If necessary, cut the mirrors to fit your backsplash area using a utility knife. Carefully mark the measurements on the mirror’s backing and score along the line several times before breaking off the excess glass. Make sure to wear gloves and handle the mirrors with care to avoid any injuries.
You can also enlist the help of a professional glass cutter if you are uncomfortable with cutting the mirrors yourself.
Step 4: Apply Adhesive
Using a caulk gun, apply the chosen adhesive to the back of each mirror in an even zigzag pattern. Be careful not to apply too much or too little adhesive as this can affect the strength and stability of the mirrors.

Before attaching the mirrors to the wall, let the adhesive sit for a few minutes to become tacky. This will ensure better adhesion during installation.
Step 5: Install Mirrors
Carefully position each mirror onto the backsplash area, starting from one end and working your way across. Use a level to ensure the mirrors are straight and level. If necessary, use shims to support the mirrors until the adhesive sets.
The adhesive will take some time to cure, so avoid touching or putting pressure on the mirrors for at least 24 hours.
Step 6: Fill in the Gaps
Once the mirrors are securely in place and the adhesive has cured, it’s time to address any gaps between the mirrors or around the edges. Use a color-matched silicone sealant to fill these gaps, which will prevent moisture and debris from getting behind the mirrors. This step is essential for both the aesthetic finish and the durability of your mirrored backsplash.
Carefully apply the sealant along the edges, ensuring an even line. Then, use a damp finger or a caulking tool to smooth out the sealant for a clean and polished look. Allow the sealant to dry thoroughly, following the manufacturer’s instructions, before moving on to any additional decorative touches.
Step 7: Add Finishing Touches
Now that your mirrored backsplash is securely installed, it’s time to add any finishing touches. You can frame the mirrors with molding or tiles for a more polished look or leave them as they are for a modern and seamless design. Additionally, you can also use decorative stickers or stencils to add some personality and creativity to your mirrored backsplash. The options are endless, so feel free to get creative!
The key is to ensure that any additional elements you add are properly secured and will not damage the mirrors or affect their adhesion.
Step 8: Maintain and Clean Your Mirrored Backsplash
To keep your mirrored backsplash looking its best, it’s essential to clean and maintain it regularly. Use a mild glass cleaner and a soft cloth to wipe away any spots, smudges, or fingerprints on the mirror surface. Avoid using harsh chemicals or abrasive materials as they can damage the mirrors’ finish over time.

It is also important to periodically check for any loose or damaged mirrors and repair them immediately to avoid further issues. With proper care, your mirrored backsplash will continue to shine in your kitchen for years to come.
Following these step-by-step guidelines on how to install mirrors on kitchen backsplash will help you successfully install your mirrored backsplash in the kitchen. Remember to take your time and follow all safety precautions during the process. With a little patience and attention to detail, you can achieve a professional-looking mirrored backslash that will elevate the look of your kitchen.
Additional Tips and Considerations
- Always follow the manufacturer’s instructions for your specific type of mirrors, adhesive, and tools.
- If you are installing mirrored tiles, make sure to use spacers to ensure even spacing between each tile.
- It is recommended to have a helper assist with the installation process, especially when handling larger mirrors.
- Use caution when handling and cutting glass to avoid injury.
- If possible, use a stud finder to locate and attach the mirrors to wall studs for added support.
- Avoid applying excessive weight or pressure on the mirrors after installation as it can cause them to crack or shift out of place.
- Consider using LED strip lights or under cabinet lighting to enhance the reflective effect of your mirrored backsplash.
- If you are not confident in your DIY skills, it is best to hire a professional for installation to ensure optimal results and safety.
Conclusion
Incorporating a mirrored backsplash in your kitchen is an elegant way to enhance the space, providing both functional benefits and aesthetic appeal. By carefully following the installation process on how to install mirrors on kitchen backsplash, from surface preparation to adding final touches, you can create a stunning visual space that captures light and opens up the room. Regular maintenance and mindful cleaning will ensure that your mirrored backsplash retains its pristine condition for years.
Whether you choose a minimalist design or add decorative elements, your effort will lead to a kitchen that reflects your personal style and adds a touch of sophistication to your home. By investing time and attention to detail, you achieve a professional finish that transforms your kitchen into a centerpiece of modern design.
Professional Focus
Angela Ervin, a former interior designer turned blogger, specializes in kitchen design and renovations. Through her website, she blends her passion for cooking with design expertise, sharing practical and creative ideas. Known for balancing functionality and beauty, Angela’s insightful content has made her a trusted voice in home design and lifestyle.
About the Author
Angela Ervin, an experienced interior designer and blogger, combines her passion for kitchen renovations with storytelling. Living in Petersburg with her family, she enjoys cooking and testing her projects firsthand. Known for her humor and relatable style, Angela shares creative, functional design insights through her content, making her a trusted voice in home design.
Education History
University: Virginia Commonwealth University
Degree: Bachelor of Fine Arts (BFA) in Interior Design
- Angela’s education at VCU focused on mastering core interior design principles, including spatial planning, color theory, materials selection, and sustainable design practices.
- She gained hands-on experience through studio projects and collaborative design exercises, which honed her ability to create functional and aesthetically pleasing environments.
- Her coursework also emphasized problem-solving and practical applications of design, preparing her for real-world projects like her self-directed kitchen renovations.
- The program’s strong foundation in both technical skills and creative expression shaped Angela’s ability to seamlessly integrate form and function in her work.