


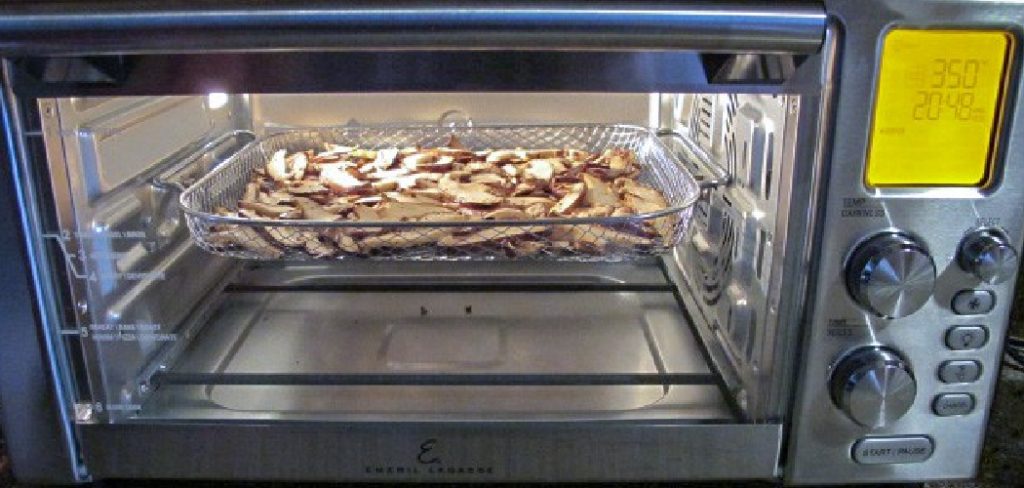
The Emeril Lagasse oven is a popular multi-functional countertop appliance for versatile cooking. Its compact design and advanced features make it a favorite choice in many kitchens. Removing the oven door is necessary for cleaning, maintenance, or replacement. Fortunately, the process is straightforward if you follow the correct steps.
This guide will help you safely remove the door from your Emeril Lagasse oven with simple instructions. Knowing how to remove oven door from Emeril Lagasse oven is crucial for cleaning hard-to-reach areas and maintaining its performance. Always ensure the oven is powered off and cool before attempting any work on the door. Handling the door during removal will prevent damage to the hinges, glass, or other components. Following this guide, you can carry out the task efficiently and maintain your oven in top condition.
Tools and Materials Needed
To successfully remove the oven door from your Emeril Lagasse oven, gather the following tools and materials to ensure a smooth and safe process:
- Protective Gloves: Protect your hands from sharp edges while handling the oven door and components.
- Flat Surface or Towel: After removal, use a sturdy, flat surface or lay down a towel to safely place the door, preventing scratches or damage.
- Screwdriver (If Required): Depending on your oven model, you may need a screwdriver to loosen screws that secure the hinges in place, facilitating easy removal.
Preparing the Oven
Before removing the oven door, it’s important to prepare the oven properly to ensure safety and ease.
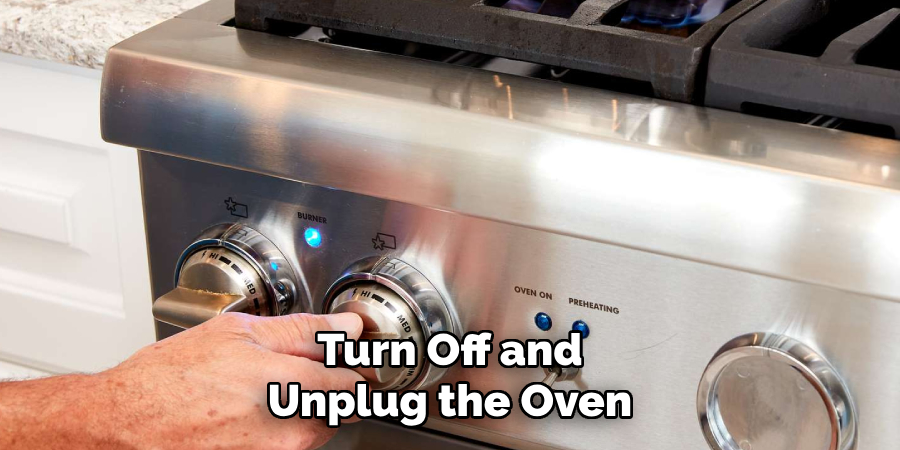
Step 1: Turn Off and Unplug the Oven
Ensure the oven is powered off and unplugged from the electrical outlet. If it has been recently used, wait for the oven to cool down completely to avoid burns. This precaution is crucial, as it prevents potential electrical hazards and skin injuries from hot surfaces.
Step 2: Open the Oven Door
Open the oven door fully. This will give you easy access to the hinges at the base of the door. In most Emeril Lagasse ovens, the hinges are located on either side of the door at the bottom. By opening the door all the way, you allow yourself the necessary space to maneuver the door during removal, making it easier to detach the hinges without exerting too much force. Make sure the door is steady before proceeding with the next steps.
Locating and Unlocking the Hinges
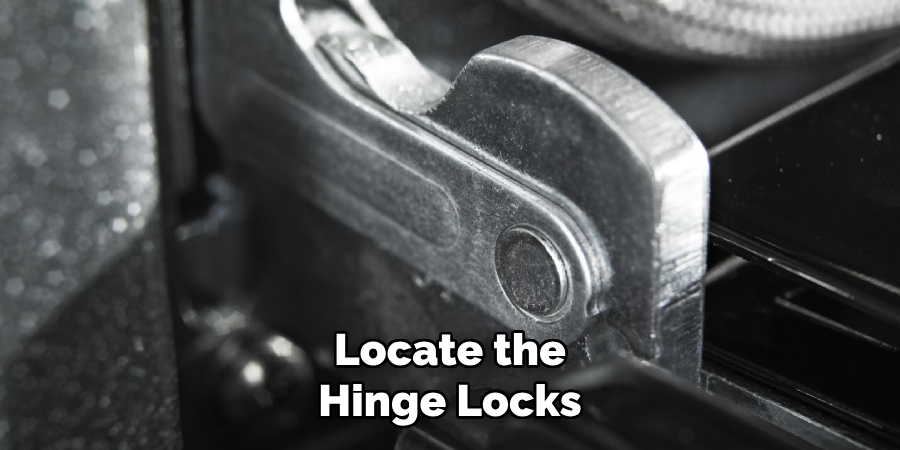
Step 1: Locate the Hinge Locks
Inspect both sides of the oven door where the hinges connect to the oven’s body. Carefully examine any components joining the door to the oven. The hinges may feature locking mechanisms, such as small tabs, levers, or screws that secure them in place.
These locks ensure the door remains firmly attached during everyday use and must be released for removal. Depending on your specific Emeril Lagasse oven model, the configuration of these mechanisms might slightly differ, so take a moment to familiarize yourself with the layout.
Step 2: Disengage the Hinge Locks
If your oven is equipped with hinge locks, you must disengage these before removing the door. Using your fingers or, if necessary, a screwdriver for those locks designed with screws or small tabs, carefully flip the lock tabs or push them away from the hinges. This subtle yet critical maneuver will release the locking mechanism, thus enabling the door to be in a state prepared for removal. Do not force the locks to avoid any potential damage to the oven or its components.
Step 3: Partially Close the Door
Once the hinge locks are successfully disengaged, proceed to partially close the oven door. Gently close it until it is at approximately a 30-degree angle. This angle is typically optimal for removing the door since it places the hinges in a loose state but keeps them attached to the oven just enough to allow for controlled removal. Ensure that the door remains steady and balanced at this position to prevent unnecessary strain on the hinge mechanism as you prepare to lift the door off its hinges.
How to Remove Oven Door from Emeril Lagasse Oven: Removing the Oven Door
Step 1: Grasp the Door Firmly
With the oven door positioned at a 30-degree angle, it is crucial to grasp both sides securely using both hands. Due to its design and components, the door may have some weight, so make sure you have a stable and firm grip. This ensures better control and prevents any sudden slips that could damage the door or surrounding areas. Pay attention to balance and posture, positioning yourself in a way that distributes the weight evenly to avoid strain.
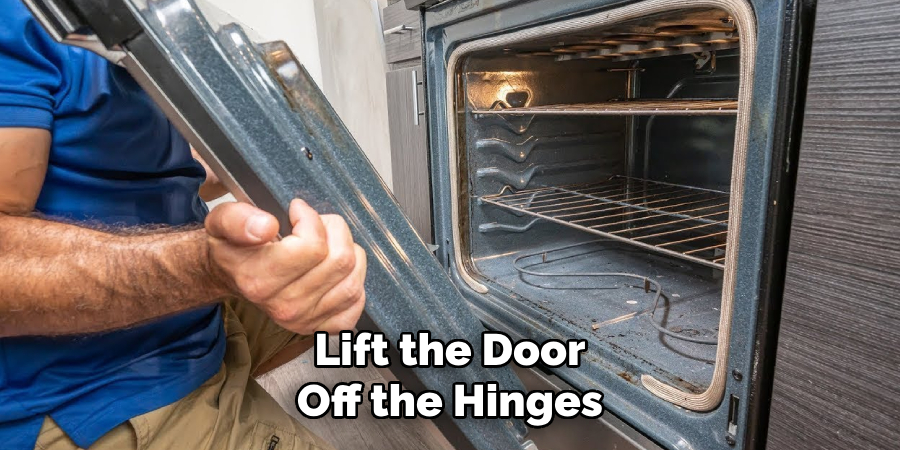
Step 2: Lift the Door Off the Hinges
Once you have a solid grip on the door, proceed to lift it gently and straight up from the oven. The hinges, now loose, should easily glide out of their slots, releasing the door from the main body of the oven. Maintaining the 30-degree angle throughout this motion is important, as it keeps the hinges aligned and minimizes resistance. Keeping the door steady ensures a smooth detachment process, reducing the risk of accidental drops or damage.
Step 3: Place the Door on a Flat Surface
After successfully removing the door, place it on a prepared flat surface to keep it safe and undamaged. Ideally, use a table or countertop covered with a soft towel, which provides a cushioned surface to prevent scratches or other harm to the door and its glass. Ensure that the surface is sturdy and large enough to support the entire door without any overhangs or instability. This setup guarantees that the door remains protected and in good condition until you are ready to proceed with cleaning, maintenance, or any other necessary tasks.
Cleaning and Inspecting the Door and Hinges
Step 1: Clean the Door
Removing the door is a great opportunity to clean any grime or grease buildup. Use a soft cloth and a non-abrasive cleaner to wipe down the door’s glass and frame. Pay special attention to the edges and areas around the handle where dirt can accumulate over time. A thorough cleaning not only improves the door’s appearance but also helps maintain your oven’s overall hygiene and functionality. Be sure to dry the door completely before reattachment to prevent any moisture-related issues.
Step 2: Inspect the Hinges
While the door is off, inspect the hinges for any signs of wear, rust, or damage. Carefully examine each hinge for cracks, bent metal, or corrosion, as these can affect the door’s operation. If the hinges seem worn out or don’t move smoothly, they may need lubrication or replacement. Using a suitable lubricant can help smooth out the hinge movement. If replacement is necessary, ensure that you purchase hinges compatible with your specific Emeril Lagasse oven model.
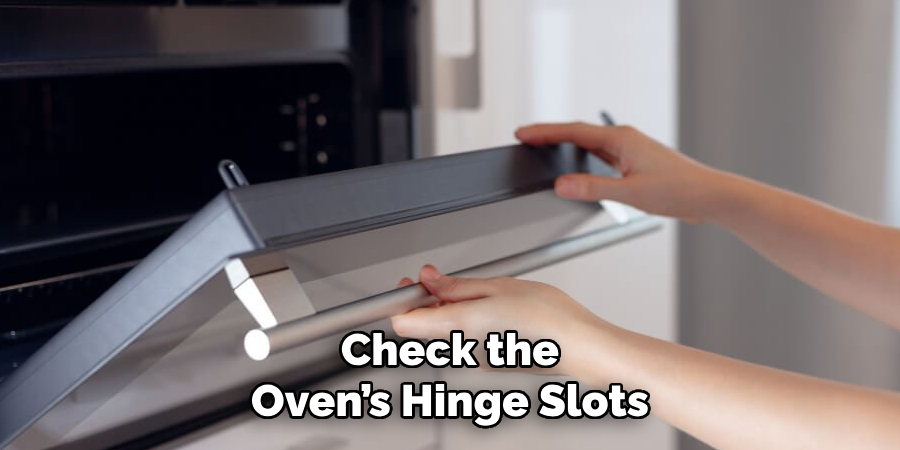
Step 3: Check the Oven’s Hinge Slots
Examine the slots where the hinges attach to the oven to ensure they are in good condition. Carefully look for any signs of wear, bending, or damage, as these might affect the door’s ability to close properly. If the slots appear damaged or bent, realignment or professional repair might be needed to ensure the oven door can be securely and safely reattached. Keeping these components in proper condition ensures your oven remains efficient and safe to use.
Reinstalling the Oven Door
Step 1: Align the Hinges
To reinstall the oven door, align the hinges with the slots on the oven body. It is crucial to keep the door at the same 30-degree angle during this process. This angle ensures that the hinges are in the correct position to fit smoothly into the slots, reducing the risk of misalignment and ensuring a more straightforward reinstallation process.
Step 2: Insert the Hinges
Once the hinges are aligned, carefully slide them back into their respective slots. Make sure each hinge is fully seated within its slot. You may need to wiggle the door slightly to achieve proper alignment; however, be gentle to avoid damaging any components. Ensuring that the hinges are correctly inserted is essential for the door’s stability and function.
Step 3: Open the Door Fully
After the hinges are securely in place, proceed to open the oven door fully to its horizontal position. This action is necessary to allow you access to the hinge locks, which must be re-engaged to secure the door to the oven. Opening the door fully also confirms that the hinges are correctly fitted, as an improper fit would likely hinder a complete opening.
Step 4: Lock the Hinges
With the door fully open, flip the hinge locks back into place to lock the door securely onto the oven. Ensure that the locks are fully engaged, preventing the door from detaching or moving loosely during operation. Double-checking this step is crucial to maintain the oven’s safety and functionality.
Step 5: Test the Door
Finally, slowly open and close the door a few times to ensure it operates smoothly. If the door does not open or close properly, check the alignment of the hinges and the hinge locks to identify any issues. Properly functioning hinges and locks will allow the door to move freely and securely, completing the reinstallation process effectively.
Conclusion
Removing the door from an Emeril Lagasse oven is a simple but crucial task for oven maintenance and cleaning. By following the outlined steps, you can safely remove and reinstall the door without causing damage to the hinges or other components. Always ensure you carefully handle the door, especially when it’s partially detached from the oven.
Take this opportunity to thoroughly clean and inspect the door and hinges to guarantee your oven remains in optimal working condition. If you experience any difficulties during the procedure, referring to your oven’s user manual or contacting customer support can offer additional guidance on “how to remove oven door from Emeril Lagasse oven.” Proper maintenance extends the life of your oven and ensures it continues to operate safely and efficiently.
Professional Focus
Angela Ervin, a former interior designer turned blogger, specializes in kitchen design and renovations. Through her website, she blends her passion for cooking with design expertise, sharing practical and creative ideas. Known for balancing functionality and beauty, Angela’s insightful content has made her a trusted voice in home design and lifestyle.
About the Author
Angela Ervin, an experienced interior designer and blogger, combines her passion for kitchen renovations with storytelling. Living in Petersburg with her family, she enjoys cooking and testing her projects firsthand. Known for her humor and relatable style, Angela shares creative, functional design insights through her content, making her a trusted voice in home design.
Education History
University: Virginia Commonwealth University
Degree: Bachelor of Fine Arts (BFA) in Interior Design
- Angela’s education at VCU focused on mastering core interior design principles, including spatial planning, color theory, materials selection, and sustainable design practices.
- She gained hands-on experience through studio projects and collaborative design exercises, which honed her ability to create functional and aesthetically pleasing environments.
- Her coursework also emphasized problem-solving and practical applications of design, preparing her for real-world projects like her self-directed kitchen renovations.
- The program’s strong foundation in both technical skills and creative expression shaped Angela’s ability to seamlessly integrate form and function in her work.