


Removing a fitted oven, also known as a built-in or wall oven, may be necessary for repair, replacement, or upgrading your kitchen appliances. While this task requires caution, you can do it safely with a few basic tools and steps. This guide will walk you through disconnecting and removing a fitted oven, ensuring you avoid damaging your kitchen cabinetry or the appliance itself.
Before beginning, ensure you have the right tools and follow all safety precautions. Tools such as a screwdriver, wrench, and possibly a drill may be required, and it’s crucial to ensure the power supply is disconnected to prevent any electrical hazards. Whether you’re an experienced DIY enthusiast or a novice tackling your first project, understanding how to remove a fitted oven properly will make the task manageable and safe, allowing for a smooth transition to your next kitchen improvement venture.
Tools and Materials Needed
Before beginning the removal process, gather the necessary tools and materials to ensure a smooth operation:
- Phillips or Flathead Screwdriver: Required for removing screws that secure the oven to the cabinetry.
- Socket Wrench or Pliers: Depending on your oven model, some fasteners may require a wrench.
- Voltage Tester: Essential for confirming that power is completely disconnected from the oven, ensuring a safe working environment.
- Protective Gloves: To safeguard your hands while maneuvering the oven.
- Drop Cloth or Towels: Lay these beneath the oven to protect your floor from potential scratches or damage during the removal.
- Second Person (Optional): It may be beneficial to have an additional person assist, especially when dealing with larger ovens, to ensure safe handling and removal.
Safety Reminder: Always turn off the power supply to the oven before starting. As most built-in ovens are directly hardwired into the electrical system, switching off the appropriate circuit breaker is crucial to prevent any risk of electrical shocks.
Turning Off the Power
Ensuring that the power to the oven is completely off is crucial for a safe removal process. Follow these steps to securely disconnect the electrical supply to your fitted oven:
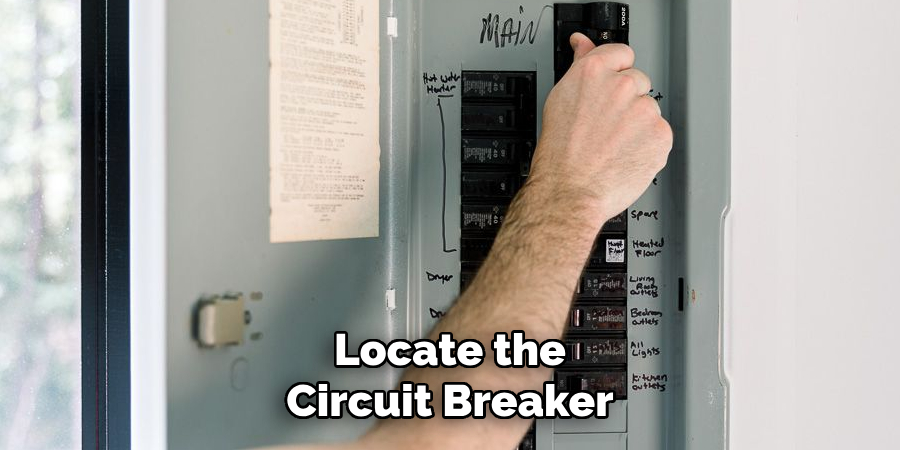
Step 1: Locate the Circuit Breaker
Find the breaker box in your home and locate the circuit breaker corresponding to the oven. It should be clearly labeled. Turn off the breaker to cut power to the oven. This step is essential to prevent any accidental electrical shock during the removal..
Step 2: Use a Voltage Tester
After turning off the breaker, use a voltage tester to ensure there’s no live current running to the oven. Test the wires connected to the oven to confirm they’re not powered. This will guarantee that all electricity is cut off, providing a safe environment in which to work.
Step 3: Double-Check Power at the Oven
If your oven has an electronic display, verify that it’s off. Open the oven door and try turning on the light or other controls to ensure the appliance no longer receives electricity. This double-checking step is vital to prevent any electrical mishaps.
Important Safety Note: Some ovens may also be plugged into an electrical outlet behind the cabinetry. If your oven is plugged in rather than hardwired, unplug it after turning off the breaker. Be sure the power is completely off before proceeding. This extra precaution helps to prevent any electrical hazards.

How to Remove a Fitted Oven: Remove Oven Trim and Securing Screws
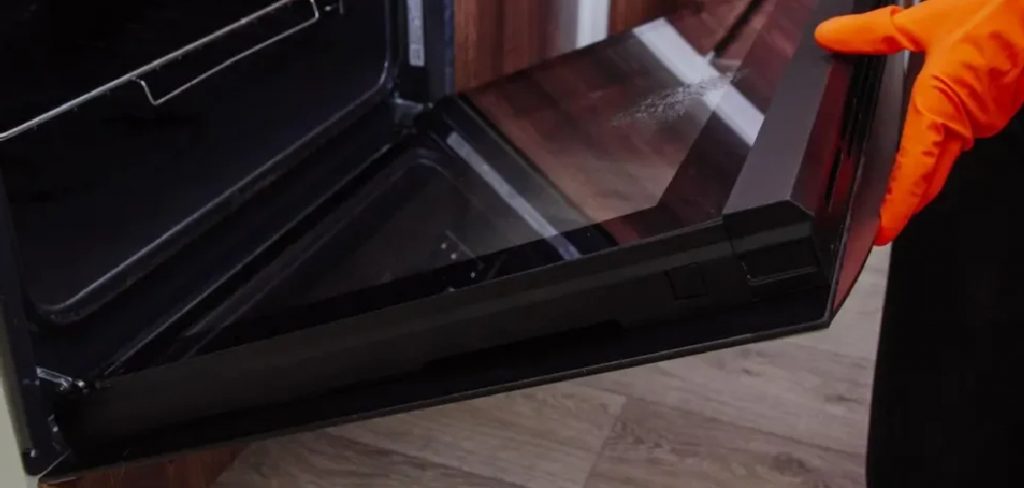
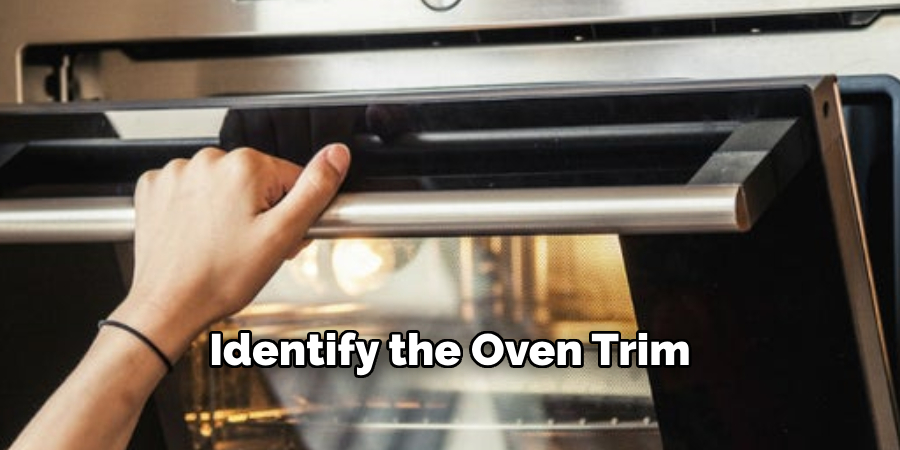
Step 1: Identify the Oven Trim
Most built-in ovens have a trim around the edges to blend seamlessly with the cabinetry. This trim may cover screws that hold the oven in place. Examine the front of the oven, particularly around the edges of the door, to locate the trim. Careful inspection will help you understand how the trim is attached and where to find its securing points.
Step 2: Remove the Trim
Gently pry off the trim using a flathead screwdriver or a plastic tool. Be mindful not to scratch or damage the surrounding cabinetry, as any forceful movement might mar the finish. Some trims are designed to snap off with little effort, while others might be secured with small screws that you’ll need to unscrew. If screws are present, use the appropriate screwdriver to remove them, and then set the trim aside in a safe place.
Step 3: Locate and Remove Securing Screws
Once the trim is removed, you’ll find the screws that hold the oven in place. These screws are typically located at the front of the oven, securing it to the sides or bottom of the cabinetry. Use a Phillips or flathead screwdriver to carefully remove the screws, setting them aside in a designated location for reinstallation later if necessary. Keeping track of these screws is vital to avoid any issues when reinstalling or replacing the oven.
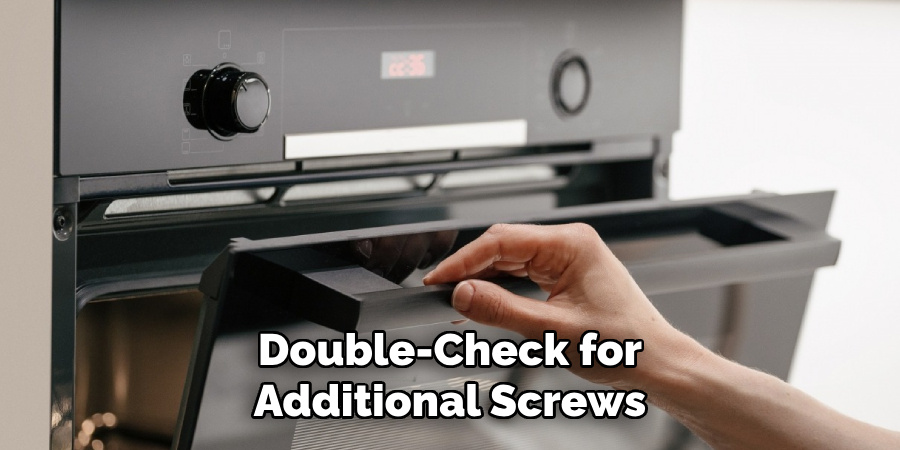
Step 4: Double-Check for Additional Screws
Depending on the model of your oven, there may be additional screws holding the unit in place. Carefully check around the sides and bottom of the oven to ensure all screws are removed before attempting to pull out the oven. Taking the time to comprehensively inspect for any remaining screws can prevent unnecessary damage or difficulty in the removal process, ensuring a smooth transition to the next steps.
Disconnecting the Wiring
Step 1: Pull the Oven Out Slightly
With the securing screws removed, gently pull the oven out of the cabinetry. Slide the oven forward just enough to access the electrical connections at the back. Be careful not to damage the cabinetry or strain the wires. Lay a drop cloth or towels on the floor to protect both the oven and your kitchen flooring.
Step 2: Identify the Electrical Connections
Look at the back of the oven to locate the power connections. Most fitted ovens are either hardwired into the home’s electrical system or plugged into a high-amp outlet. Carefully examine these connections to understand how your oven is connected to the electrical supply, as this will guide you in safely disconnecting the wires.
Step 3: Disconnect the Wiring
For hardwired ovens, you’ll need to remove the cover plate (if applicable) and use a screwdriver to disconnect the wire nuts connecting the oven’s wiring to the home’s electrical supply. Carefully separate the wires and tuck them safely away. For plugged-in ovens, simply unplug the oven from the outlet. This disconnection will ensure there’s no power running to the oven, facilitating a safe removal process.
Step 4: Cap the Wires
If the oven was hardwired, it’s a good idea to use wire caps to cover the exposed wires, ensuring safety. Tuck them back into the wall or cabinet until you’re ready to install a new oven. Taking this precaution helps prevent any accidental electrical contact and maintains a tidy setup for future appliance installations.
Removing the Oven from the Cabinetry
Step 1: Slide the Oven Out
With the power disconnected and all screws removed, carefully slide the oven out of the cabinet. It’s important to lift evenly to avoid scratching the surrounding cabinetry. Depending on the oven’s size and weight, it’s recommended to have a second person help with this step to avoid injury or damage. Taking your time during this process minimizes the risk of accidents and ensures a smooth removal.
Step 2: Protect the Floor
Place the oven on the drop cloth or towels you laid out earlier to protect the floor from scratches or dents. If necessary, you can place the oven on a dolly or cardboard to make moving it easier. This precaution shields your flooring and facilitates more manageable maneuvering of the appliance across the kitchen.
Step 3: Inspect the Cabinet Space
Once the oven is removed, inspect the space inside the cabinet. Clean out any debris, dust, or grease that may have accumulated over time. This ensures a clean installation area if you’re replacing the oven with a new one. A detailed inspection and cleaning allow for a fresh start, essential for proper fitting and optimal operation of your next appliance installation. Take this opportunity to make any necessary repairs to the cabinetry, such as fixing any loose shelves or refinishing damaged wood, to maintain the quality and appearance of your kitchen.
Troubleshooting Common Problems
Oven is Stuck
If the oven doesn’t budge when pulling, it could be due to additional screws or adhesive holding the unit in place. Double-check for any missed fasteners and carefully wiggle the oven back and forth to loosen it. Avoid applying too much force to prevent damage. It may be beneficial to revisit the removal steps, ensuring that all visible and hidden screws have been detached before attempting to pull out the oven again.
Electrical Wires Too Short
If the wires connecting the oven to the power supply are too short to easily access, pull the oven out just enough to reach the connections. Avoid stretching the wires excessively to prevent disconnection or damage. Consider having an electrician extend the wires if necessary, ensuring a safe and reliable setup for future appliance installations.
Cabinet Damage
If you notice that pulling the oven is causing cabinet damage, stop immediately and assess the situation. It may help to place thin cardboard or padding between the oven and the cabinetry to prevent further harm. Inspect the cabinetry for any pre-existing damage and implement temporary protective measures to shield it during removal. Taking care of these issues promptly helps maintain the integrity and appearance of your kitchen.
Conclusion
Removing a fitted oven can be a straightforward process if you take the time to follow safety precautions and work carefully. By prioritizing disconnecting the power, removing the trim and screws, and safely handling the wiring, you can easily remove the oven without damaging your cabinetry or the appliance.
This step-by-step guide on how to remove a fitted oven helps ensure that whether you’re replacing your old oven or making space for a kitchen remodel, the process is smooth and efficient. Always remember, if you encounter any difficulties or feel unsure about handling electrical components, it is wise to consider contacting a professional technician to assist with the task. Following these guidelines protects your kitchen and appliances and ensures your personal safety throughout the removal process.
Professional Focus
Angela Ervin, a former interior designer turned blogger, specializes in kitchen design and renovations. Through her website, she blends her passion for cooking with design expertise, sharing practical and creative ideas. Known for balancing functionality and beauty, Angela’s insightful content has made her a trusted voice in home design and lifestyle.
About the Author
Angela Ervin, an experienced interior designer and blogger, combines her passion for kitchen renovations with storytelling. Living in Petersburg with her family, she enjoys cooking and testing her projects firsthand. Known for her humor and relatable style, Angela shares creative, functional design insights through her content, making her a trusted voice in home design.
Education History
University: Virginia Commonwealth University
Degree: Bachelor of Fine Arts (BFA) in Interior Design
- Angela’s education at VCU focused on mastering core interior design principles, including spatial planning, color theory, materials selection, and sustainable design practices.
- She gained hands-on experience through studio projects and collaborative design exercises, which honed her ability to create functional and aesthetically pleasing environments.
- Her coursework also emphasized problem-solving and practical applications of design, preparing her for real-world projects like her self-directed kitchen renovations.
- The program’s strong foundation in both technical skills and creative expression shaped Angela’s ability to seamlessly integrate form and function in her work.