


The light inside your GE oven is essential in helping you monitor the cooking progress without having to open the door and let heat escape. However, there might be times when the light bulb burns out, creating an inconvenience during your cooking activities. Fortunately, learning how to change ge oven light is easy and can be done in just a few minutes with minimal effort.
This guide will guide you through the steps of replacing the oven light in your GE oven, ensuring that you can safely and efficiently restore this handy feature. Before you begin, it is crucial to ensure you acquire the correct replacement bulb suited for your oven model, as using an inappropriate bulb may cause potential issues or damage. You can keep your cooking endeavors illuminated and efficient with the right tools and guidance.
Tools and Materials Needed
Preparation and the right tools are essential for changing the GE oven light, and it is essential for a smooth and safe process. First and foremost, you’ll need a Replacement Bulb. GE ovens typically employ a 40-watt appliance bulb, but it’s important to check your oven’s user manual to confirm the exact bulb type needed for your model. In some instances, a Screwdriver may be necessary to remove the light cover, though this isn’t needed for all models.
Protective Gear is also advisable, so consider using Protective Gloves to prevent oils from your skin from transferring to the bulb, which could cause it to burn out more quickly. Before starting, ensure Preparation is adequate by making sure the oven is completely off and cool. If cooking has just concluded, allow the oven to reach room temperature to avoid any risk of burns during the bulb replacement process.
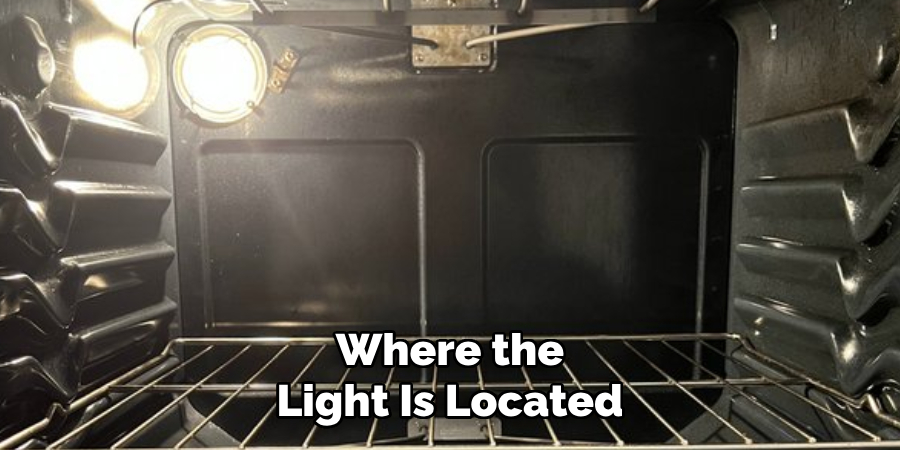
Locating the Oven Light
Where the Light Is Located
The oven light is typically mounted inside the oven cavity, providing crucial illumination to aid in checking on your dishes without needing to open the door and lose valuable heat. In most GE ovens, you will find the light on either the back wall of the oven or on the ceiling. The bulb is commonly nestled behind a protective glass cover designed to safeguard the bulb from splatters and potential damage from the cooking environment.
Checking the Manual
If you’re uncertain about the precise location of the light in your particular oven model or are confused regarding model-specific instructions, your best resource is the oven’s user manual. The manual should provide a detailed diagram indicating exactly where the light is located and any special instructions necessary for safely replacing the bulb. Manuals often include step-by-step guidance tailored to your specific oven model, ensuring you correctly conduct the replacement process.
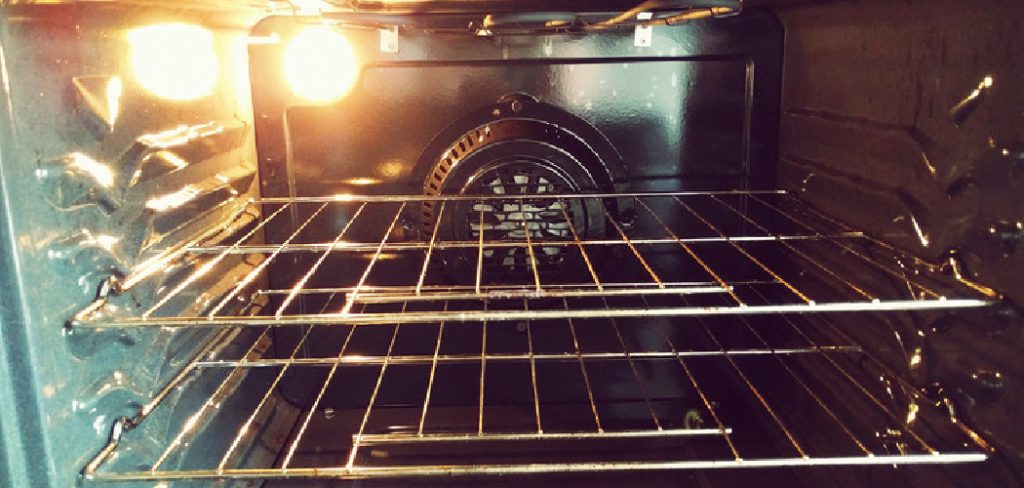
Remove Oven Racks (If Necessary)
In some situations, the oven racks may obstruct your access to the oven light, making it difficult to reach behind and replace the bulb. If this is the case, you must remove the racks to create adequate working space. This can usually be done easily by sliding the racks out of their fixed positions. Once they are removed, you will have clearer and more manageable access to the oven light, allowing you to confidently change the bulb.
How to Change Ge Oven Light: Remove the Old Bulb
When it’s time to replace your GE oven light, removing the old bulb safely and efficiently is a key step. Follow these detailed instructions to ensure you do it correctly.
Step 1: Turn Off Power
Before you start, it is crucial to cut the oven’s power for safety. Either unplug the oven from the electrical outlet or switch off the oven’s circuit breaker in your home’s electrical panel. This precaution helps prevent electrical shock and ensures your safety as you work.
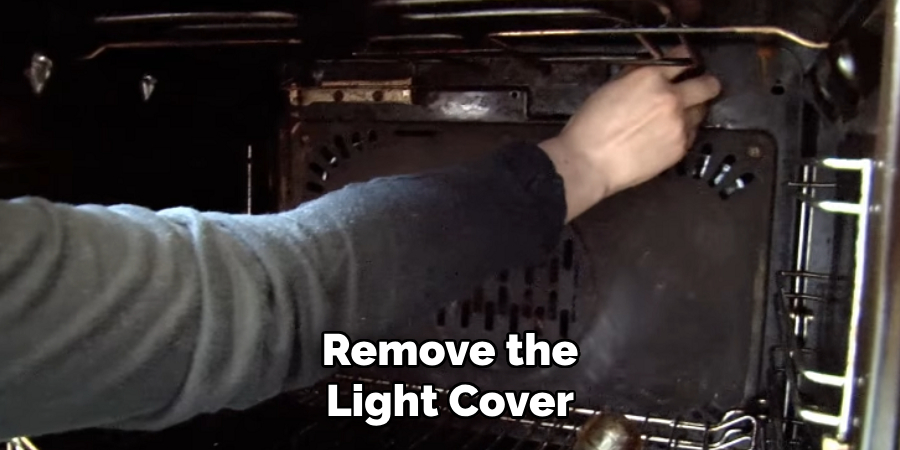
Step 2: Remove the Light Cover
A glass cover protects the oven light. Depending on the model of your GE oven, you might need to unscrew the light cover. For some models, gently twist the cover counterclockwise by hand to remove it. If the cover is stuck or hard to turn, use a soft cloth to get a better grip, or gently tap it to loosen any debris that might be obstructing the cover.
Step 3: Remove the Old Bulb
Once the cover is off, unscrew the old bulb by turning it counterclockwise. Be careful when handling the old bulb, as it may still be warm if recently used. Always ensure the bulb has cooled down before touching it to prevent burns. Dispose of the old bulb properly, especially if it is broken or damaged.
Wrap it in paper or cloth before discarding it to prevent injury, and consider placing it in a secure trash container to avoid accidents. With the old bulb safely removed, you are ready to install the new one.
How to Change Ge Oven Light: Installing the New Bulb
Replacing your GE oven light is a straightforward process, and following these simple steps ensures the new bulb is correctly installed.
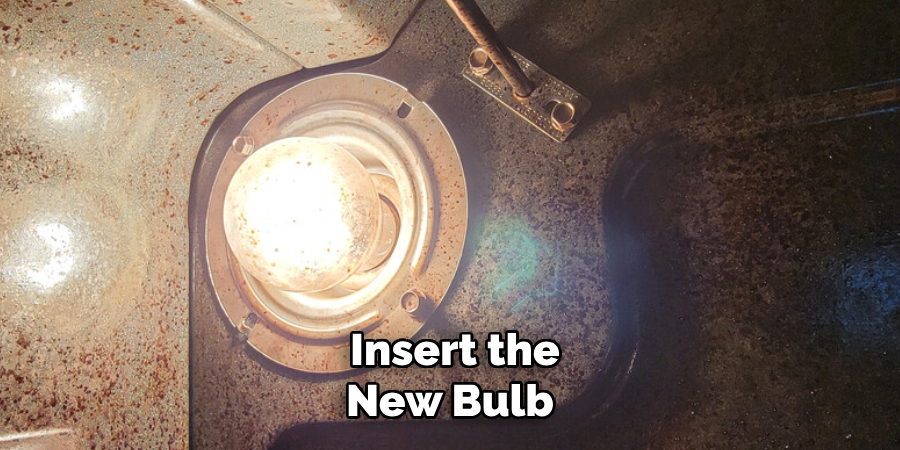
Step 1: Insert the New Bulb
With the old bulb removed, take your new bulb and gently screw it into the socket. Turn the bulb clockwise until it sits snugly in place. It’s important not to overtighten the bulb, as this could cause damage to the bulb itself or potentially compromise the socket. Ensuring a secure yet gentle connection will help the bulb function properly and extend its lifespan.
Step 2: Replace the Light Cover
Once you’ve successfully screwed in the new bulb, the next step is to replace the protective glass cover. If your GE oven model features a cover that screws on, simply twist it clockwise until it is secure. For models that require screws to hold the cover in place, use your screwdriver to carefully fasten them. Be cautious not to overtighten the screws, as excessive force could crack the glass or strip the screw holes, leading to further complications.
Step 3: Restore Power
After you have the new bulb and cover securely in place, the next step is to restore the power to your oven. You can do this by plugging the oven back into the electrical outlet or by switching the circuit breaker back on in your home’s electrical panel. Restoring the power correctly ensures that the new bulb receives the necessary energy to operate effectively.
Step 4: Test the Light
To confirm that your installation was successful, turn on the oven light using the switch on the control panel. This test will verify that the new bulb is functioning as expected. If the light does not illuminate, revisit the previous steps to ensure the bulb is correctly positioned and secured and the oven receives power. A quick check guarantees that your cooking and baking experiences remain uninterrupted and fully illuminated.
Troubleshooting Common Issues
Light Doesn’t Turn On
If the new bulb doesn’t light up after installation, ensure that the bulb is properly seated in the socket. Begin by removing and reinstalling the bulb, making sure it’s screwed in completely and securely. Additionally, verify that the oven is properly plugged in or check if the circuit breaker tripped during installation. Restoring any interrupted connections can often resolve the issue, ensuring your oven light operates as intended.
Cover Won’t Come Off
If you find the light cover stuck or difficult to remove, refrain from using excessive force, which might crack the glass. Instead, apply a small amount of cooking oil around the edges of the cover to help loosen it. Let the oil work for a few minutes, and try gently twisting the cover again. This method can effectively reduce the resistance and allow for easier removal without the risk of damage.
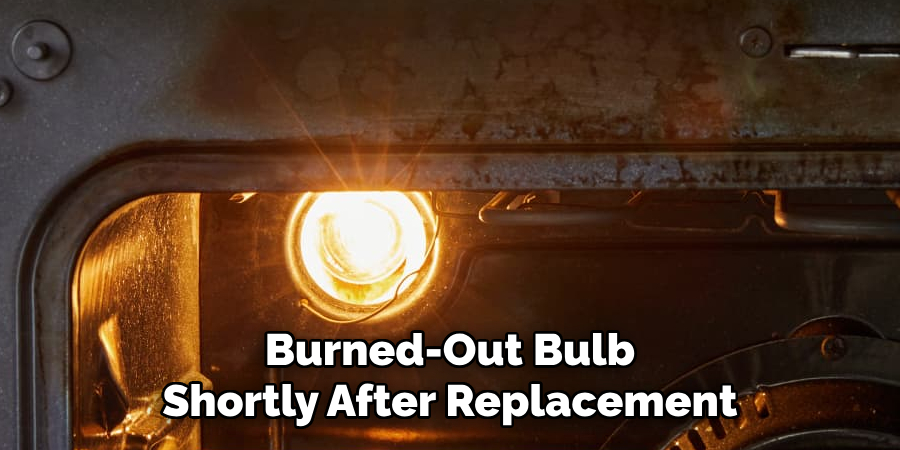
Burned-Out Bulb Shortly After Replacement
Should your new bulb burn out soon after replacement, it’s essential to confirm that you’re using a high-temperature appliance bulb specifically designed for ovens. Standard light bulbs lack the durability to withstand the extreme heat inside the oven. Always ensure that replacement bulbs meet the specifications to prevent early burnout and ensure lasting performance.
Light Flickers
If the oven light flickers post-replacement, this may indicate a loose connection in the socket. Double-check that the bulb is tightly screwed in, and examine the socket for debris or signs of corrosion. Cleaning the socket gently and re-securing the bulb may resolve any flickering issues, offering a stable and consistent light source for your cooking needs.
Conclusion
Changing the light bulb in your GE oven is a quick and easy task that requires minimal tools and effort. By following the outlined steps in this guide on “how to change GE oven light,” you can keep your oven well-lit and functional. Regularly checking the oven light and cleaning the cover will help prolong the life of your bulbs, ensuring your oven continues to operate smoothly.
Remember, proper maintenance extends bulb life and enhances your cooking experience by providing consistent illumination. Should you encounter persistent issues with the oven light, do not hesitate to contact GE customer service or a professional technician for further assistance. By attending to small maintenance tasks like this, you can ensure your kitchen appliances remain in top condition for many years to come.
Professional Focus
Angela Ervin, a former interior designer turned blogger, specializes in kitchen design and renovations. Through her website, she blends her passion for cooking with design expertise, sharing practical and creative ideas. Known for balancing functionality and beauty, Angela’s insightful content has made her a trusted voice in home design and lifestyle.
About the Author
Angela Ervin, an experienced interior designer and blogger, combines her passion for kitchen renovations with storytelling. Living in Petersburg with her family, she enjoys cooking and testing her projects firsthand. Known for her humor and relatable style, Angela shares creative, functional design insights through her content, making her a trusted voice in home design.
Education History
University: Virginia Commonwealth University
Degree: Bachelor of Fine Arts (BFA) in Interior Design
- Angela’s education at VCU focused on mastering core interior design principles, including spatial planning, color theory, materials selection, and sustainable design practices.
- She gained hands-on experience through studio projects and collaborative design exercises, which honed her ability to create functional and aesthetically pleasing environments.
- Her coursework also emphasized problem-solving and practical applications of design, preparing her for real-world projects like her self-directed kitchen renovations.
- The program’s strong foundation in both technical skills and creative expression shaped Angela’s ability to seamlessly integrate form and function in her work.