


Are you tired of scrubbing your sneakers by hand only to have them look dirty and worn? Look no further—washing your sneakers in the dishwasher can be a game changer!
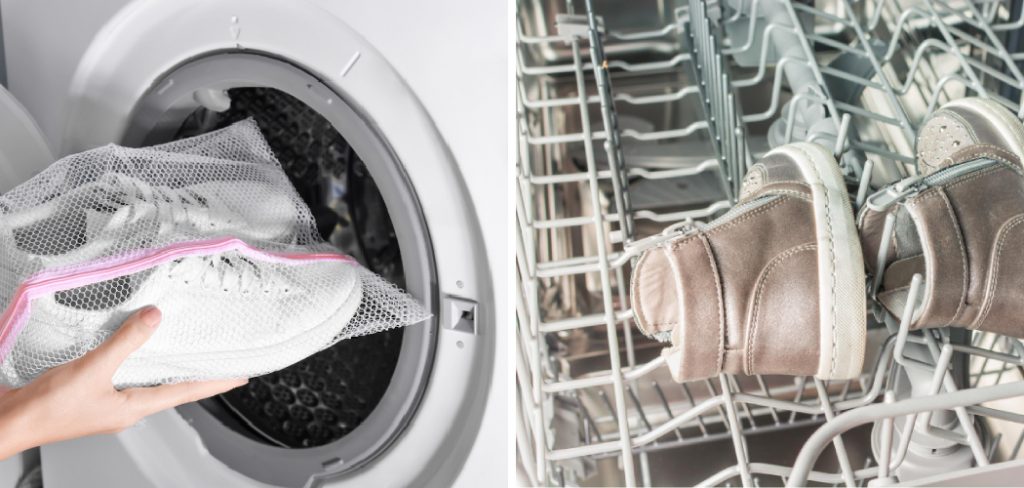
How to wash sneakers in the dishwasher can be a daunting task, especially when they are heavily soiled or made from delicate materials. One unconventional yet surprisingly effective method is using a dishwasher. This approach harnesses the dishwasher’s ability to clean using water jets and detergent, providing a thorough clean without labor-intensive scrubbing. However, it is essential to approach this method cautiously and be aware of the best practices to avoid damaging your shoes or the dishwasher.
This guide will explore the steps involved in safely and efficiently washing your sneakers in the dishwasher, ensuring they come out looking fresh and clean.
What Will You Need?
Before jumping into the steps, ensure you have all the necessary materials. Here’s what you’ll need:
- Dishwasher: Ensure your dishwasher is empty and free of leftover food particles or detergent residue.
- Detergent: Choose a mild detergent specifically designed for dishwashers. It will be gentle on your sneakers and not cause excessive sudsing.
- Sneakers: Select sneakers made from sturdy materials such as canvas or rubber. Avoid washing delicate materials like suede or leather in the dishwasher, as they can be damaged by water and heat.
- Laundry Bag: This is optional but highly recommended to prevent your sneakers from banging against the dishwasher’s walls and potentially causing damage.
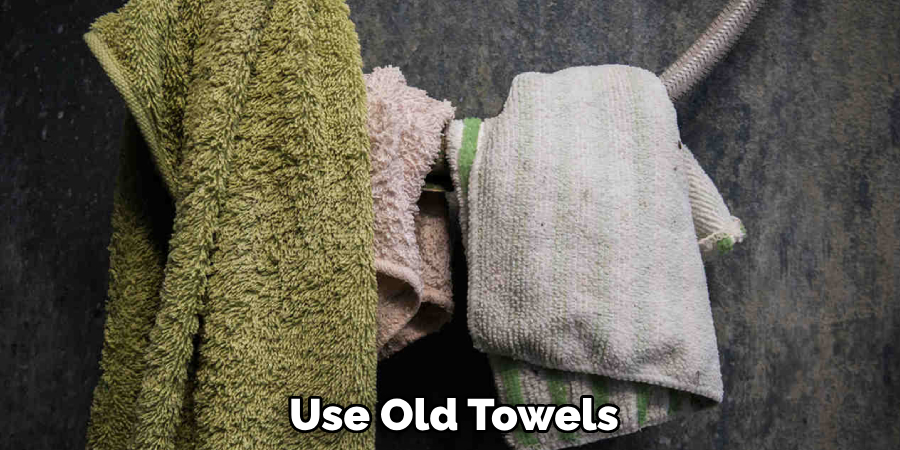
- Old Towels: These will come in handy for drying your sneakers after the wash cycle.
Once you have all your materials ready, it’s time to start washing!
10 Easy Steps on How to Wash Sneakers in the Dishwasher
Step 1. Remove Laces and Insoles:
Before placing your sneakers in the dishwasher, removing both the laces and insoles is crucial. Laces can become tangled during the wash cycle, potentially causing damage to both the laces and the dishwasher. Additionally, washing them separately will ensure they are cleaned thoroughly.
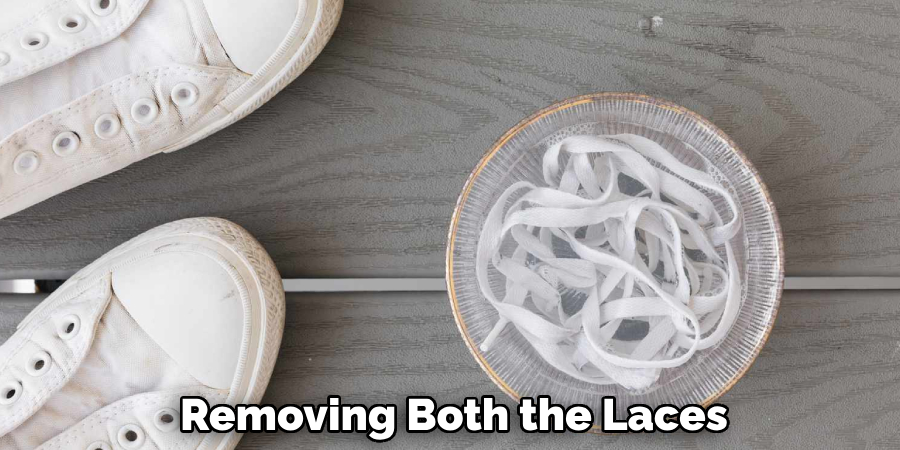
You can wash the laces by hand or place them in a small laundry bag alongside the sneakers in the dishwasher. Similarly, removing the insoles is essential because they can absorb a substantial amount of water, leading to longer drying times and potential odor retention. Instead, clean the insoles separately by hand using mild soap and water, and allow them to air dry completely before reinserting them into your sneakers.
Step 2. Pre-Rinse the Sneakers:
It is beneficial to give them a quick pre-rinse before placing your sneakers in the dishwasher. Use a gentle stream of water to remove any loose dirt, mud, or debris from the surface. This step helps to prevent these particles from circulating within the dishwasher and potentially clogging filters or scratching other items.
Moreover, the pre-rinse ensures that your sneakers get a more effective cleaning by allowing the dishwasher detergent to focus on deeper stains rather than surface grime. You can use a soft brush or cloth for stubborn areas to scrub away any stuck-on particles gently. Avoid soaking the sneakers entirely; a light rinse is sufficient to prepare them for the dishwasher cycle. After completing the pre-rinse, check for any remaining debris and remove it manually.
Step 3. Place Sneakers in a Laundry Bag:
After pre-rinsing, place your sneakers in a mesh laundry bag to protect them from direct contact with the dishwasher’s interior. This bag acts as a buffer, reducing the risk of scratches or damage caused by the sneakers knocking against the dishwasher walls. If a laundry bag is unavailable, ensure that your sneakers are positioned securely on the top rack, with less exposure to intense water pressure. This placement minimizes the chance of deformation or other potential harm during the wash cycle.
Step 4. Select the Appropriate Wash Cycle:
Choose a gentle or light wash cycle for your sneakers to minimize the risk of damage. Avoid high-temperature settings or heated drying options, as excessive heat can cause deformation, shrinkage, or color fading on certain materials. The gentle cycle ensures a thorough clean while being less abrasive to the sneaker materials.
Additionally, if your dishwasher has an option for additional rinsing, consider using it to ensure all detergent residues are thoroughly washed away. Selecting a lower-intensity setting maximizes the chances of your sneakers retaining their shape and durability. Always avoid high-temperature settings as they may compromise the structural integrity of the sneakers and lead to unwelcome wear and tear.

Step 5. Add Detergent:
Once your sneakers are securely placed in the dishwasher, it’s time to add detergent. Use a mild dishwasher detergent that does not contain bleach or harsh chemicals, as these can damage the fabric and colors of your sneakers. Add the detergent to the designated compartment, following the manufacturer’s instructions for the amount to use.
Remember, sneakers require less detergent than a whole load of dishes, and using excess detergent could result in excessive suds or residue. Ensuring the detergent is suitable for use in a dishwasher will help achieve an effective cleaning without compromising the materials of your sneakers.
Step 6. Start the Dishwasher:
With everything in place, close the dishwasher door securely and start the gentle or light wash cycle. Allow the cycle to run its full course without interruption to ensure the sneakers receive a complete and thorough clean. During this time, avoid opening the dishwasher to check on the sneakers, as this can disrupt the cycle and potentially affect the overall cleaning efficiency.
After the cycle has finished, wait a few minutes before opening the door to allow any remaining steam to dissipate, ensuring a safer and more comfortable environment for removing the sneakers.
Step 7. Dry the Sneakers:
After the wash cycle is complete, remove the sneakers from the dishwasher and remove them from the laundry bag if used. Gently shake off any excess water and use old towels to pat them dry. Avoid using a high-heat dryer, which can warp or damage the materials. Instead, allow the sneakers to air dry naturally in a well-ventilated area away from direct sunlight or heat sources.
To help maintain their shape, consider stuffing the sneakers with paper towels or dry cloths, which can absorb some of the remaining moisture. Air drying might take several hours or even a full day, depending on the material and thickness of the sneakers, but this method ensures they dry safely without the risk of structural damage.
Step 8. Reinsert Laces and Insoles:
Once your sneakers are completely dry, it’s time to reinsert the laces and insoles. Begin by checking that both the insoles and laces are also thoroughly dry to prevent any moisture from lingering inside the sneakers, which could lead to odor or mold. Place the insoles back into the sneakers, ensuring they are aligned for maximum comfort.
Next, thread the laces through the eyelets, ensuring they are evenly tightened and secure. At this point, your sneakers should be clean, fresh, and ready for wear. You’ll prolong their lifespan and maintain their appearance after each wash by reassembling them with care.
Step 9. Perform a Final Inspection:
Before wearing your sneakers, perform a final inspection to ensure they are spotless and have not been damaged during washing. Check the exterior and interior for any signs of discoloration, fraying, or structural changes. Ensure the soles are intact and unchanged, and inspect that the stitching hasn’t loosened.
If everything appears in order, your sneakers are ready to be worn again. If you notice any issues, consider making necessary repairs or adjustments to restore their optimal condition. Engaging in this final check helps maintain the sneakers’ durability and ensures continuous comfort and style for your activities.
Step 10. Store Your Sneakers Properly:
After ensuring your sneakers are clean, dry, and in good condition, proper storage will help maintain their quality and extend their lifespan. Choose a cool, dry place away from direct sunlight, which can fade colors and weaken materials over time. If your sneakers are infrequently worn, consider placing them in a breathable shoe bag or box to protect them from dust and potential moisture damage. Place supportive inserts or shoe trees inside to retain their shape, especially if made of softer materials.
By following these steps, you can effectively clean your sneakers in the dishwasher without compromising their quality and appearance.

5 Things You Should Avoid
- Using Hot Water: Avoid hot water settings as high temperatures can damage the glue and synthetic materials your sneakers are made from, leading to potential deformation and separation.
- Detergents with Bleach: Avoid using detergents that contain bleach or harsh chemicals. These can fade colors and weaken fabric fibers, ultimately ruining your shoes.
- Placing Sneakers Near Delicate Items: Ensure sneakers are not washed alongside fragile dishes or glassware, as the shoes can cause damage or break these items during the wash cycle.
- Neglecting to Secure Laces: Unsecured laces can get tangled around the dishwasher’s spinning parts, leading to mechanical issues. Permanently remove or tightly secure laces before starting the wash cycle.
- Don’t Use the Dryer: Resist the urge to speed up drying by placing your sneakers in a dryer. High temperatures can cause shrinkage and damage the materials, so it’s best to let them air dry at room temperature.
Conclusion
How to wash sneakers in the dishwasher can be a convenient and effective method to keep them clean and fresh if done correctly.
By following the outlined steps and taking necessary precautions, you can ensure that your sneakers come out spotless without any damage. Always select a gentle cycle, use appropriate detergent, and avoid high temperatures to preserve the materials and structure of the sneakers. Proper drying and storage techniques are crucial to maintain their shape and appearance. Remember to avoid common mistakes, such as using bleach or drying them in a high-heat environment.
With careful attention, this cleaning approach can prolong the lifespan and ensure your sneakers’ continued comfort and style.
Professional Focus
Angela Ervin, a former interior designer turned blogger, specializes in kitchen design and renovations. Through her website, she blends her passion for cooking with design expertise, sharing practical and creative ideas. Known for balancing functionality and beauty, Angela’s insightful content has made her a trusted voice in home design and lifestyle.
About the Author
Angela Ervin, an experienced interior designer and blogger, combines her passion for kitchen renovations with storytelling. Living in Petersburg with her family, she enjoys cooking and testing her projects firsthand. Known for her humor and relatable style, Angela shares creative, functional design insights through her content, making her a trusted voice in home design.
Education History
University: Virginia Commonwealth University
Degree: Bachelor of Fine Arts (BFA) in Interior Design
- Angela’s education at VCU focused on mastering core interior design principles, including spatial planning, color theory, materials selection, and sustainable design practices.
- She gained hands-on experience through studio projects and collaborative design exercises, which honed her ability to create functional and aesthetically pleasing environments.
- Her coursework also emphasized problem-solving and practical applications of design, preparing her for real-world projects like her self-directed kitchen renovations.
- The program’s strong foundation in both technical skills and creative expression shaped Angela’s ability to seamlessly integrate form and function in her work.