


Installing a kitchen faucet supply line is a straightforward process that can be accomplished with a few basic tools and some patience. Whether you’re upgrading your kitchen fixtures or replacing a worn-out supply line, proper installation ensures a leak-free connection and optimal water flow.

Before starting, it’s essential to gather the necessary tools and materials and to familiarize yourself with the faucet and plumbing setup in your kitchen. This guide will walk you through how do you install a kitchen faucet supply line, ensuring your kitchen is fully functional and efficient.
Why Proper Installation is Important
Proper installation of a kitchen faucet supply line is crucial for several reasons. Firstly, it prevents leaks, which can lead to water damage and costly repairs if left unchecked. A secure and well-installed supply line ensures that water flows efficiently, providing consistent pressure and minimizing wastage.
Additionally, correct installation extends the life of both the faucet and the supply line, avoiding unnecessary replacements and ensuring your kitchen functions smoothly. Lastly, a properly installed supply line contributes to the overall safety of your home, as it reduces the risk of mold growth and structural damage associated with water leaks.
Tools and Materials Needed for Installation
Before getting started with the installation of a kitchen faucet supply line, gather the following tools and materials to ensure a smooth process:
- Adjustable Wrench: Essential for tightening and loosening nuts without damaging the plumbing.
- Basin Wrench: A specialized tool designed for accessing hard-to-reach nuts under the sink.
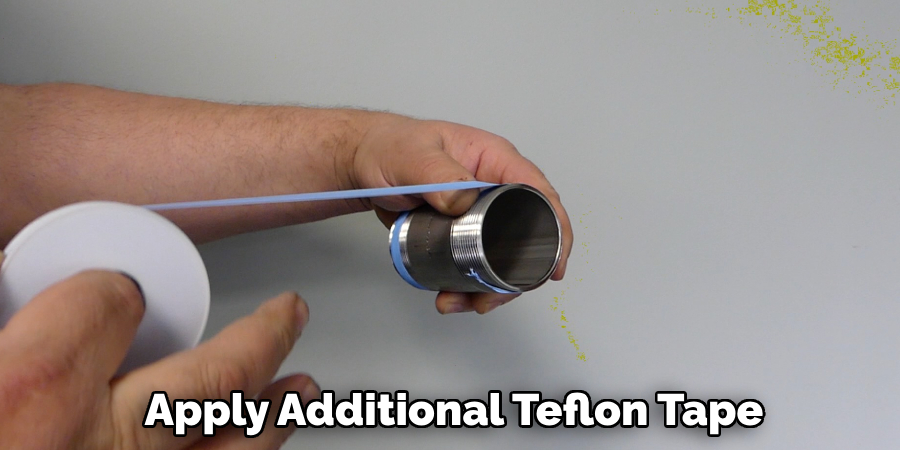
- Teflon Tape: Also known as plumber’s tape, it helps create a watertight seal on threaded connections.
- Bucket or Towel: To catch any water that may spill during the installation process.
- New Faucet Supply Lines: Ensure they are the correct length and compatible with your faucet and water supply shut-off valves.
- Plumber’s Putty or Silicone Sealant: Optional, for creating seals around certain fittings if needed.
- Phillips and Flathead Screwdrivers: For any screws involved in the installation process.
- Safety Glasses: Protects your eyes from debris during installation.
Having these tools and materials on hand will streamline the installation process, allowing you to efficiently replace or install your kitchen faucet supply line.
10 Steps for How Do You Install a Kitchen Faucet Supply Line
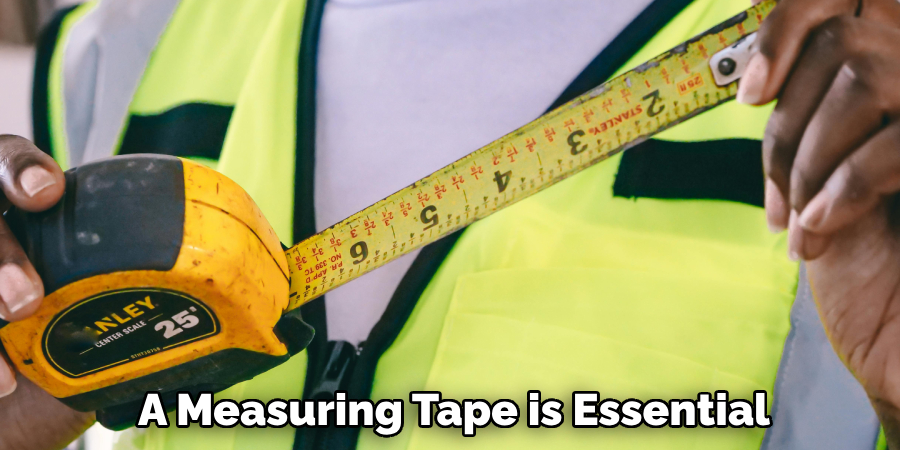
1. Measuring Tape
A measuring tape is essential for accurately measuring the space where the installation will take place. This will ensure that all materials and tools are properly sized and fit into the designated area.
2. Level
A level is necessary to ensure that the installation is even and straight. This tool will help prevent any crooked or uneven lines, which can greatly affect the overall appearance of the project.
3. Drill
A drill is needed to create holes in walls or other surfaces for screws, nails, or other fasteners. It is important to have a drill with different drill bit sizes to accommodate various screw sizes.
4. Screws/Nails
Depending on the type of installation, you may need either screws or nails to secure materials in place. Make sure to have a variety of sizes on hand to accommodate different thicknesses of materials.
5. Screwdriver/Hammer
These tools are necessary for driving screws or nails into place. A screwdriver with interchangeable heads can be helpful for different types of screws, while a hammer can be used for both nails and certain types of screws.
6. Stud Finder
If your installation involves attaching materials to a wall, a stud finder will help locate studs behind drywall for more secure attachment points.
7. Pencil/Marker
Having a pencil or marker on hand will allow you to mark measurements and placement points before drilling or attaching materials.
8. Ladder/Step Stool
For installations that require reaching high places, having a ladder or step stool will make it easier and safer to work at elevated heights.
9. Safety Equipment
Depending on the type of installation, safety equipment such as goggles, gloves, and ear protection may be necessary. Always prioritize safety when working with tools and materials.
10. Materials Needed for Specific Installation
Lastly, make sure you have all the necessary materials for your specific installation project such as shelves, brackets, hooks, or any other items needed to complete the project. Double check your list and make sure you have everything before beginning the installation process.

Troubleshooting Common Installation Problems
Even with careful preparation and execution, you may encounter some common problems during the installation of a kitchen faucet supply line. Here are a few troubleshooting tips to address these issues:
- Leaks at the Connections: If you notice leaks where the supply line connects to the faucet or shut-off valve, ensure that the connections are tightened properly. Apply additional Teflon tape to threaded connections to create a better seal, and check for any damage to washers or fittings that may need replacement.
- Low Water Pressure: If the water flow is weaker than expected after installation, check that the supply line is not kinked or twisted, as this can restrict water flow. Ensure that the shut-off valve is fully open, and remove any debris or sediment build-up from the aerator on the faucet.
- Misalignment: In cases where the supply lines do not align correctly with the shut-off valves, verify that the lines are of the correct length and not coiled or looped excessively, as this can cause tension or misfit.
- Drips or Constant Running Water: If you encounter persistent drips or the faucet continues to run slightly, inspect the faucet cartridge or washers for wear and tear. Replacing these components often resolves such issues.
- Difficulties Reaching or Accessing Nuts: Use the basin wrench for hard-to-reach nuts that standard wrenches can’t handle. If space is particularly tight, consider using a flexible or telescoping wrench for added reach.
Addressing these common issues ensures a successful installation process and optimal performance of your kitchen faucet supply line. If problems persist despite troubleshooting, consulting with a professional plumber may be necessary.
Best Practices for Maintaining Kitchen Faucet Supply Lines
Regular maintenance of your kitchen faucet supply lines is crucial to ensure their longevity and performance. Here are some best practices to consider:
- Periodic Inspection: Regularly check your supply lines for any signs of wear, corrosion, or leaks. Early detection of potential issues can prevent more extensive damage and costly repairs.
- Tighten Connections: Over time, the connections on your supply lines may loosen due to regular use. Ensure all connections remain tight to prevent leaks. Use a basin wrench or adjustable wrench as needed.
- Clean the Aerator: Mineral build-up can affect water flow and pressure. Periodically remove and clean the aerator on the faucet to maintain optimal performance.
- Avoid Kinks and Twists: Ensure that supply lines are not kinked or twisted, as these can restrict water flow and cause pressure issues. Ensure lines are of appropriate length and positioned properly to avoid unnecessary stress.
- Use Quality Materials: When replacing or installing new supply lines, opt for high-quality materials that are designed to withstand the rigors of daily use and are compatible with your plumbing setup.
- Replace Worn Parts Promptly: If you notice any signs of wear on washers, valves, or cartridges, replace them promptly to prevent leaks and ensure smooth operation.
- Climate Consideration: In colder climates, ensure supply lines are protected from freezing temperatures to prevent bursts. Insulating pipes and keeping the kitchen adequately heated can help.
Implementing these best practices can significantly extend the life of your kitchen faucet supply lines and keep your plumbing in excellent working condition. Regular attention and maintenance will mitigate potential issues and maintain efficient performance.
Common Mistakes to Avoid
When working with kitchen faucet supply lines, there are several common mistakes that can lead to suboptimal performance or even damage to your plumbing system. Avoid these errors to ensure a hassle-free experience:
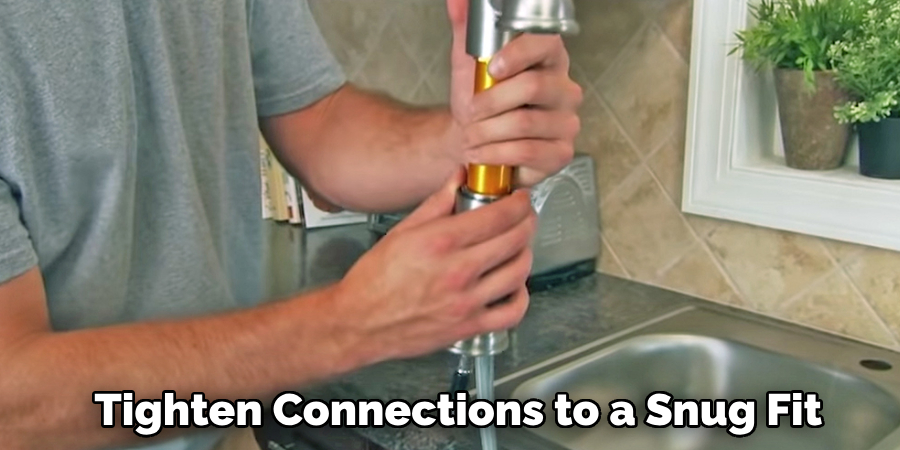
- Over-Tightening Connections: While it is important to ensure secure connections, over-tightening can damage fittings, threads, and washers, leading to leaks. Tighten connections to a snug fit and check for leaks rather than applying excessive force.
- Ignoring Manufacturer’s Guidelines: Each faucet and supply line may come with specific installation instructions from the manufacturer. Failing to follow these guidelines can result in improper installation and void warranties. Always refer to and adhere to the provided instructions.
- Using Incorrect Tools: Utilizing the wrong tools can strip connections or fail to provide the necessary leverage, leading to improper installations. Ensure you have the right tools for the job, such as basin wrenches, adjustable wrenches, and pliers.
- Neglecting to Turn Off Water Supply: One of the most critical steps is turning off the water supply before starting any installation or maintenance work. Forgetting this step can result in a messy and potentially damaging water leak.
Conclusion
Proper installation and maintenance of kitchen faucet supply lines are essential to ensuring the smooth and efficient operation of your kitchen plumbing. By taking the time to carefully follow installation instructions, address any issues with troubleshooting tips, and adhere to maintenance best practices, you can prevent common problems and extend the life of your supply lines.
Thanks for reading, and we hope this has given you some inspiration on how do you install a kitchen faucet supply line!
Professional Focus
Angela Ervin, a former interior designer turned blogger, specializes in kitchen design and renovations. Through her website, she blends her passion for cooking with design expertise, sharing practical and creative ideas. Known for balancing functionality and beauty, Angela’s insightful content has made her a trusted voice in home design and lifestyle.
About the Author
Angela Ervin, an experienced interior designer and blogger, combines her passion for kitchen renovations with storytelling. Living in Petersburg with her family, she enjoys cooking and testing her projects firsthand. Known for her humor and relatable style, Angela shares creative, functional design insights through her content, making her a trusted voice in home design.
Education History
University: Virginia Commonwealth University
Degree: Bachelor of Fine Arts (BFA) in Interior Design
- Angela’s education at VCU focused on mastering core interior design principles, including spatial planning, color theory, materials selection, and sustainable design practices.
- She gained hands-on experience through studio projects and collaborative design exercises, which honed her ability to create functional and aesthetically pleasing environments.
- Her coursework also emphasized problem-solving and practical applications of design, preparing her for real-world projects like her self-directed kitchen renovations.
- The program’s strong foundation in both technical skills and creative expression shaped Angela’s ability to seamlessly integrate form and function in her work.