


Over time, ovens can lose their temperature accuracy, which may result in undercooked or overcooked meals. Performing regular calibrations is essential to ensure your Frigidaire oven is cooking as intended. Calibrating your Frigidaire oven can help restore its temperature accuracy, ensuring your dishes come out perfectly cooked every time. The calibration process involves adjusting the oven’s internal temperature settings to match the temperature within the oven chamber. Fortunately, this simple process can be easily accomplished without professional help.
This guide will teach you how to calibrate a Frigidaire oven effectively. We’ll walk you through the steps needed to check your oven’s current temperature accuracy and make the necessary adjustments for optimal performance. By following these instructions, you can confidently regain control over your cooking and baking.
When Should You Calibrate Your Frigidaire Oven?
Inconsistent Cooking Results:
One of the most common indicators that your Frigidaire oven requires calibration is when you consistently find your baked goods undercooked or overcooked. This disparity suggests that the oven’s internal temperature may not align with the set temperature.
Temperature Testing:
To confirm suspicions of temperature inaccuracy, use an oven-safe thermometer to measure the oven’s internal temperature. Place the thermometer inside the oven and preheat to a specific temperature. If the actual temperature consistently reads higher or lower than the setting, calibration is necessary to ensure precise cooking temperatures.
Common Signs:
Be vigilant for signs such as longer-than-expected cooking times and burnt or unevenly cooked food, even when adhering to recipe instructions. An observable difference between the oven’s displayed temperature and that of an oven thermometer can also signal the need for recalibration.
New Ovens:
Surprisingly, even a brand-new Frigidaire oven might require calibration. The factory settings can exhibit slight variances in actual versus displayed temperatures. Performing a calibration ensures that the oven performs optimally, aligning the actual temperature to the set values. Addressing these factors in a timely can significantly enhance your cooking experience, providing consistently reliable outcomes.
Tools and Materials You’ll Need
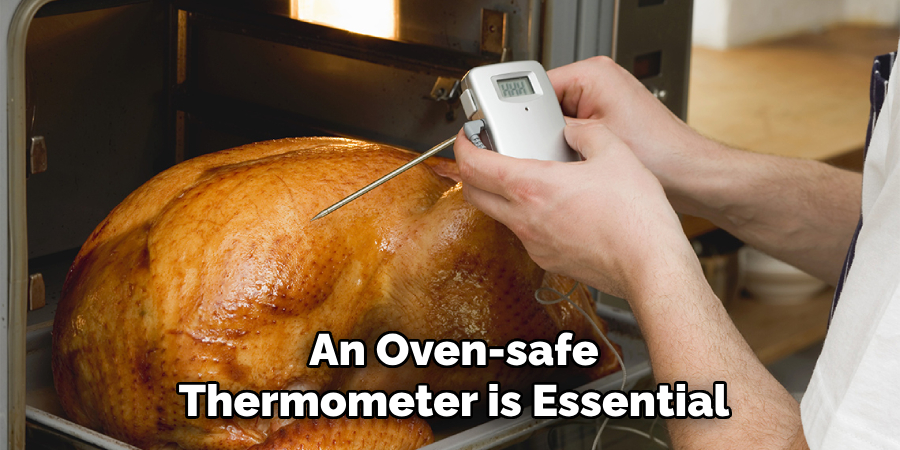
Oven-Safe Thermometer
You’ll need this to test your oven’s current temperature accuracy. An oven-safe thermometer is essential for checking if the internal temperature aligns with the settings on your Frigidaire oven. If you don’t already own one, you can easily purchase one from a kitchen store or online. Ensure you choose a model suited for high temperatures and easy readability.
User Manual
Although most Frigidaire ovens have a similar calibration process, having your specific model’s manual for reference is always helpful. The user manual can provide additional instructions or details specific to your model, guiding you through the calibration steps with precision. Having this on hand ensures you can address your oven’s unique features.
Notepad and Pen
A notepad and pen are useful for recording temperature differences during testing. Keep track of any discrepancies between the thermometer readings and the set temperature of your oven. These notes will assist you in accurately adjusting the settings to achieve optimal cooking performance. Documenting this information helps in making precise adjustments for consistent results.
How to Test Your Frigidaire Oven’s Temperature Accuracy
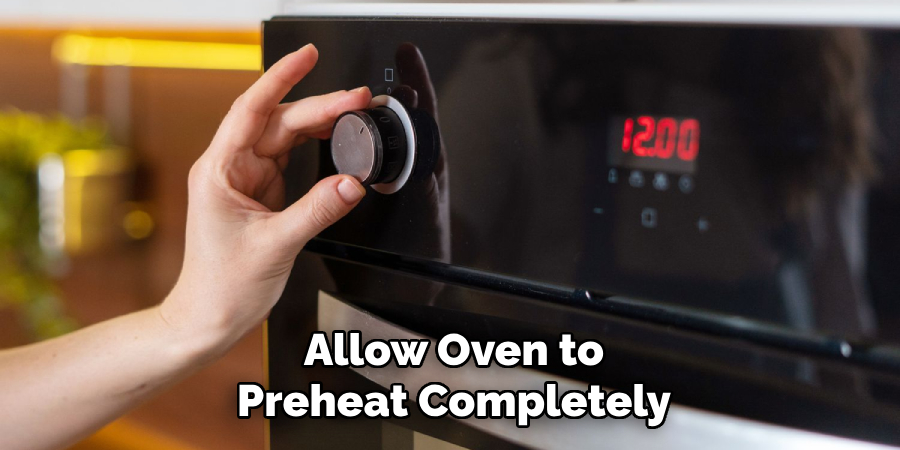
Step 1: Preheat the Oven
Set your Frigidaire oven to 350°F (or the temperature you most frequently use for cooking) and allow it to preheat completely. It’s crucial to wait at least 10 minutes after the preheat signal to ensure the oven has stabilized and uniformly reached the desired temperature throughout the chamber. This waiting period provides a baseline condition, contributing to a more reliable temperature test.
Step 2: Place the Thermometer
Place your oven-safe thermometer in the center of the oven, away from the heating elements, to avoid skewed readings. The center placement allows for an accurate reflection of the overall oven temperature, as areas too close to these elements can result in falsely higher readings.
Step 3: Check the Temperature
After 10-15 minutes of maintaining the oven temperature, check the thermometer for the current reading. Compare this reading to the set temperature displayed on the oven. It’s important to repeat this process several times to ensure consistency in the results. Consistent readings help identify actual temperature discrepancies from isolated reading errors.
Step 4: Record the Results
Document any differences between the thermometer’s temperature reading and the oven’s set temperature. A deviation greater than 10-15°F indicates a significant inaccuracy, suggesting that calibration may be needed to ensure your Frigidaire oven cooks accurately. Keeping careful records will assist in making precise adjustments to achieve the optimal cooking performance your appliance can deliver.
How to Calibrate a Frigidaire Oven: Process
The calibration process will adjust the oven’s internal settings to compensate for temperature inaccuracies. Here’s how to calibrate your Frigidaire oven:
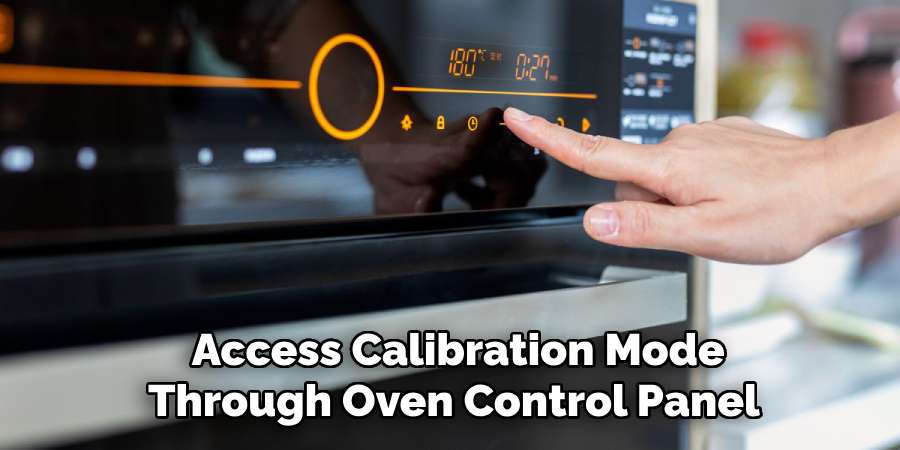
Step 1: Access the Calibration Mode
Most Frigidaire ovens allow you to access calibration mode through the oven control panel. To enter calibration mode, Press and hold the Bake button for about 6-10 seconds until the display shows “0” or a temperature adjustment screen. This step is crucial to initiate the calibration process and should be performed with the oven in the off position for safety.
Step 2: Adjust the Temperature
Once in calibration mode, use the up or down arrow buttons to adjust the oven’s temperature. If your oven runs hot, lower the temperature by the amount needed (based on your thermometer readings). If it’s running cool, increase the temperature accordingly. The temperature can usually be adjusted in increments of 5°F or 10°F, depending on the model. Carefully adjust based on the discrepancies recorded during your earlier temperature checks.
Step 3: Confirm the Adjustment
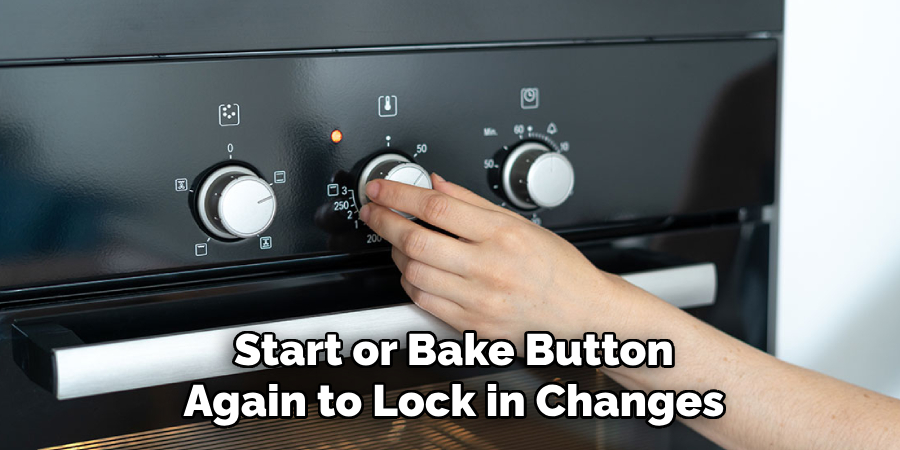
After making the necessary adjustments, press the Start or Bake button to confirm the new settings. This step ensures that the adjustments are saved and the oven is recalibrated to match the actual temperature more accurately. Confirmation signals the completion of the calibration and readies the appliance for accurate usage.
Step 4: Test Again
Repeat the testing process by setting the oven to 350°F and using the oven thermometer to ensure the calibration succeeded. Allow the oven to stabilize, then compare the thermometer reading to the set temperature. If further adjustments are needed, repeat the calibration steps. Achieving consistent readings verifies the efficacy of the calibration and enhances future baking results.
How to Calibrate a Frigidaire Oven (Continued)
Advanced Calibration for Digital Frigidaire Ovens
Some digital Frigidaire ovens feature advanced calibration options that allow you to make more precise adjustments to the temperature. Here’s how to calibrate digital models:
Step 1: Press Bake
Press and hold the Bake button on the control panel for approximately 6-10 seconds. The display will show a number, typically starting with “00,” indicating the current temperature adjustment. This number reflects any previous calibration adjustments you may have made.
Step 2: Adjust the Calibration
Use the Up or Down arrow keys to adjust the temperature setting. In most Frigidaire digital models, you can typically adjust the temperature by up to ±35°F. It’s important to make gradual adjustments based on the discrepancies identified during your initial testing with the thermometer. By compensating for consistent inaccuracies noted earlier, aim to bring the oven’s temperature closer to the actual target.
Step 3: Confirm the New Setting
After adjusting the temperature to compensate for any inaccuracies (as determined by your thermometer), press the Start or Bake button again to lock in the changes. This confirmation ensures that the new settings are stored in the oven’s memory, allowing for more accurate cooking performance moving forward.
Step 4: Retest the Oven
Once you’ve made adjustments, test the oven again by preheating it to a temperature of 350°F and using the thermometer to check for accuracy. Allow the oven to preheat and stabilize, then verify the consistency of the temperature readings with the adjustments made.
Note: Keep in mind that advanced calibration may not always be necessary for minor temperature deviations. Adjustments by 5-10°F are often sufficient for most needs. However, if you frequently cook demanding recipes requiring precise temperature settings, these advanced calibration steps can be integral in achieving optimal results. Regular retesting ensures your Frigidaire oven maintains accuracy over time, improving the cooking experience.
Conclusion
Calibrating your Frigidaire oven is a straightforward process that can significantly improve your cooking results by ensuring your oven reaches and maintains the correct temperature. By understanding “how to calibrate a Frigidaire oven,” you can enhance its performance and achieve more accurate cooking. The outlined steps for testing and adjusting the oven’s temperature allow you to address any discrepancies effectively, leading to more consistent outcomes in your culinary efforts.
Regularly checking and maintaining your oven’s calibration is especially crucial if you encounter persistent issues with temperature accuracy. Investing time in this maintenance ensures that your appliance continues to function optimally, providing reliable cooking results that meet your expectations. This proactive approach to oven care prolongs the appliance’s lifespan and enhances your overall cooking experience, allowing you to fully enjoy the art of preparing delicious, perfectly cooked meals.
Professional Focus
Angela Ervin, a former interior designer turned blogger, specializes in kitchen design and renovations. Through her website, she blends her passion for cooking with design expertise, sharing practical and creative ideas. Known for balancing functionality and beauty, Angela’s insightful content has made her a trusted voice in home design and lifestyle.
About the Author
Angela Ervin, an experienced interior designer and blogger, combines her passion for kitchen renovations with storytelling. Living in Petersburg with her family, she enjoys cooking and testing her projects firsthand. Known for her humor and relatable style, Angela shares creative, functional design insights through her content, making her a trusted voice in home design.
Education History
University: Virginia Commonwealth University
Degree: Bachelor of Fine Arts (BFA) in Interior Design
- Angela’s education at VCU focused on mastering core interior design principles, including spatial planning, color theory, materials selection, and sustainable design practices.
- She gained hands-on experience through studio projects and collaborative design exercises, which honed her ability to create functional and aesthetically pleasing environments.
- Her coursework also emphasized problem-solving and practical applications of design, preparing her for real-world projects like her self-directed kitchen renovations.
- The program’s strong foundation in both technical skills and creative expression shaped Angela’s ability to seamlessly integrate form and function in her work.