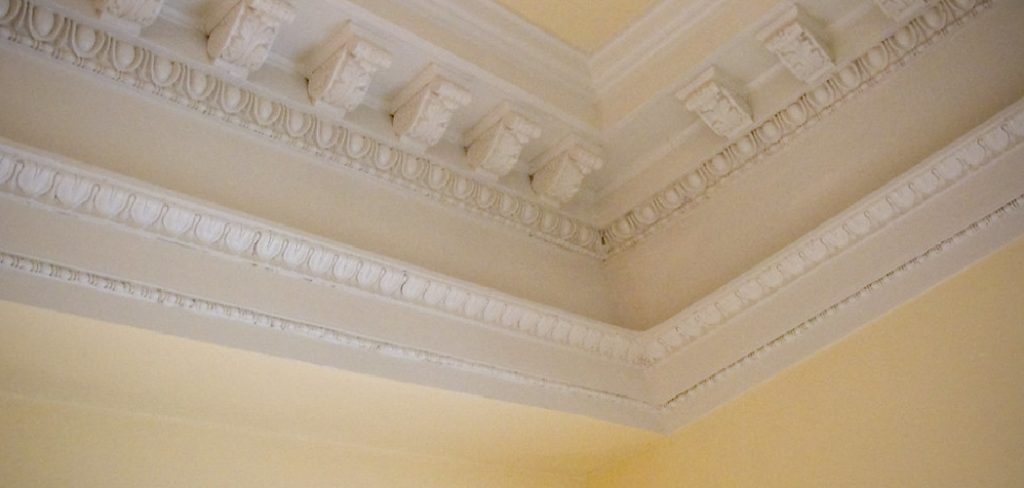
Crown molding is a beautiful decorative feature that adds elegance to any room, but like any surface in your home, it collects dust, dirt, and grime over time. Cleaning crown molding can be tricky due to its position and intricate details.

This guide provides a step-by-step process on how to clean crown molding effectively, whether it’s made of wood, plaster, or composite material, without damaging the surface or finish. By understanding the right techniques and supplies, you can easily maintain the pristine look of your crown molding.
Whether you’re doing a regular cleaning or tackling built-up dirt, this guide will ensure that your crown molding remains a standout feature in your home. With the right approach, learning how to clean crown molding doesn’t have to be intimidating—just a simple part of your cleaning routine.
Types of Crown Molding and Cleaning Considerations
Wood Crown Molding:
Wood molding is a classic and durable choice that can be cleaned using gentle soap and water. When cleaning, avoiding soaking the wood is crucial, as excessive moisture can lead to warping or damage to the finish.
Opt for a mild cleaner that preserves the natural grain and enhances the wood’s longevity. Ensuring that the cleaning process respects the wood’s sensitivity will help maintain its elegant appearance over time.
Plaster Crown Molding:
Plaster molding, while beautifully intricate, is more delicate and needs careful handling to avoid chipping or crumbling. A soft cloth is ideal for dusting and cleaning, and it’s best to avoid water unless it’s absolutely necessary. Regular dusting is essential to keep plaster crown moldings looking sharp, as it helps prevent the accumulation of dirt and grime that may be harder to remove.
Composite or PVC Crown Molding:
These materials are commonly found in modern homes and are appreciated for their resistance to water and chemicals compared to their wood and plaster counterparts.
Cleaning these requires less caution; you can use mild cleaning solutions or even harsher cleaners for tougher grime. However, to ensure safety, it’s wise to test any cleaner on an inconspicuous area first to confirm there’s no adverse reaction.

Painted Crown Molding:
When dealing with painted molding, be cautious about employing abrasive cleaning tools, as they can scratch or remove the paint layer. A mild detergent paired with a soft cloth should be suitable for regular cleaning. This method will maintain the molding’s aesthetic without compromising its painted finish.
Gathering Supplies for Cleaning Crown Molding
Before embarking on your crown molding cleaning journey, having the right supplies on hand is essential for an efficient and effective process. Below is a list of basic and optional supplies to simplify your task:
Basic Supplies:
- Microfiber cloths
- Duster with an extendable handle
- Soft sponge
- Mild dish soap
- White vinegar (for deeper cleaning)
- Bucket of warm water
- Soft-bristle brush (for detailed molding)
Optional Supplies:
- Wood cleaner (for wooden molding)
- Vacuum with a brush attachment
- Magic Eraser (for tough stains or marks)
- Ladder or step stool (for reaching higher moldings)
Preparation:
Before starting, gather all your cleaning supplies. Set up a ladder or step stool if needed to reach your crown molding safely. Consider placing towels or drop cloths under your cleaning area to protect your furniture and floors. Being prepared ensures a smooth cleaning process and helps maintain the pristine appearance of your crown molding.

Dusting Crown Molding
Dusting your crown molding is the first step to maintaining its cleanliness and beauty, ensuring no buildup mars its elegant appearance.
Step 1: Use a Duster with an Extendable Handle
Begin by dusting the crown molding to remove loose dirt, dust, and cobwebs. Utilize a microfiber or feather duster equipped with an extendable handle to reach the molding without climbing up and down frequently on a ladder.
Move the duster gently along the molding, working methodically from one end of the room to the other. Make sure to dust the corners and any intricate designs on the molding carefully, ensuring no area is overlooked during the process.
Step 2: Vacuum with a Brush Attachment
If crown molding has accumulated more dust or if anyone in your household has allergies, consider using a vacuum with a brush attachment for a more thorough cleaning.
This approach allows for effective dust removal while minimizing airborne particles. Gently hold the brush attachment against the molding’s surface and run it along the length, paying extra attention to top ledges and corners where dust collects more easily.
Step 3: Wipe with a Dry Cloth
After dusting or vacuuming, use a dry microfiber cloth to wipe down the crown molding. This final step helps pick up any remaining dust particles, leaving your molding clean and ready for further cleaning if needed. The gentle nature of a microfiber cloth ensures the delicate surface of the molding is respected, maintaining its pristine condition.

How to Clean Crown Molding: Cleaning Grime and Stains from Crown Molding
Ensuring your crown molding remains beautiful and free from grime or stains can maintain its visual appeal and longevity. Here’s a step-by-step guide to effectively clean grime and stains from crown molding:
Step 1: Mix a Mild Cleaning Solution
For basic cleaning, mix a solution of warm water and a few drops of mild dish soap. This mixture is safe for most crown molding materials, including wood, composite, and painted surfaces.
In situations where the crown molding is particularly dirty or greasy, such as in the kitchen, you can enhance the cleaning power of your solution by adding a small amount of white vinegar. The vinegar effectively breaks down grease and grime, ensuring a thorough clean without damaging the molding.
Step 2: Wipe Down the Molding
Take a soft sponge or microfiber cloth, dip it into the soapy water, and then wring out the excess liquid to prevent over-saturation. Gently wipe down the crown molding, working in small, manageable sections.
Start from one corner of the room and methodically work across to cover the entire molding area. Pay particular attention to corners and sections with intricate designs, as these are common areas where dust and dirt accumulate.
Step 3: Scrub Tough Spots with a Soft-Bristle Brush
For areas with stubborn grime or stains, a soft-bristle brush can be quite useful. It allows for targeted cleaning without damaging the delicate surface of the molding. Use a brush like a toothbrush to gently scrub the problematic areas, focusing on the intricate sections where dirt may be trapped in small crevices. Steer clear of abrasive scrubbers or harsh chemicals, which can scratch or otherwise damage your crown molding.
Step 4: Use a Magic Eraser for Stubborn Marks (Optional)
If you encounter tough stains or scuff marks, particularly on painted or composite crown molding, a Magic Eraser can be an excellent solution. Carefully rub the eraser on the stain, but test it first on a small, discreet spot to ensure no paint or finish damage. This step should help in lifting stubborn marks without compromising the molding’s appearance.
Step 5: Rinse and Dry
Once you’ve finished wiping down the molding with the cleaning solution, take a clean, damp cloth to wipe away any soap residue. Ensuring a thorough rinse is crucial as it prevents soap buildup, which could leave unsightly streaks or attract future dust accumulation. Finish by drying the crown molding with a dry microfiber cloth to remove any remaining moisture, leaving the molding polished and spotless, enhancing its elegance and cleanliness.
Cleaning Hard-to-Reach Crown Molding
Tackling crown molding located at significant heights can be challenging, but with the right approach, it is entirely manageable without compromising safety or effectiveness.
Step 1: Use an Extendable Tool
When your crown molding is too high to reach with standard tools, an extendable duster or microfiber cloth attached to a long handle can be the perfect solution. This allows you to clean thoroughly from the floor, avoiding the need to climb while removing all dust smoothly.
Step 2: Attach a Cloth to a Broomstick (DIY Method)
For a simple DIY solution, attach a microfiber cloth to the end of a broomstick using rubber bands. This method is economical and effective for both dusting and wiping down the crown molding. You can easily maneuver the broomstick to reach those high places by standing on the ground.
Step 3: Use a Ladder Safely
Safety should be your top priority if a ladder is necessary to reach particularly high moldings. Before climbing, make sure the ladder is placed on a stable, even surface. Move the ladder frequently instead of overreaching, minimizing the risk of falls and ensuring you can clean every spot thoroughly.
Step 4: Clean in Sections
Divide your cleaning task into manageable segments, tackling a few feet of crown molding at a time. This organization prevents you from missing areas and keeps the process organized. Be cautious of your movements to avoid bumping into the wall or molding, which might cause damage. By systematically working through each section, you’ll achieve an even and comprehensive clean, enhancing the beauty and longevity of your crown molding.

Conclusion
Cleaning crown molding doesn’t have to be a daunting task. By employing the right techniques and using appropriate cleaning supplies, you can keep your crown molding looking pristine and free of dust and grime.
Regular dusting, complemented by occasional deep cleaning, will maintain the beauty of your crown molding, preserving its elegance and enhancing the overall appearance of your room. Whether your crown molding is made of wood, plaster, or composite materials, this guide provides all the steps you need to ensure it remains in excellent condition.
Understanding “how to clean crown molding” effectively means following simple steps and using common household items to achieve a thorough clean. By caring for your crown molding, you contribute to its longevity and uphold the aesthetic quality of your home’s interior. Embrace these methods and enjoy the satisfaction of a fresh and vibrant living space.
Professional Focus
Angela Ervin, a former interior designer turned blogger, specializes in kitchen design and renovations. Through her website, she blends her passion for cooking with design expertise, sharing practical and creative ideas. Known for balancing functionality and beauty, Angela’s insightful content has made her a trusted voice in home design and lifestyle.
About the Author
Angela Ervin, an experienced interior designer and blogger, combines her passion for kitchen renovations with storytelling. Living in Petersburg with her family, she enjoys cooking and testing her projects firsthand. Known for her humor and relatable style, Angela shares creative, functional design insights through her content, making her a trusted voice in home design.
Education History
University: Virginia Commonwealth University
Degree: Bachelor of Fine Arts (BFA) in Interior Design
- Angela’s education at VCU focused on mastering core interior design principles, including spatial planning, color theory, materials selection, and sustainable design practices.
- She gained hands-on experience through studio projects and collaborative design exercises, which honed her ability to create functional and aesthetically pleasing environments.
- Her coursework also emphasized problem-solving and practical applications of design, preparing her for real-world projects like her self-directed kitchen renovations.
- The program’s strong foundation in both technical skills and creative expression shaped Angela’s ability to seamlessly integrate form and function in her work.


