


Dealing with a mice infestation can be unsettling, and ensuring your oven is adequately disinfected is crucial for maintaining a safe cooking environment.

Mice are known to carry bacteria and diseases, so thoroughly cleaning any areas they may have accessed is vital for your health and peace of mind. This guide will walk you through how to disinfect oven after mice, helping you to eliminate any harmful germs and restore confidence in your kitchen’s hygiene.
Importance of Thoroughly Disinfecting Your Oven After a Mice Infestation
Thoroughly disinfecting your oven after a mice infestation is an essential step in safeguarding your household’s health. Mice can leave behind urine, droppings, and other contaminants that are not only unhygienic but can also harbor pathogens.
These pathogens have the potential to cause foodborne illnesses if they come into contact with food preparation surfaces. Additionally, mice can sometimes gnaw on wires and components within the oven, leading to potential fire hazards or equipment malfunction.
Ensuring that your oven is thoroughly cleaned and disinfected not only eliminates these health risks but also restores the integrity and performance of your kitchen appliance. By taking meticulous measures to sanitize your oven, you contribute to a safer and more hygienic home environment.
Initial Cleaning and Preparation
Before you begin the disinfection process, it’s important to conduct an initial cleaning and preparation of your oven. Start by ensuring the oven is completely turned off and unplugged to avoid any electrical hazards. Remove any loose debris, such as food particles or droppings, using a pair of gloves and disposable paper towels.
It’s crucial to wear protective gloves to minimize direct contact with any contaminants. Dispose of the gloves and towels in a sealed plastic bag to prevent the spread of germs. Next, remove the oven racks and any detachable components, such as trays and handles, and soak them in a sink filled with hot, soapy water.
Use a scrubbing brush to clean these parts meticulously, ensuring all crevices are thoroughly scrubbed. Rinse them with clean water and set them aside to dry. This initial cleaning stage lays the groundwork for the subsequent disinfection process, ensuring that any visible contaminants are removed before you proceed with deeper cleaning measures.

10 Methods How to Disinfect Oven after Mice
1. Unplug the Oven and Ensure Safety
Before you begin disinfecting, make sure to unplug the oven or turn off the circuit breaker to eliminate any risk of electrical hazards. This precaution is essential for both your safety and the effectiveness of the cleaning process.
Disconnecting the oven allows you to clean it thoroughly without the risk of accidental activation. If your oven is built-in, ensure that you can safely move or access it, and always prioritize safety during the cleaning process.
2. Remove Oven Racks and Accessories
Start by removing all oven racks, trays, and any other removable accessories. These components can harbor mouse droppings and urine, making it crucial to clean them separately.
Wash the racks and accessories with hot, soapy water and a scrub brush. If they are heavily soiled, soak them in a mixture of hot water and baking soda to help dissolve stubborn residues. Rinse thoroughly and allow them to air dry completely before reinserting them into the oven.
3. Vacuum Loose Debris
Use a vacuum cleaner with a hose attachment to remove any loose debris, droppings, or nesting materials from the oven’s interior. Carefully vacuum the interior surfaces, including the walls, floor, and ceiling of the oven. Pay special attention to crevices and corners where debris might accumulate. This step helps to eliminate loose particles before you proceed with more thorough cleaning and disinfecting.
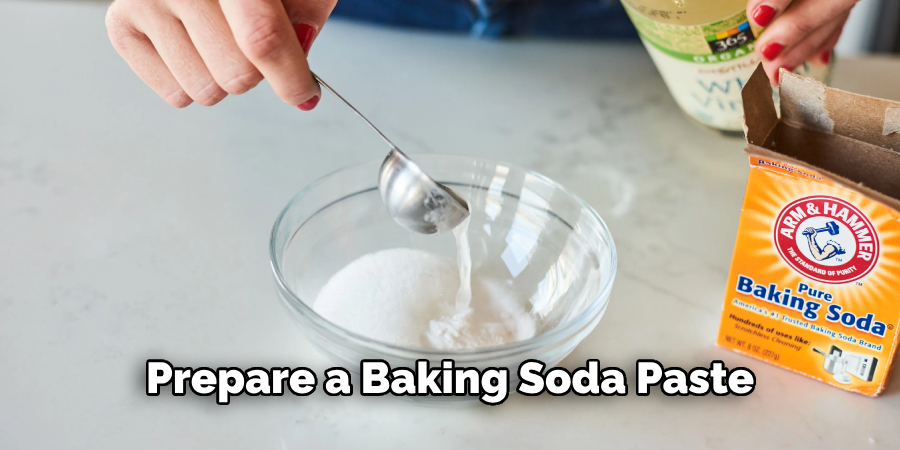
4. Clean with a Baking Soda Paste
Prepare a baking soda paste by mixing baking soda with a small amount of water to create a thick consistency. Apply this paste generously to the interior surfaces of the oven, including the walls, floor, and ceiling.
Baking soda is a natural deodorizer and cleaner that helps to neutralize odors and lift grime. Allow the paste to sit for at least 30 minutes to an hour. Afterward, scrub the surfaces with a non-abrasive sponge or brush to remove any remaining residue. Wipe down with a damp cloth to ensure all baking soda is removed.
5. Use a Vinegar Solution for Disinfection
After cleaning with baking soda, use a solution of equal parts white vinegar and water to disinfect the oven. Vinegar is a natural disinfectant that helps to kill germs and bacteria. Spray or wipe the vinegar solution onto all interior surfaces of the oven. Allow it to sit for a few minutes to work its disinfecting magic. Wipe down the surfaces with a clean, damp cloth to remove any excess vinegar and residues.
6. Apply a Commercial Oven Cleaner
For a more thorough cleaning, especially if there are stubborn stains or residues, consider using a commercial oven cleaner. Select a cleaner that is safe for the interior surfaces of your oven and follow the manufacturer’s instructions carefully.
Apply the cleaner according to the directions, and let it sit for the recommended time. Scrub the surfaces with a non-abrasive sponge or brush, and then wipe clean with a damp cloth. Ensure that all cleaner residues are thoroughly removed before using the oven again.
7. Disinfect the Oven Door and Exterior
Don’t forget to clean and disinfect the oven door and exterior surfaces. Wipe down the door with a solution of warm water and mild detergent, paying special attention to areas around the door seal and hinges. Use a non-abrasive cleaner if necessary. For the exterior, use a disinfectant suitable for kitchen surfaces. Make sure to remove any fingerprints, spills, or residues. Dry all surfaces with a clean cloth to prevent streaks and ensure cleanliness.
8. Use a Steam Cleaning Method
A steam cleaning method can be highly effective for disinfecting the oven and removing any lingering odors. Fill a heat-resistant bowl with water and place it in the oven. Set the oven to a low temperature, around 200°F (93°C), and let the water steam for about 30 minutes. The steam helps to loosen grime and residues, making them easier to wipe away. After steaming, carefully wipe down the interior surfaces with a clean cloth.

9. Check and Clean the Oven Ventilation
Inspect and clean the oven’s ventilation system, including the fan and any filters, if applicable. Mice can leave behind contaminants that might be trapped in the ventilation system. Remove any filters and wash them according to the manufacturer’s instructions.
Use a vacuum or brush to clean the fan blades and any vents. Ensure that the ventilation system is free from debris and properly functioning to maintain good air quality and prevent future infestations.
10. Inspect for Signs of Residual Contamination
After cleaning and disinfecting, carefully inspect the oven for any signs of residual contamination or odor. Check for any remaining mouse droppings, urine stains, or unusual smells.
If necessary, repeat the cleaning and disinfecting process to ensure that the oven is thoroughly sanitized. Once you are satisfied with the cleanliness, plug the oven back in or turn on the circuit breaker. Allow the oven to run at a high temperature for a short period to ensure that any remaining cleaning residues are burned off.
Things to Consider When Cleaning an Oven Contaminated by Mice
- Protective Gear: Always wear protective gear such as gloves and a mask when cleaning areas contaminated by mice. This will help prevent direct contact with harmful bacteria or viruses that mice may carry.
- Ventilation: Ensure the area is well-ventilated by opening windows or using fans. Cleaning agents, and even the odors from mouse contaminants, can be pungent or potentially harmful, so adequate airflow is important.
- Proper Disposal: Be mindful of how you dispose of debris and cleaning materials. Seal any contaminated items in a plastic bag before disposing of them in an outside trash container to prevent the spread of contaminants.
- Use of Non-Toxic Cleaners: Opt for non-toxic cleaners, especially if you plan to use the oven soon after cleaning. This is crucial to avoid chemical residues that could affect food safety.
- Regular Maintenance: Consider implementing a regular maintenance routine to check for signs of mice or other pests and ensure your oven stays clean and safe for use.
- Professional Assistance: If the infestation is severe or you are uncomfortable with the cleaning process, it may be advisable to hire a professional cleaning service or pest control specialist.
- Follow-Up Inspections: Regularly inspect the kitchen area for signs of returning mice or other pests to address issues promptly before they become significant problems again.
Conclusion
Disinfecting an oven after a mice infestation requires a thorough and methodical approach to ensure safety and cleanliness. By following these methods—unplugging the oven, removing and cleaning racks, vacuuming debris, using baking soda and vinegar solutions, and employing commercial cleaners or steam—you can effectively remove contaminants and odors. Thanks for reading, and we hope this has given you some inspiration on how to disinfect oven after mice!
Professional Focus
Angela Ervin, a former interior designer turned blogger, specializes in kitchen design and renovations. Through her website, she blends her passion for cooking with design expertise, sharing practical and creative ideas. Known for balancing functionality and beauty, Angela’s insightful content has made her a trusted voice in home design and lifestyle.
About the Author
Angela Ervin, an experienced interior designer and blogger, combines her passion for kitchen renovations with storytelling. Living in Petersburg with her family, she enjoys cooking and testing her projects firsthand. Known for her humor and relatable style, Angela shares creative, functional design insights through her content, making her a trusted voice in home design.
Education History
University: Virginia Commonwealth University
Degree: Bachelor of Fine Arts (BFA) in Interior Design
- Angela’s education at VCU focused on mastering core interior design principles, including spatial planning, color theory, materials selection, and sustainable design practices.
- She gained hands-on experience through studio projects and collaborative design exercises, which honed her ability to create functional and aesthetically pleasing environments.
- Her coursework also emphasized problem-solving and practical applications of design, preparing her for real-world projects like her self-directed kitchen renovations.
- The program’s strong foundation in both technical skills and creative expression shaped Angela’s ability to seamlessly integrate form and function in her work.