


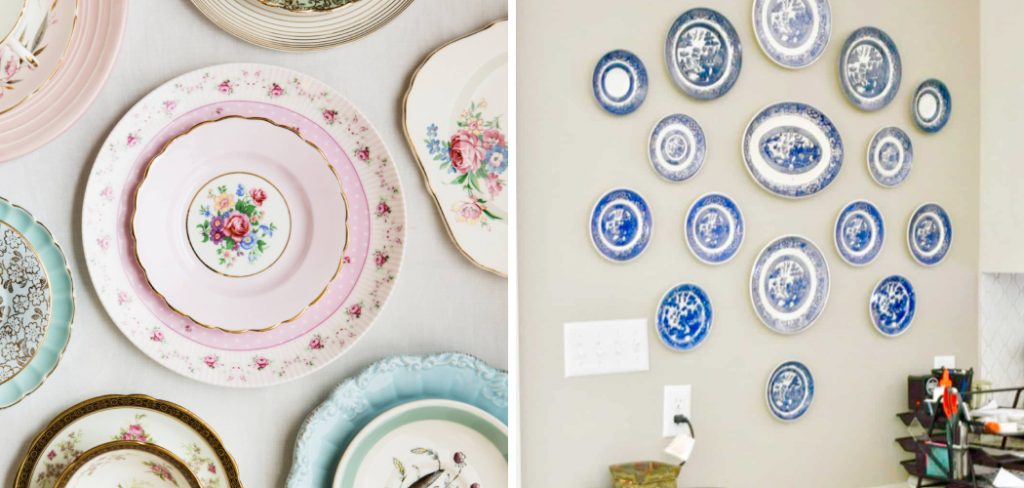
Hanging plates on a backsplash can turn an ordinary kitchen into a vibrant display of art and personal style. This decorative technique is both practical and aesthetic, adding a pop of color and character to your cooking space. Whether you’re showcasing heirloom china, colorful ceramics, or unique flea market finds, properly hanging plates can enhance your kitchen design.
In this guide on how to hang plates on backsplash, we’ll explore step-by-step instructions and useful tips to help you safely and artistically mount plates on your backsplash, ensuring they remain secure and beautifully aligned.
Why Hang Plates on Backsplash?
Plates are a versatile and affordable way to add visual interest to your kitchen backsplash. Not only do they create a decorative focal point, but they also serve as an alternative to traditional wall art. Additionally, hanging plates on your backsplash can help protect the walls from splashes and spills, making for easy cleanup.
It’s also a great way to display your personal style and add a touch of nostalgia or sentimentality by showcasing family heirlooms or souvenir plates from travels. With endless design possibilities, hanging plates on a backsplash is an excellent way to infuse character into your kitchen décor.
Materials Needed
Before we dive into the process, here are the materials you’ll need to hang plates on your backsplash:
Plates:
Choose plates with a flat back and raised rims, as these will be easier to hang. Avoid using fragile or valuable dishes, as they may get damaged during the hanging process.
Plate Hangers:
There are different types of plate hangers available in various sizes and styles. Choose one that fits your plate size and complements your kitchen décor.
Pencil:
Mark the exact spot where the plate hanger is placed on the backsplash.
Measuring Tape:
To ensure equal spacing between each plate.
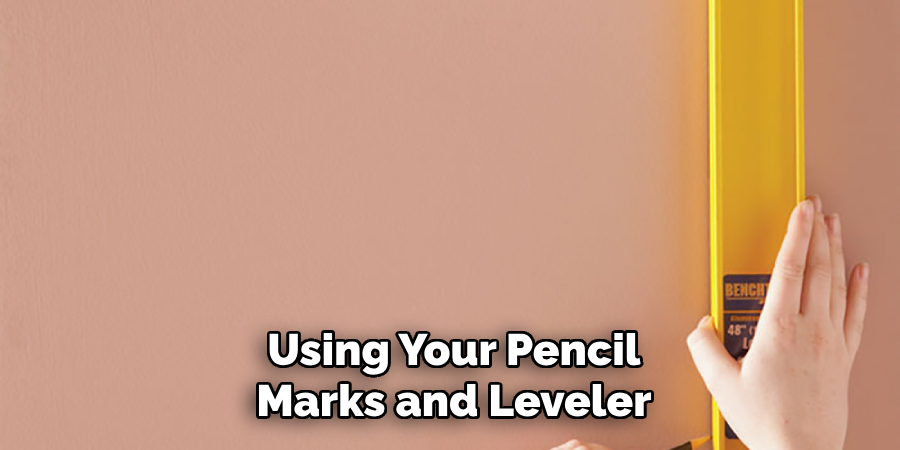
Leveler:
Make sure your plates are hung straight.
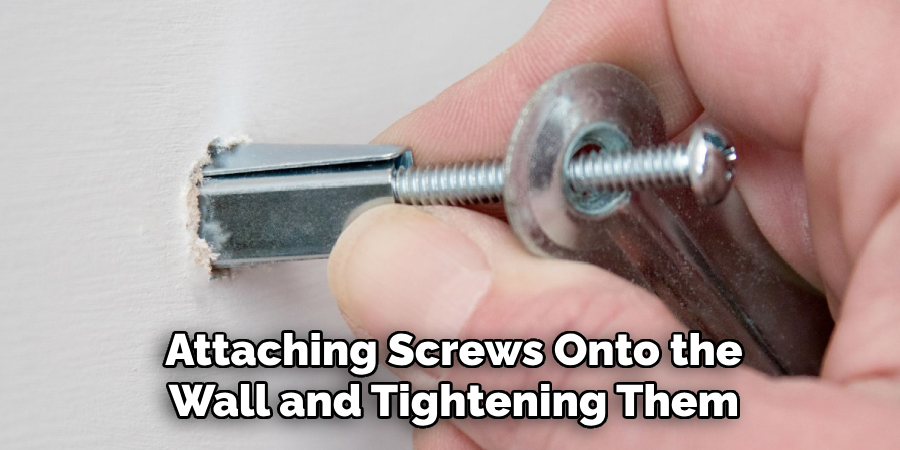
Screwdriver:
For attaching screws onto the wall and tightening them into place.
8 Step-by-step Instructions on How to Hang Plates on Backsplash
Step 1: Choose Your Plates
The first step in hanging plates on your backsplash is selecting the right plates for your display. Consider the color scheme and style of your kitchen when choosing plates that will complement the space. You can mix and match patterns and sizes for an eclectic look or stick to a cohesive theme for a more uniform display.
It’s also essential to make sure the plates you choose have a flat back and raised rims for easy hanging.
Step 2: Measure and Mark
Once you’ve selected the plates, the next step is to carefully measure the area where you plan to hang them. Start by using the measuring tape to determine the total width and height of the space available on your backsplash. Mark the center point lightly with a pencil, as this will help you achieve a balanced arrangement of your plates.
Ensure there is a sufficient gap between each plate, allowing space for plate hangers without overcrowding. Use the leveler to draw straight, horizontal pencil lines that serve as guides for the installation, helping you maintain consistency and symmetry in your display.
Step 3: Prepare the Plate Hangers
Now that you’ve measured and marked the space for your plates, it’s time to prepare the plate hangers. Start by choosing the appropriate hangers for your plates, ensuring they are the correct size and style for a secure fit. Carefully attach the hangers to the back of each plate according to the manufacturer’s instructions.
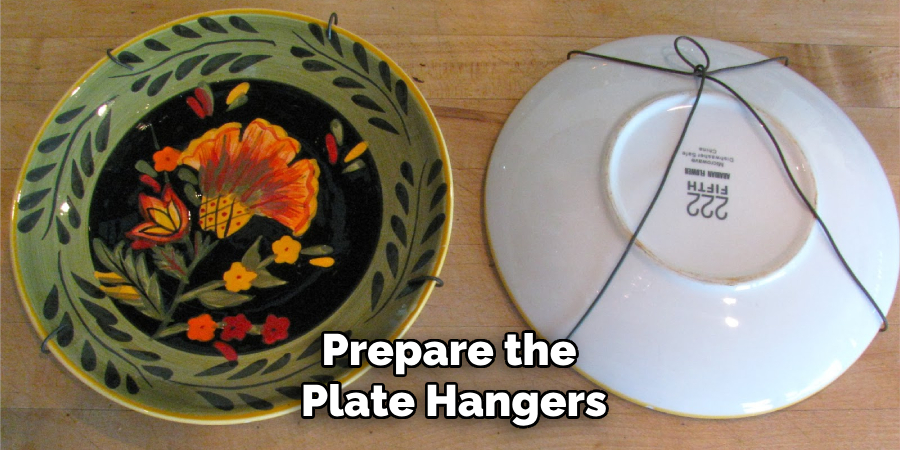
Make sure the hangers are positioned so that the plate will hang straight and flat against the backsplash. Adjust the tension of the hangers if they are spring-loaded, checking that the grip is firm but without putting excessive pressure on the plate, which might risk damage. Once all the hangers are securely attached, lay the plates on a flat surface to double-check that they remain level and centered in the hangers, ready for hanging.
Step 4: Drill Holes into the Wall
With your plates and hangers prepared, the next step is to drill holes into the backsplash wall where the plates will be mounted. Using the pencil marks as a guide, position your drill bit at each designated spot. Make sure to select an appropriate drill bit size that corresponds with the screws you will be using.
When drilling, hold the drill steady and apply gentle pressure to ensure a clean entry into the wall surface. It’s important to drill at a right angle to avoid any misalignment. Take care to avoid drilling into any electrical wires or plumbing that may be hidden behind the backsplash. Once all the holes are drilled, remove any dust and debris from the surface, ensuring that the wall is clear and ready for the next step of screwing in the plate hangers.
Step 5: Attach Plate Hangers to the Wall
With the holes drilled, it’s time to attach the plate hangers to the wall. Using your screwdriver, carefully insert screws through each hole and secure them into place. Make sure to leave a small gap between the wall and the screw head, as this will provide enough space for hanging the plates securely.
It’s crucial to check each screw for stability before moving on to the next one. If needed, use wall anchors or toggle bolts for added support, especially if your plates are heavier or if you’re drilling into a tile backsplash.
Step 6: Hang Your Plates
Once all of your plate hangers are securely attached to the wall, you can begin hanging your plates. Start with the center plate and work outwards from there, using your pencil marks and leveler as a guide for placement. Hold the plate firmly against the hanger and gently press down to secure it in place. Repeat this process for each plate, adjusting the tension on the hangers if needed to ensure a level display.
The beauty of hanging plates on a backsplash is that you can easily rearrange them or switch out plates for a fresh look whenever you want.
Step 7: Add Finishing Touches
With all of your plates hung, take a step back and admire your new display. If you notice any wobbly plates or uneven spacing, use the leveler to make minor adjustments as needed. You can also add decorative elements such as greenery, small frames, or other kitchen accessories to complete the look.
It’s also a good idea to periodically check the screws and hangers for stability, especially if you live in an area prone to earthquakes or have small children who may accidentally bump into the plates.
Step 8: Enjoy Your New Backsplash Display!
Congratulations, you have successfully hung plates on your backsplash! Not only does it protect your walls from splashes and spills, but it also adds a unique and personalized touch to your kitchen decor. With the right tools and careful attention to detail, you can create a beautiful plate display that will surely impress your guests and bring joy to your everyday life. Have fun experimenting with different plate arrangements or adding new plates for special occasions – the possibilities are endless! Happy decorating!
Additional Tips
- When selecting plates for your display, consider using a mix of antique and modern pieces to add depth and character to the arrangement.
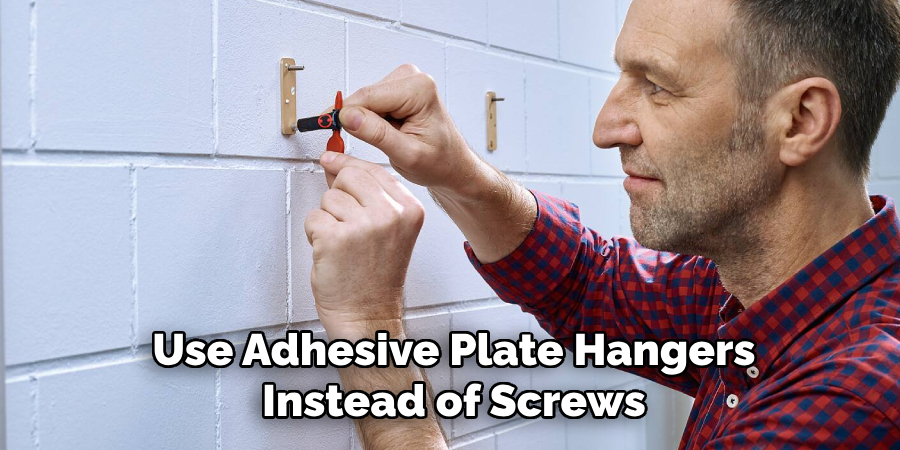
- To avoid any potential damage to your backsplash, use adhesive plate hangers instead of screws if you have tile or delicate material as your backsplash surface.
- For a minimalist look, opt for simple white plates with different sizes and patterns for a cohesive yet eye-catching display.
- Consider incorporating other types of kitchenware, such as cutting boards or vintage trays, into your plate display to add texture and interest.
- If you’re hesitant about drilling holes into your backsplash wall, try using removable adhesive hooks that can securely hold plates without causing any damage. Just make sure to follow the weight limit for each hook.
- Don’t be afraid to think outside the box and hang plates in unconventional ways, such as overlapping or arranging them in a unique shape. Let your creativity shine!
With these steps on how to hang plates on backsplash, you can transform your kitchen into a beautiful and functional space. Whether you choose to display family heirlooms or mix and match different designs, your plate display will surely become a conversation starter and a reflection of your style. Have fun decorating!
Conclusion
Adding a plate display to your kitchen backsplash is a great way to showcase your personality and elevate the look of your space. With the right tools and techniques, you can easily achieve a balanced and visually appealing arrangement that will enhance the overall aesthetic of your kitchen.
Just remember to take your time with measuring, marking, and hanging each plate, and don’t hesitate to make adjustments as needed. Have fun creating your own personalized plate display – we hope this guide has been helpful in inspiring you to get started! Thanks for reading this article on how to hang plates on backsplash.
Professional Focus
Angela Ervin, a former interior designer turned blogger, specializes in kitchen design and renovations. Through her website, she blends her passion for cooking with design expertise, sharing practical and creative ideas. Known for balancing functionality and beauty, Angela’s insightful content has made her a trusted voice in home design and lifestyle.
About the Author
Angela Ervin, an experienced interior designer and blogger, combines her passion for kitchen renovations with storytelling. Living in Petersburg with her family, she enjoys cooking and testing her projects firsthand. Known for her humor and relatable style, Angela shares creative, functional design insights through her content, making her a trusted voice in home design.
Education History
University: Virginia Commonwealth University
Degree: Bachelor of Fine Arts (BFA) in Interior Design
- Angela’s education at VCU focused on mastering core interior design principles, including spatial planning, color theory, materials selection, and sustainable design practices.
- She gained hands-on experience through studio projects and collaborative design exercises, which honed her ability to create functional and aesthetically pleasing environments.
- Her coursework also emphasized problem-solving and practical applications of design, preparing her for real-world projects like her self-directed kitchen renovations.
- The program’s strong foundation in both technical skills and creative expression shaped Angela’s ability to seamlessly integrate form and function in her work.