


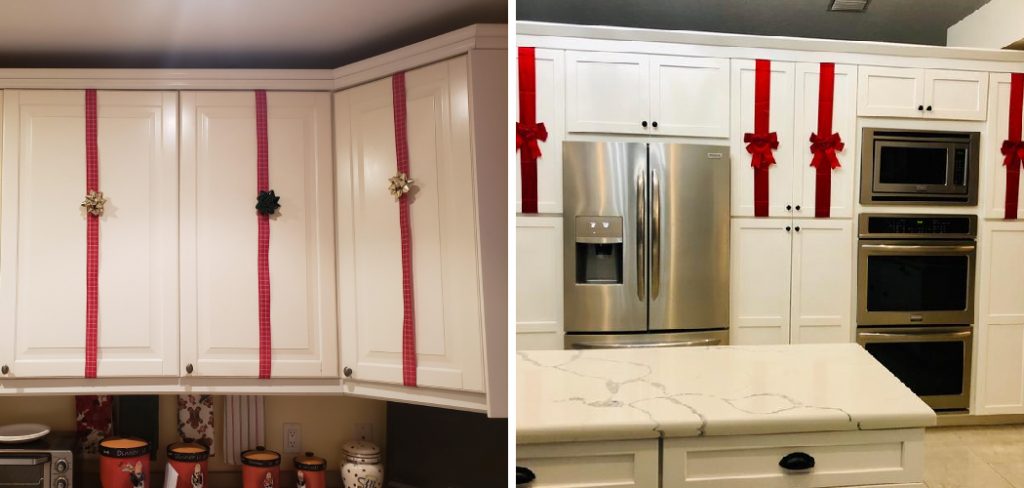
Are you looking to add a touch of elegance to your kitchen cabinets? Adding ribbon can be a simple and cost-effective way to achieve this. Here’s how you can put ribbon on your kitchen cabinets.
How to put ribbon on kitchen cabinets is a simple and creative way to revitalize your space without the need for extensive renovations. This approach not only adds a pop of color to your kitchen decor but also allows for seasonal or thematic customization. Whether preparing for a festive occasion or just wanting to refresh your kitchen’s look, attaching ribbons to your cabinets can be an easy and budget-friendly project.
In this guide, we’ll explore step-by-step instructions for effectively incorporating ribbons into your cabinet design. This ensures a neat and professional finish that enhances the overall aesthetic of your kitchen.
What Will You Need?
To get started, you will need the following supplies:
- Kitchen cabinets – preferably with recessed panels for attaching ribbons
- Ribbons of your choice – consider the color, width, and texture based on your desired look
- Scissors or a rotary cutter
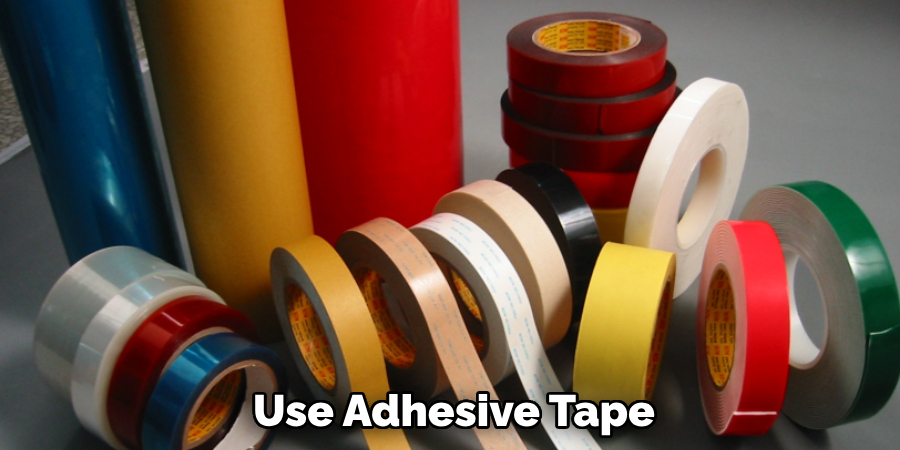
- Adhesive tape or hot glue gun (if not using self-adhesive ribbons)
- Measuring tape or ruler
Once you have gathered all the necessary supplies, it’s time to start putting ribbons on your kitchen cabinets.
10 Easy Steps on How to Put Ribbon on Kitchen Cabinets
Step 1. Measure the Cabinets
Begin by measuring the length and width of each cabinet door you plan to decorate. Using a measuring tape or ruler, carefully note down these measurements, ensuring that your ribbons have the appropriate length to fit across each panel comfortably. Consider whether you want the ribbon to stretch across the entire width, form a cross pattern, or simply outline the recessed panel.
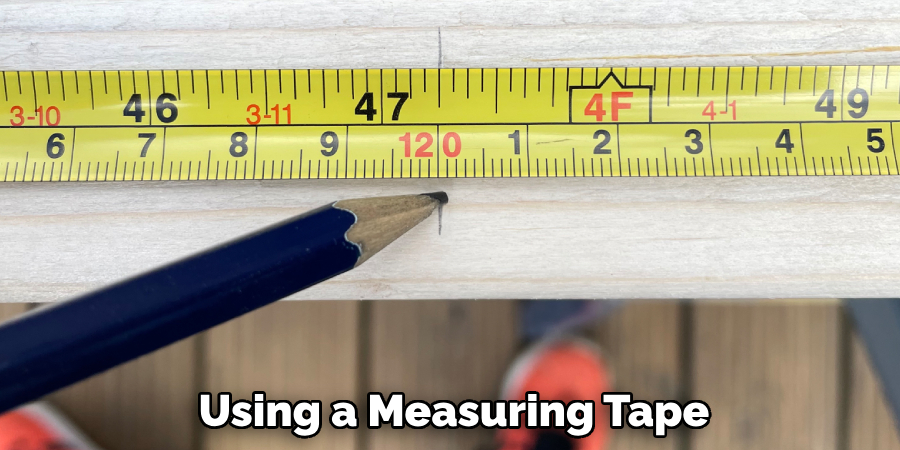
Accurate measurements are crucial for a neat and professional finish, so take your time and double-check each dimension. Determining the precise amount of ribbon needed for each cabinet can avoid unnecessary waste and ensure consistency throughout your kitchen.
Step 2. Cut the Ribbon
Once you have your measurements, it’s time to cut the ribbon accordingly. Lay the ribbon flat on a clean surface and use scissors or a rotary cutter to cut it to the required lengths. Consider using a cutting mat and ruler as a guide for a straight and clean cut. If you plan to create patterns or lay the ribbon, cut sufficient strips to accommodate your design choice.
It’s a good idea to cut a little extra to allow for adjustments or trimming later. Properly cut ribbons ensure a smooth application and reduce the risk of fraying or uneven edges.
Step 3. Position the Ribbon
With the ribbons cut to the desired length, carefully position them on your cabinet doors according to your chosen design. If you’re outlining the recessed panel, start by placing one end of the ribbon at the top or side of the panel and gently lay it across, ensuring it’s straight and even. For cross patterns or more intricate designs, lay out the ribbons on a flat surface first to visualize the final look.
Adjust their position as necessary to achieve a balanced and symmetrical arrangement. This step ensures the ribbons’ visual impact and can be adjusted easily before applying adhesive.
Step 4. Secure the Ribbon
Once you are satisfied with the positioning of the ribbons, it’s time to secure them in place. Use adhesive tape or a hot glue gun to attach the ribbons to the cabinets. If using tape, cut small pieces and place them strategically along the edges and midpoints of the ribbon to hold it firmly. For hot glue, apply tiny dots or lines along the ribbon’s path and press the ribbon gently into place while the glue is still warm.
Be careful not to apply too much glue, as it can seep out from under the ribbon and create a messy appearance. Ensure the ribbon is taut and flat against the cabinet to maintain a sleek look.
Step 5. Trim Excess Ribbon
After securing the ribbons to the cabinet doors, inspect each piece to ensure it is appropriately aligned and flat. Use your scissors or rotary cutter to carefully trim any excess ribbon extending past the edges of the cabinet. This gives a polished and tidy look and prevents the ribbon from catching or fraying over time.
Pay close attention to the corners and edges, ensuring the cuts are clean and precise. By trimming any overhanging ribbon, you ensure the aesthetic remains sharp and professional, ready to enhance your kitchen’s overall design.
Step 6. Add Finishing Touches
Now that your ribbons are securely in place and any excess material has been trimmed, it’s time to add finishing touches to complement your cabinet transformation further. Consider adding decorative elements such as bows or small embellishments at the intersections of crossed ribbons or at the corners for an accent.
These extra details can elevate the overall appearance and personalize your kitchen decor. If you’re using seasonal or themed ribbons, incorporating additional decor elements that match the theme can create a cohesive and more festive look. Ensure that all embellishments are securely attached using an adhesive that is compatible with the materials to avoid them falling off over time.
Step 7. Inspect and Adjust
After completing the ribbon application and adding any decorative touches, take a moment to inspect your work thoroughly. Walk around the kitchen to view your cabinets from different angles and lighting conditions to ensure consistency and appeal. Check for any loose edges, uneven placement, or areas where the ribbon may need additional securing.
If adjustments are required, gently lift and reposition the ribbon or add extra adhesive as necessary. This step ensures that your final product looks polished and durable, ready to impress guests and elevate your kitchen’s style. Inspecting and adjusting at this stage can prevent potential peeling or sagging in the future, maintaining the aesthetic quality of your ribbon-enhanced cabinets.
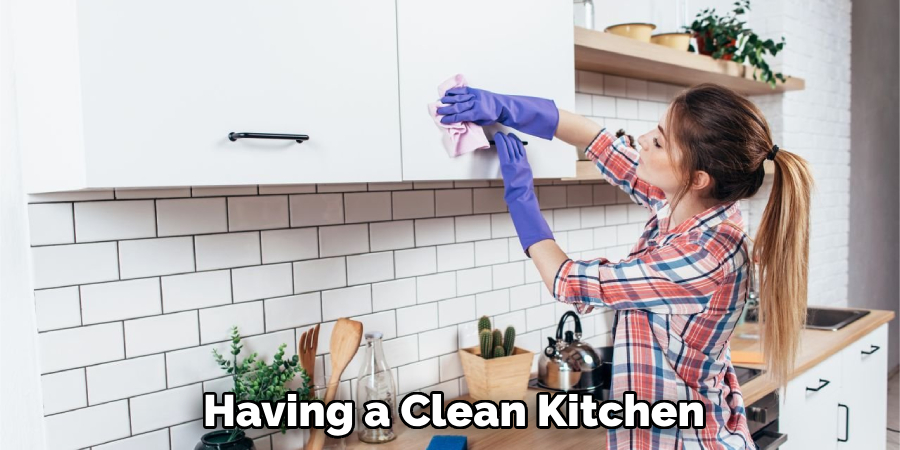
Step 8. Clean Up
After ensuring all ribbons are firmly secured, and adjustments are completed, tidying up your workspace is essential. Gather all leftover ribbon pieces, adhesive supplies, and tools used. Discard any scraps and wipe down the cabinets to remove any residue from adhesives or fingerprints.
Cleaning up not only leaves your kitchen neat but also helps avoid mishaps like glue stains on unwanted areas. Having a clean kitchen allows you to fully appreciate the refreshed look that the ribbons bring to your cabinet doors.
Step 9. Maintain Your Ribbon Accents
Regular maintenance is necessary to keep your ribbon-accented cabinets looking fresh and vibrant. Depending on the material of the ribbon, it might be prone to collecting dust or fading over time. Wipe the ribbons gently with a damp cloth to remove any accumulated dust or dirt.
If you notice any loose sections or fraying edges, secure them promptly with additional adhesive to maintain a clean look. Consider periodically checking for signs of wear and replacing ribbons that have become discolored or damaged.
Step 10. Enjoy Your Customized Cabinets
With your ribbons securely in place and maintenance routine set, it’s time to enjoy the enhanced look of your kitchen cabinets. Take pride in your handiwork and the personal touch the ribbons bring to your home. Invite friends or family over to showcase your creativity and the harmonious blend of DIY charm with functional design.
Your newly adorned cabinets highlight your unique style and breathe new life into your kitchen space, making it a more enjoyable and beautiful environment for cooking and gathering.
By following these simple steps, you can quickly transform your plain cabinet doors into eye-catching and personalized focal points in your kitchen.
5 Things You Should Avoid
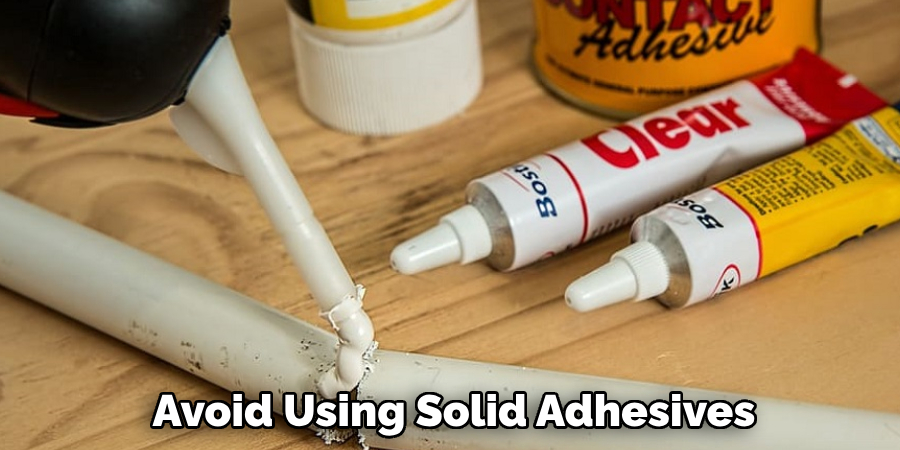
- Using Adhesive That Damages Surfaces: Avoid using solid adhesives or tapes that could damage the cabinet surfaces when removed. Instead, opt for removable adhesive strips that are gentle on finishes.
- Choosing the Wrong Ribbon Type: Refrain from using too stiff or bulky ribbons, as they may not drape well on cabinets. Choose a flexible, narrower ribbon that complements your kitchen’s decor.
- Ignoring Measurements: Before cutting the ribbon, don’t neglect taking accurate measurements of your cabinets. Incorrect measurements can lead to uneven or insufficient coverage, affecting the overall aesthetic.
- Neglecting to Clean the Surface: Ensure the cabinet surfaces are clean and dry before applying the ribbon. Dust and grease can prevent adhesives from sticking properly, causing the ribbon to fall off.
- Overcrowding the Space: Avoid overdecorating by using too many ribbons or embellishments on your cabinets, as this can make the space look cluttered. Opt for a simple design that enhances rather than overwhelms the existing kitchen style.
Conclusion
To successfully put ribbon on kitchen cabinets, it is essential to plan the process carefully and choose materials that complement your existing decor.
Using the right type of adhesive and ribbon, along with precise measurements, can achieve a polished and elegant look. Clean the surfaces thoroughly to ensure the adhesives hold well, and avoid overcrowding the space with excessive embellishments.
Hopefully, the article on how to put ribbon on kitchen cabinets, you now have the knowledge and confidence to transform your kitchen cabinets into unique and eye-catching features in your home. So go ahead, grab some ribbon, and start changing those plain cabinet doors! Happy decorating!
Professional Focus
Angela Ervin, a former interior designer turned blogger, specializes in kitchen design and renovations. Through her website, she blends her passion for cooking with design expertise, sharing practical and creative ideas. Known for balancing functionality and beauty, Angela’s insightful content has made her a trusted voice in home design and lifestyle.
About the Author
Angela Ervin, an experienced interior designer and blogger, combines her passion for kitchen renovations with storytelling. Living in Petersburg with her family, she enjoys cooking and testing her projects firsthand. Known for her humor and relatable style, Angela shares creative, functional design insights through her content, making her a trusted voice in home design.
Education History
University: Virginia Commonwealth University
Degree: Bachelor of Fine Arts (BFA) in Interior Design
- Angela’s education at VCU focused on mastering core interior design principles, including spatial planning, color theory, materials selection, and sustainable design practices.
- She gained hands-on experience through studio projects and collaborative design exercises, which honed her ability to create functional and aesthetically pleasing environments.
- Her coursework also emphasized problem-solving and practical applications of design, preparing her for real-world projects like her self-directed kitchen renovations.
- The program’s strong foundation in both technical skills and creative expression shaped Angela’s ability to seamlessly integrate form and function in her work.