


Shelving is a great way to add both functionality and style to a room. Traditional shelf installation often involves using visible brackets, but there are several ways to put up shelves without using brackets for a more minimalist, floating look.
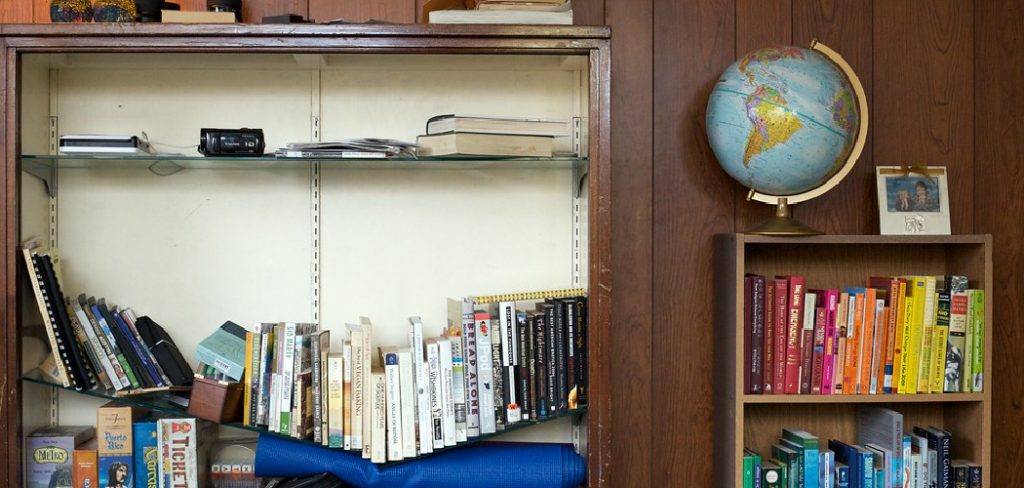
This guide will take you through different bracket-free options for installing shelves, including floating shelves, hidden mounting hardware, and other creative methods. By exploring “how to put shelves up without brackets,” you can achieve a sleek and modern aesthetic while eliminating cumbersome supports that detract from your design.
Whether you wish to showcase books, décor, or other items, these bracket-free solutions will highlight your displays, making the shelves blend seamlessly with the wall. By following these methods, you can maintain both the visual appeal and structural integrity of your shelves, ensuring they remain a stylish and practical addition to your space for years to come.
Choosing the Right Shelf Type
When opting for bracket-free shelving, selecting the appropriate shelf type is crucial for both aesthetic and functional purposes. Here are some popular options to consider:
Floating Shelves
Floating shelves are a favored choice for those seeking a clean, minimalist look. These shelves utilize concealed support systems or hidden brackets, making them appear as if they are gracefully “floating” against the wall. The hidden hardware often includes metal rods that extend into the wall, providing adequate support for moderate to heavy loads.
Recessed Shelves
Recessed shelves are built directly into the wall, sitting comfortably between studs. This approach not only saves space but also creates a sleek, built-in appearance without the use of any brackets. Recessed shelves are perfect for display items and offer a seamless integration with the surrounding wall surface.

Peg Shelves
Peg shelves make use of dowels or pegs inserted directly into the wall. Pre-drilled holes accommodate these pegs, allowing the shelf to rest securely on top. This method provides a sturdy yet visually unobtrusive solution for lightweight items.
Rail Systems
Shelves mounted on hidden rail systems offer another ingenious approach. The rail is fastened to the wall, and the shelf itself is simply slotted onto the rail, obscuring the mounting hardware for a streamlined look.
Considerations
When choosing a bracket-free shelving option, it’s important to consider the weight capacity and wall material. The shelf material and support system must be capable of handling the intended weight distribution, especially if the items are heavy.
For example, floating shelves with steel rods may be necessary for robust support. Additionally, while shelves installed directly into studs will provide the best support, those on drywall will require anchors to ensure stability and to prevent damage to the wall.
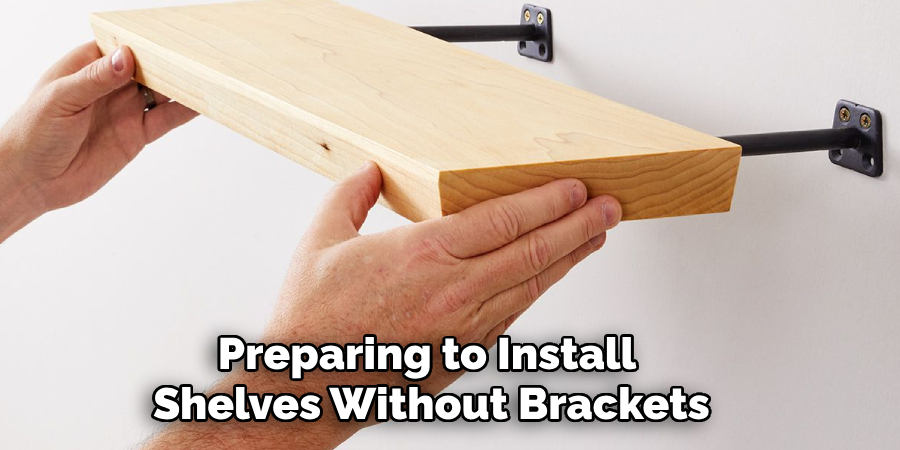
Materials and Tools You Will Need
When preparing to install shelves without brackets, the right materials and tools are essential to ensure the process is seamless and the end result is both sturdy and aesthetically pleasing.
Materials:
- Shelves: Select from wood, MDF, or another sturdy material suited to your design preference.
- Floating shelf mounting hardware: These can be purchased in stores or online, providing the hidden support necessary for the floating effect.
- Heavy-duty wall anchors: Essential if the studs cannot be located, ensuring secure attachment to drywall.
- Wood glue: Provides additional support for joints or layered shelves.
- Screws: Choose screws that are appropriate for your specific wall material and the weight capacity of your shelf type.
Tools:
- Stud finder: Helps you locate studs for optimal weight support and shelf stability.
- Level: Ensures that your shelves are installed straight and even.
- Drill and drill bits: Vital for making precise holes for mounting hardware or wall anchors.
- Measuring tape: Used to measure and plan the exact positioning of your shelves.
- Screwdriver: Needed to secure screws and hardware into place.
- Pencil: This marks the placement of holes and ensures accuracy.
Optional:
- Dowels or pegs: For peg-style shelf installations.
- Rail system: If opting for rail-mounted shelves.
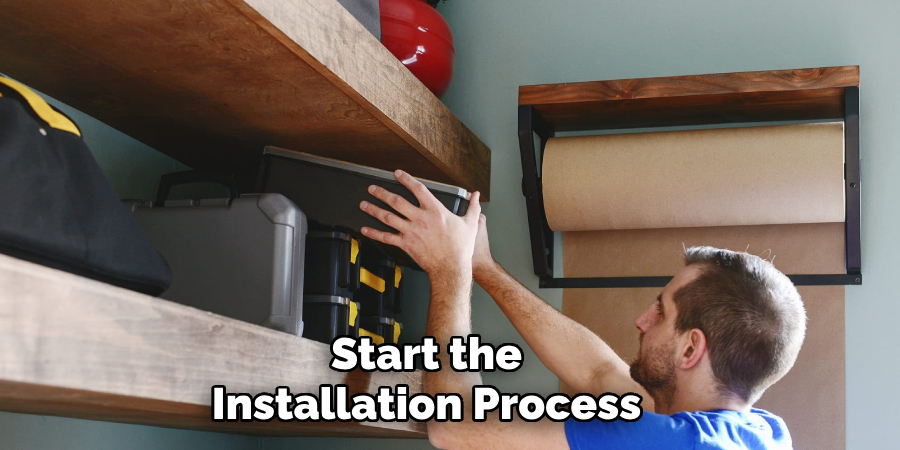
Preparation:
Before you start the installation process, gather all your materials and tools. Use the measuring tape to determine where the shelf will be placed and mark the location of the studs or the spot for wall anchors. This preparation ensures a smooth installation process and a professional finish.
How to Put Shelves Up Without Brackets: Installing Floating Shelves
Step 1: Locate Wall Studs
Use a stud finder to locate the studs in the wall where you want to install the shelves. Floating shelves are most secure when mounted into studs, as this ensures they can hold heavier items without pulling away from the wall.
Mark the position of each stud with a pencil to guide where to drill later on. Accurate stud location is crucial for the robust support of the shelf, minimizing the risk of sagging or falling.
Step 2: Mark and Drill Holes
Measure the height and width of the shelf to ensure even placement on the wall. Use a level to mark the shelf’s position to avoid ending up with a crooked shelf. Depending on your floating shelf kit, mark the spots where the hardware will attach to the wall.
Drill pilot holes into the studs using a drill equipped with an appropriate drill bit. If the shelf cannot be aligned with a stud, use heavy-duty wall anchors to provide the necessary support on drywall. Pilot holes help guide screws and prevent the wood from splitting during installation.
Step 3: Install the Hidden Brackets or Supports
Once the pilot holes or wall anchors are ready, attach the concealed brackets or rods to the wall using screws and a drill. Ensure they are level and securely fastened to avoid shifting under the shelf’s weight. The hidden brackets serve as the backbone of the floating shelf, providing the necessary strength to support items while staying out of view for an uncluttered aesthetic.
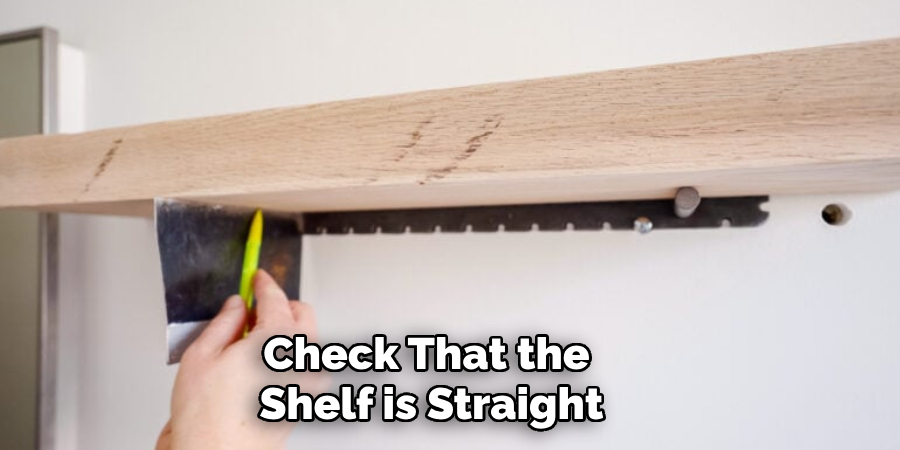
Step 4: Attach the Shelf to the Supports
Slide the shelf onto the concealed brackets or supports. Some floating shelves come with pre-drilled holes that cleanly slot onto the supports, ensuring a snug fit. In other cases, you may need to screw the shelf into place using the provided hardware. Use a level once more to check that the shelf is straight, making any needed adjustments. A properly mounted shelf should sit flush against the wall without wobbling.
Step 5: Add Wood Glue (Optional)
For added stability, you can apply a small amount of wood glue between the shelf and the supports. This additional step can be particularly beneficial for households with young children or in high-traffic areas, as it helps secure the shelf and prevent it from shifting over time. Allow the glue to dry completely before placing items on the shelf to ensure optimal adhesion.
By following these detailed steps, you can successfully install floating shelves without brackets, resulting in a sleek and modern display that maximizes style and functionality.
How to Put Shelves Up Without Brackets: Installing Recessed Shelves
Recessed shelves are an excellent choice for homeowners looking to add storage without sacrificing floor space. These sleek installations allow you to create built-in storage solutions that blend seamlessly with your wall for an elegant and modern aesthetic. Here are detailed steps to guide you through the process.
Step 1: Determine the Location
Decide on the ideal spot for your recessed shelf. Choosing a location between wall studs is crucial, as the shelf is installed within the wall cavity itself. Use a stud finder to accurately identify the position of the studs. This initial step is vital for ensuring you have ample space to work with and that the existing structure properly supports the recessed shelf.
Step 2: Measure and Cut the Wall
Begin by measuring the width between the studs where you plan to install the shelf. Mark the area you intend to cut precisely. Use a utility knife, or drywall saw to carefully cut a hole in the drywall, creating an opening that will house your shelf. Take care to avoid damaging wiring or plumbing that may be concealed within the wall cavity.
Step 3: Build a Simple Frame
Construct a simple frame using durable materials like 2x4s to fit snugly within the wall cavity. This frame acts as the support structure for your recessed shelf. Ensure each cut is precise and the assembled frame is level and square, allowing it to steadily hold the shelf once installed.
Step 4: Insert the Frame and Secure It
With your frame complete, carefully slide it into the wall cavity. Use screws to attach it securely to the wall studs on either side. A tightly secured frame is essential for maintaining the structural integrity and load-bearing capacity of the shelf. Confirm that the frame is level before proceeding to the next step.
Step 5: Install the Shelf
Cut your shelf material to precisely fit the dimensions of the installed frame. You can use wood, MDF, or another suitable material based on your design preference. Once cut, insert the shelf into the frame, ensuring a snug fit. Secure the shelf with screws or wood glue, depending on the weight and intended use of the shelf.
Step 6: Finish the Edges
For a polished appearance, complete your project by adding trim or molding around the edges where the shelf meets the wall. This finishing touch conceals any raw edges and seamlessly integrates with the wall.
Sand down any rough surfaces and apply paint or finish that complements your decor, delivering a professional look that enhances the overall aesthetic of your space.
By following these comprehensive steps, you can achieve a functional and stylish addition to your home, maximizing both space and style with recessed shelving.
Installing Peg Shelves
Peg shelves provide a minimalist yet functional storage solution that can be customized to fit any space. Here’s how you can install peg shelves effectively in your home.
Step 1: Measure and Mark the Peg Locations
Start by measuring the height and width of your shelf to determine the exact spots where the pegs or dowels will be placed. Ensuring that the pegs are spaced evenly is crucial for the shelf’s stability and balance. Use a pencil to mark these locations clearly.
Step 2: Drill Holes for the Pegs
Select a drill bit that matches the diameter of your pegs or dowels. Carefully drill holes at the marked locations on the wall or the back of the shelf. Make sure each hole is drilled straight to ensure a perfect fit for the pegs.
Step 3: Insert the Pegs
Take your chosen pegs, which can be wooden dowels or metal rods, and insert them into the drilled holes. For added security, apply a small amount of wood glue to the ends of the pegs before insertion. This will help keep them in place over time, preventing any unwanted movement or instability.
Step 4: Place the Shelf on the Pegs
Once all the pegs are securely in place, gently lay the shelf on top of them. Double-check that the shelf sits level and feels sturdy before you start placing any items on it. Your new peg shelf should offer both functional storage and an aesthetically pleasing addition to your room.

Conclusion
Installing shelves without visible brackets is a great way to achieve a clean, modern look in any room. Whether you choose floating, recessed, or peg, these methods can be tailored to fit your space and design preferences.
By carefully following the steps for your chosen method, you can create sturdy, stylish shelving without the need for traditional brackets. This guide on how to put shelves up without brackets provides you with the knowledge and confidence to take on this rewarding DIY project.
With a little planning and the right tools, you can enhance your home’s storage and decor with beautiful, bracket-free, functional, and aesthetically pleasing shelves. This innovative approach to shelving optimizes space and elevates your interiors’ visual appeal, leaving you with a tidy and streamlined look.
Professional Focus
Angela Ervin, a former interior designer turned blogger, specializes in kitchen design and renovations. Through her website, she blends her passion for cooking with design expertise, sharing practical and creative ideas. Known for balancing functionality and beauty, Angela’s insightful content has made her a trusted voice in home design and lifestyle.
About the Author
Angela Ervin, an experienced interior designer and blogger, combines her passion for kitchen renovations with storytelling. Living in Petersburg with her family, she enjoys cooking and testing her projects firsthand. Known for her humor and relatable style, Angela shares creative, functional design insights through her content, making her a trusted voice in home design.
Education History
University: Virginia Commonwealth University
Degree: Bachelor of Fine Arts (BFA) in Interior Design
- Angela’s education at VCU focused on mastering core interior design principles, including spatial planning, color theory, materials selection, and sustainable design practices.
- She gained hands-on experience through studio projects and collaborative design exercises, which honed her ability to create functional and aesthetically pleasing environments.
- Her coursework also emphasized problem-solving and practical applications of design, preparing her for real-world projects like her self-directed kitchen renovations.
- The program’s strong foundation in both technical skills and creative expression shaped Angela’s ability to seamlessly integrate form and function in her work.