


Removing a kitchen cabinet door can be a straightforward task, perfect for anyone looking to update their kitchen’s appearance or make necessary repairs. Whether replacing old doors with new ones or simply removing them for cleaning or painting, knowing the correct method is essential to avoid damage and ensure a smooth process. This guide will walk you through how to remove a kitchen cabinet door, equipping you with the knowledge to tackle this DIY project with confidence.
Reasons for Removing Cabinet Doors
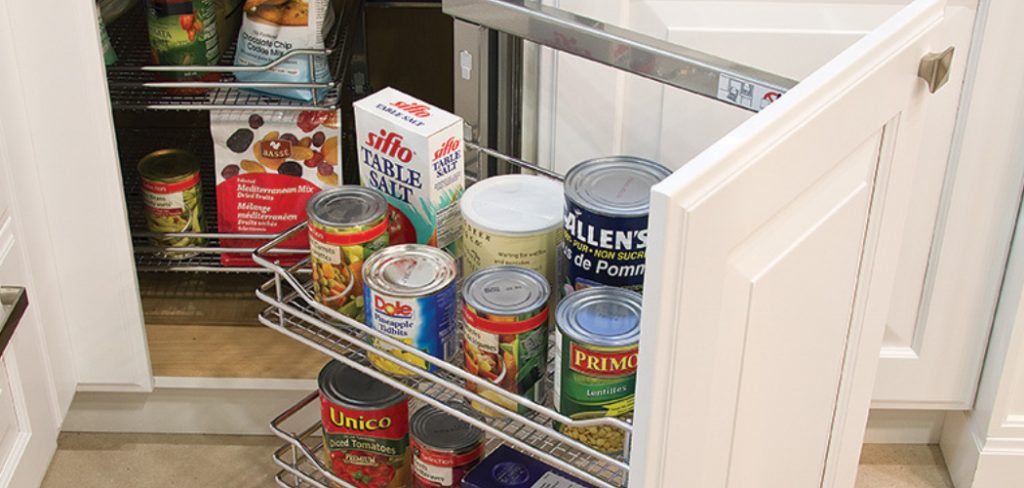
There are several reasons why you might want to remove kitchen cabinet doors. One common reason is for cleaning or maintenance purposes; without the doors, you can easily access all the corners and edges of the cabinet for thorough cleaning. Another reason could be to update the look of your kitchen; by removing cabinet doors, you can achieve an open shelving concept that gives your kitchen a modern and airy feeling. Additionally, if doors are damaged or outdated, removing and replacing them can enhance both the functionality and aesthetics of your kitchen space. Finally, during kitchen renovations, removing cabinet doors may be necessary to fit new appliances or reconfigure the kitchen layout.
Tools and Materials Needed
Before starting the process of removing your kitchen cabinet doors, it’s important to gather all the necessary tools and materials to ensure a smooth and efficient task. Here’s a list of what you will need:
- Screwdriver: Depending on the type of hinges, you will require either a Phillips or flat-head screwdriver. It’s crucial to have the right one to avoid stripping screws.
- Drill with a Screwdriver Bit (optional): For quicker removal, a drill with a compatible bit can be more efficient than a manual screwdriver.
- Step Ladder or Sturdy Chair: To safely reach upper cabinets, a step ladder or a sturdy chair will provide the necessary height.
- Soft Cloth or Towel: To protect countertops or floors, place a soft cloth or towel underneath the work area.
- Permanent Marker or Tape: Use these for labeling each door and its corresponding hardware to ease the reinstallation process.
- Storage Container: A small box or bag will keep screws and hardware organized once removed.
- Protective Gloves: To prevent slippage and protect your hands during the process.
Having these tools and materials ready will prepare you for a seamless and organized cabinet door removal experience.
10 Methods How to Remove a Kitchen Cabinet Door
1. Gather the Necessary Tools
Before embarking on the task of removing a kitchen cabinet door, it’s essential to gather all the necessary tools and materials. A standard toolkit will usually suffice, including a screwdriver (either Phillips or flathead, depending on your cabinet hinges), a drill with a drill bit for any screws, a level, and a soft cloth for cleaning. Additionally, having a pencil and measuring tape on hand can be helpful for marking alignment and for any future adjustments. Preparing all these items beforehand ensures that you can complete the job efficiently and without interruption.
2. Clear the Area
Before you start, clear the area around the cabinet and remove any items stored in or on the cabinets. This will not only provide you with ample workspace but also prevent any accidents or damage to your dishes, utensils, or decorative items. If necessary, lay down a drop cloth or old towel on the countertop or floor beneath the cabinet to catch any falling debris or screws. Having a clean and organized work area will make the removal process smoother and reduce the risk of losing any hardware.
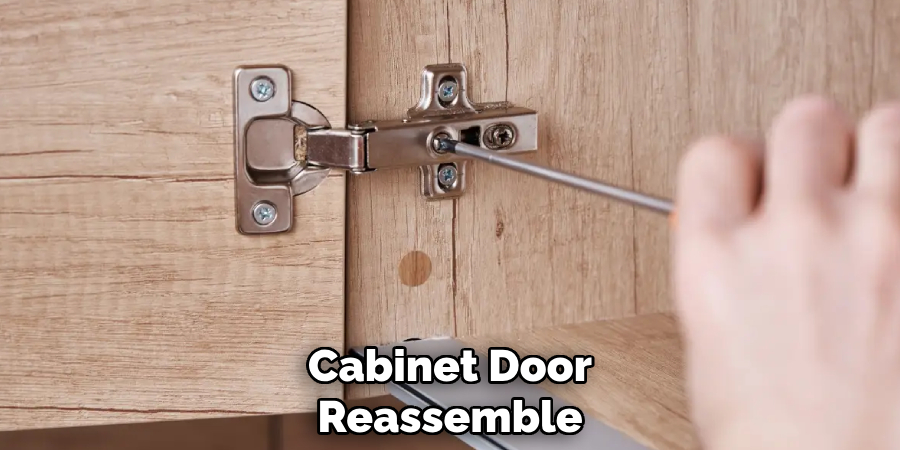
3. Inspect the Hinges
Once you are ready to remove the cabinet door, inspect the hinges to determine how they are attached. Most kitchen cabinet doors use either concealed hinges or traditional exposed hinges. Identifying the type of hinges will dictate how you approach the removal process. For concealed hinges, you may need to remove a cover plate, while exposed hinges will generally just require unscrewing the screws. Familiarizing yourself with the hinge type will help you understand what tools or techniques are necessary for a successful removal.
4. Support the Door
Before you begin unscrewing the hinges, it’s important to support the cabinet door to prevent it from falling. Use your knee or another hand to hold the door steady while you work on the hinges. If the door is particularly heavy or large, consider using a doorstop or a small piece of wood underneath to support it while you remove the screws. This extra support will prevent any accidental dropping that could damage the door or the cabinet frame and ensures your safety during the process.
5. Remove the Screws from the Hinges
Using the appropriate screwdriver, carefully unscrew the screws holding the cabinet door to the hinges. Start with the screws that are connected to the cabinet frame, then move on to the screws on the door itself. It’s a good idea to keep a small container nearby to store the screws, preventing them from getting lost during the process. If the screws are stubborn, consider applying a little penetrating oil and letting it sit for a few minutes to loosen them up. Take care not to strip the screws, as this could make removal more complicated.
6. Detach the Door from the Hinges
Once all the screws are removed, gently pull the door away from the cabinet. If you’re working with concealed hinges, you may need to slide the door upward or downward slightly to release it from the hinge mounts. For traditional hinges, the door should simply lift away from the frame. Be cautious as you do this, ensuring that the door does not swing suddenly or unexpectedly. If the door feels stuck, double-check that all screws have been completely removed before applying gentle pressure to detach it.
7. Inspect for Damage or Wear
After successfully removing the door, take a moment to inspect both the door and the hinge hardware for any signs of damage, wear, or corrosion. This is particularly important if you plan to reinstall the door or replace it. Check the hinges for any rust or excessive wear that may require replacement. Similarly, look for any damage to the door itself, such as cracks or chips, that may need repair. Documenting any issues will help you make informed decisions on whether to repair or replace components.
8. Clean the Hinge Areas
With the door removed, it’s an opportune time to clean the hinge areas on both the cabinet frame and the door itself. Use a damp cloth or sponge to wipe away any dust, grease, or grime that may have accumulated around the hinges. For tough stains, a mixture of warm water and mild detergent can work wonders. Make sure to dry the surfaces thoroughly to prevent moisture from causing damage to the wood or finish. Cleaning these areas not only prepares them for reinstallation but also enhances the overall appearance of your cabinets.
9. Label the Hardware
If you plan to remove multiple cabinet doors, consider labeling the hardware to make reinstallation easier later on. Use a small piece of tape or a labeled baggie to store each set of screws and hinges together with the corresponding door. This practice ensures that you won’t mix up screws or hinges when it comes time to reassemble everything, saving you time and effort. Keeping the hardware organized also minimizes the chances of losing essential components during the project.
10. Reinstallation Considerations
After the door is removed, you may be considering whether to replace, refinish, or simply clean the door. When reinstallation time comes, take care to align the hinges properly with the door and cabinet frame. Use a level to ensure the door hangs straight before tightening the screws. If you’re planning to repaint or refinish the cabinet doors, do this before reinstallation, allowing adequate drying time. Taking these steps during reinstallation will not only ensure a smooth and professional look but also prolong the life of your cabinets.
Things to Consider When Removing Cabinet Doors
When embarking on the task of removing cabinet doors, it’s imperative to consider several factors that can influence the success and safety of the project. First, assess the weight and size of the cabinet doors, as heavier doors may require additional support or a second pair of hands during removal. Second, consider the tools needed for the task—ensure you have the correct type and size of screwdriver or drill bit to avoid any delays. Third, evaluate the current condition of the cabinetry and hardware, as older doors or hinges might present unforeseen challenges such as stripped screws or weakened materials.
Conclusion
Removing kitchen cabinet doors involves a detailed process but is manageable with adequate preparation and the right tools. By following each step carefully, you ensure a safe and efficient removal while preserving the integrity of your cabinets. From clearing the workspace to inspecting the hardware, each stage plays a crucial role in the overall project outcome. Thanks for reading, and we hope this has given you some inspiration on how to remove a kitchen cabinet door!
Professional Focus
Angela Ervin, a former interior designer turned blogger, specializes in kitchen design and renovations. Through her website, she blends her passion for cooking with design expertise, sharing practical and creative ideas. Known for balancing functionality and beauty, Angela’s insightful content has made her a trusted voice in home design and lifestyle.
About the Author
Angela Ervin, an experienced interior designer and blogger, combines her passion for kitchen renovations with storytelling. Living in Petersburg with her family, she enjoys cooking and testing her projects firsthand. Known for her humor and relatable style, Angela shares creative, functional design insights through her content, making her a trusted voice in home design.
Education History
University: Virginia Commonwealth University
Degree: Bachelor of Fine Arts (BFA) in Interior Design
- Angela’s education at VCU focused on mastering core interior design principles, including spatial planning, color theory, materials selection, and sustainable design practices.
- She gained hands-on experience through studio projects and collaborative design exercises, which honed her ability to create functional and aesthetically pleasing environments.
- Her coursework also emphasized problem-solving and practical applications of design, preparing her for real-world projects like her self-directed kitchen renovations.
- The program’s strong foundation in both technical skills and creative expression shaped Angela’s ability to seamlessly integrate form and function in her work.