


Milk kefir grains are a valuable ingredient for creating a probiotic-rich, tangy, and nutritious fermented beverage. Properly storing these grains is essential to maintaining their vitality and ensuring they remain healthy for future use.
Whether you need to take a short break from brewing or plan to store your grains long-term, it’s important to understand the best practices to keep them active and effective. This guide on how to store milk kefir grains will explain how to preserve your milk kefir grains in optimal condition.
Benefits of Milk Kefir
Before diving into the specifics of storing milk kefir grains, it’s important to understand their benefits. Milk kefir grains are a symbiotic culture of bacteria and yeast (SCOBY) that ferment milk into a delicious and nutritious drink. This dairy-based probiotic is packed with beneficial bacteria, yeasts, and enzymes that can help improve digestion, boost the immune system, and promote overall gut health.
In addition to being rich in probiotics, milk kefir is also a good source of calcium, magnesium, vitamin B12, and other important nutrients. It’s a great alternative for those who are lactose intolerant as the fermentation process breaks down lactose into more easily digestible forms.
Needed Materials
To store milk kefir grains, you will need the following materials:
- Glass Jar or Container With a Tight-fitting Lid
- Milk Kefir Grains
- Fresh Milk (Preferably Whole Milk)
- Plastic Wrap or Cheesecloth (if Using a Jar Without a Lid)
8 Step-by-step Guidelines on How to Store Milk Kefir Grains
Step 1: Strain Your Kefir Grains
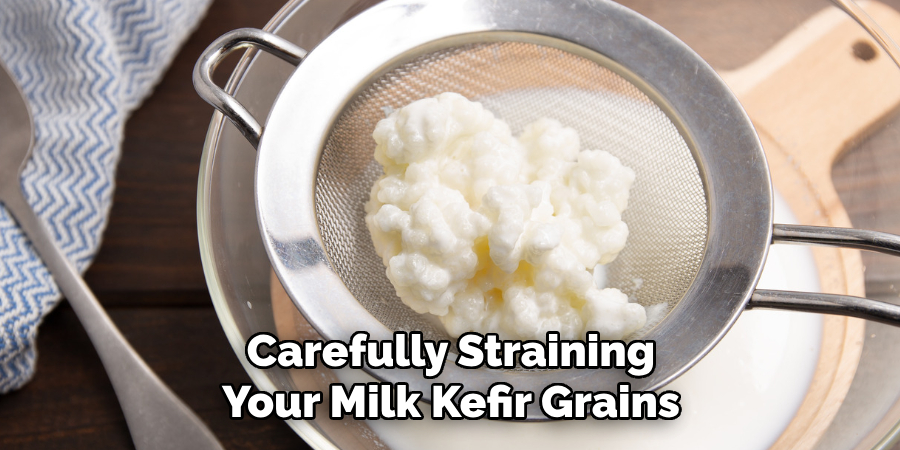
Begin by carefully straining your milk kefir grains from the finished kefir using a fine, non-metallic strainer. Use a plastic or nylon strainer and avoid metal as it can react with the grains. Gently stir the kefir with a non-metallic spoon to help separate the grains from the liquid. Once strained, your grains are ready for storage, whether short-term or long-term.
You can also rinse the grains with filtered water before storing them to remove any excess milk residue. However, this is not necessary as it can wash away some of the beneficial bacteria on the grains.
Step 2: Transfer Grains to a Clean Jar or Container
Using a clean glass jar or container, transfer your kefir grains into it. Make sure the container has enough space for both the grains and additional milk needed for storage. Avoid using metal containers as they can react with the acid in the kefir and affect its taste.
It’s important to keep your storage container clean and free from any soap residue, as this can also affect the taste of your kefir.
Step 3: Add Fresh Milk
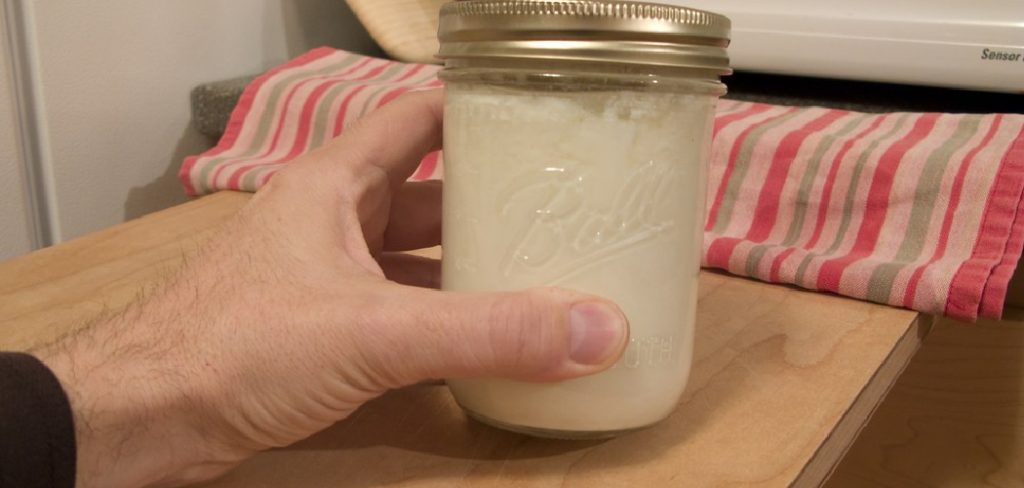
Pour fresh milk over the grains in the jar or container. Use whole milk for best results as it provides more nutrients and a thicker consistency to the kefir. The ratio of kefir grains to milk should be approximately 1:10, meaning for every tablespoon of grains, you will need one cup of milk.
It’s essential to add enough milk to cover all the grains completely. If there isn’t enough liquid, your grains may dry out and die.
Step 4: Cover Jar or Container With a Tight-fitting Lid

If using a jar or container with a lid, simply close it tightly and store it in the refrigerator. Make sure the lid is airtight to prevent any contamination from other bacteria.
If you’re using a jar without a lid, cover the top with plastic wrap or cheesecloth and secure it with a rubber band.
Step 5: Store in the Refrigerator
Place the jar or container with the kefir grains and milk in the refrigerator. The cold temperature will slow down the fermentation process, allowing the grains to remain dormant but still healthy. This storage method is ideal for short-term breaks, typically up to two weeks.
Be sure to check the grains occasionally and change the milk every 7-10 days to maintain freshness and keep the grains alive. You can also strain and make a fresh batch of kefir with the grains after 7-10 days.
Step 6: Long-term Storage
If you need to store your milk kefir grains for an extended period, you can use a different method. Instead of adding fresh milk, strain the grains and rinse them with filtered water. Then, place them in a clean jar or container and cover them completely with filtered water.
Store the jar or container in the refrigerator for up to two months. Change the water every 2-3 weeks to prevent any bacteria build-up and keep the grains healthy.
Step 7: Reviving Dormant Grains

When you’re ready to use your stored milk kefir grains again, start by taking them out of the refrigerator and straining them from their storage liquid. If the grains were stored in milk, strain and discard the milk. If they were stored in water, rinse them gently with filtered water to remove any residue.
Next, place the grains in a clean jar or container and add fresh milk, using the standard ratio of 1 tablespoon of grains to 1 cup of milk. Allow them to ferment at room temperature for 24 to 48 hours. During this time, the grains will reactivate and resume their fermentation process. The first batch of kefir after revival might not have the ideal taste or texture, so you can discard it and use the grains to start a fresh batch of kefir. With proper care, your grains will be fully active and ready to consistently produce kefir again.
Step 8: Share or Store the Extra Grains
Over time, your milk kefir grains will multiply and grow. This means you will have extra grains that can be shared with friends and family or stored for backup.
To store extra grains, repeat steps 1-3 in a separate jar or container. You can then freeze the excess grains in their milk before storing them in the freezer for up to six months. When ready to use, thaw the grains at room temperature and follow the revival process outlined in step 7.
Following these guidelines on how to store milk kefir grains, you can easily store your milk kefir grains and maintain their health and potency for continuous use. Enjoy the many benefits of homemade milk kefir with this simple storage method.
Additional Tips
Use Non-Metallic Tools

Always handle milk kefir grains with non-metallic utensils and containers to avoid any possible reaction with metal, which may harm the grains. Stick to tools made of plastic, wood, or glass.
Store in a Cool Place
If you’re unable to store your milk kefir grains in the refrigerator, make sure to keep them in a cool place away from direct sunlight and extreme temperatures. This will help slow down the fermentation process and keep the grains healthy.
Avoid Exposure to Chemicals
When storing or handling milk kefir grains, make sure they are not exposed to any chemicals or detergents as it can damage their delicate balance of bacteria. Use natural cleaning products when washing your storage containers and thoroughly rinse them before adding the grains.
Use High-Quality Fresh Milk
The quality of your kefir depends on the quality of fresh milk used for fermentation. Choose high-quality, organic milk for the best results and avoid using ultra-pasteurized or homogenized milk as they may alter the taste and texture of your kefir.
Rotate Your Grains
Rotate your grains between different storage containers to prevent mold growth and maintain their health. This will also help distribute any excess moisture evenly throughout the grains, preventing them from drying out.
Keep a Backup
It’s always good to have a backup batch of kefir grains in case something happens to your main batch, like contamination or spoilage. Keep a small portion of your active grains in storage as insurance.
Remember, properly storing your milk kefir grains is crucial for maintaining their health and potency. With these simple steps and additional tips, you can ensure your grains will consistently produce delicious homemade kefir for years to come. Happy fermenting!
Frequently Asked Questions
Q1: Can I Store Kefir Grains in the Freezer?
A1: Yes, you can store extra kefir grains in the freezer for up to six months. Follow step 8 for freezing instructions. However, it’s not recommended to freeze grains that are actively producing kefir as the cold temperature can damage them.
Q2: How Often Should I Change the Milk When Storing Kefir Grains?
A2: For short-term storage, change the milk every 7-10 days. For long-term storage, change the water every 2-3 weeks. This will keep your grains fresh and healthy.
Q3: Can I Use Other Types of Milk for Storage?
A3: Yes, you can use different types of milk, such as coconut milk or almond milk, to store kefir grains. However, keep in mind that this may affect the taste and consistency of the kefir. Stick to using whole milk for best results.
Q4: Can I Store Kefir Grains in Water Instead of Milk?
A4: Yes, you can store kefir grains in water if necessary. Follow step 6 for long-term storage instructions. Just remember to rinse the grains with filtered water before using them again to make kefir.
Conclusion
By following these simple guidelines on how to store milk kefir grains, you can easily store your milk kefir grains and keep them healthy for extended periods. Remember to use clean materials and avoid metal, and regularly change the milk or water for long-term storage. With proper care, your milk kefir grains will continue to provide you with delicious and nutritious homemade kefir.
Share the extra grains with others or keep them as a backup to ensure a continuous supply of this beneficial beverage. Happy fermenting!
Professional Focus
Angela Ervin, a former interior designer turned blogger, specializes in kitchen design and renovations. Through her website, she blends her passion for cooking with design expertise, sharing practical and creative ideas. Known for balancing functionality and beauty, Angela’s insightful content has made her a trusted voice in home design and lifestyle.
About the Author
Angela Ervin, an experienced interior designer and blogger, combines her passion for kitchen renovations with storytelling. Living in Petersburg with her family, she enjoys cooking and testing her projects firsthand. Known for her humor and relatable style, Angela shares creative, functional design insights through her content, making her a trusted voice in home design.
Education History
University: Virginia Commonwealth University
Degree: Bachelor of Fine Arts (BFA) in Interior Design
- Angela’s education at VCU focused on mastering core interior design principles, including spatial planning, color theory, materials selection, and sustainable design practices.
- She gained hands-on experience through studio projects and collaborative design exercises, which honed her ability to create functional and aesthetically pleasing environments.
- Her coursework also emphasized problem-solving and practical applications of design, preparing her for real-world projects like her self-directed kitchen renovations.
- The program’s strong foundation in both technical skills and creative expression shaped Angela’s ability to seamlessly integrate form and function in her work.