


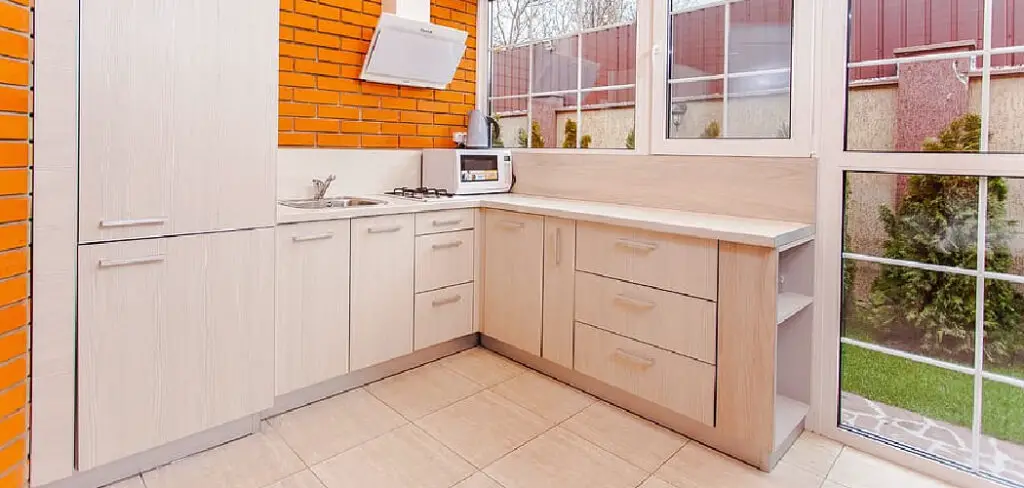
Achieving that fresh, newly painted look on your cabinets is a satisfying transformation for any living space. However, the process doesn’t end with the last stroke of the paintbrush.
Properly cleaning and maintaining newly painted cabinets is crucial to preserving their pristine appearance and ensuring their longevity. Dust, debris, and lingering paint fumes can mar the finish and detract from the overall aesthetic.
In this article, we’ll guide you through the essential steps and techniques for how to clean newly painted cabinets. From gentle cleaning solutions to suitable cleaning tools, we’ll provide insights to help you navigate this process, allowing you to enjoy the beauty of your revamped cabinets for years to come.
The Importance of Cleaning Newly Painted Cabinets
Cleaning newly painted cabinets is an important part of the painting process that should not be overlooked. Proper cleaning will ensure that your paint job is more durable and long-lasting, giving you a better return on your investment.
Cleaning after painting also helps to protect against dirt, dust, and other airborne particles that may collect over time and damage the finish on your cabinets.
Before you begin cleaning, make sure to remove any tarps or plastic sheets that were used to protect your cabinets during the painting process. It is also important to remove any caulk, glue, or other residue from the cabinet before you start cleaning. This will help ensure that the cleaner can reach into all of the crevices and corners for a thorough clean.
There are a few different types of cleaners that you can use to effectively clean newly painted cabinets. The most popular option is a mild soap and water solution, which will help remove dirt and dust without damaging the paint on your cabinet doors.
For tougher stains or grime buildup, you may want to try an oil-based cleaner like mineral spirits or denatured alcohol. Make sure to always test any product on an inconspicuous area first before using it on the entire cabinet so you can see how the cleaner will react with the paint.
The Importance of Allowing Paint to Fully Cure
Once you’ve completed the painting of your cabinets, it’s important to ensure that they’re given enough time to cure and dry properly. Depending on the type of paint you used, this could take anywhere from two days up to a week or more. It’s best to check the instructions on your particular paint can for an exact timeline.

During this curing period, you’ll want to avoid exposing the cabinets to any extreme temperatures or humidity. This could cause the paint to crack and chip prematurely.
Once your paint has had enough time to cure, you can move on to cleaning it properly. You’ll need to choose a cleaner that’s safe for use on painted surfaces and is suitable for your type of cabinet material. Be sure to check the instructions on any cleaner you use to make sure it won’t damage your cabinets.
It’s also important to avoid using abrasive cleaners or scrubbing pads, as this could cause damage to the paint finish. Instead, opt for soft cloths and gentle strokes when cleaning. This will help keep your cabinets looking like new for years to come!
10 Steps How to Clean Newly Painted Cabinets
1. Gather Necessary Supplies
Before you begin cleaning your newly painted cabinets, it is important to gather the necessary supplies. You will need a soft cloth, mild detergent, warm water, and a vacuum cleaner with an upholstery attachment. If you have any special cleaning products for wood or painted surfaces, these can also be used.
2. Vacuum the Cabinets
The first step in cleaning your newly painted cabinets is to vacuum them using the upholstery attachment on your vacuum cleaner. This will remove any dust or debris that may have accumulated on the surface of the cabinets. Make sure to focus on areas around handles and knobs as these are prone to accumulating dust and dirt.
3. Wipe Down with Detergent
Once you have finished vacuuming the cabinets, it is time to wipe them down with a mild detergent and warm water. Use a soft cloth to gently scrub away any dirt or grime that may have built up over time. Make sure to rinse off any excess soap residue before moving on to the next step.

4. Dry with Soft Cloth
After wiping down your cabinets with detergent and water, it is important to dry them thoroughly with a soft cloth. This will help prevent any streaks from forming after you finish cleaning them. It is also important to make sure that all of the surfaces are completely dry before moving on to the next step in this process.
5. Clean Hardware
The next step in cleaning your newly painted cabinets is to clean all of the hardware such as knobs and handles using warm soapy water and a soft cloth or brush if needed.
Make sure to pay close attention when scrubbing around hinges as these can be difficult areas for dirt and grime buildup over time. Rinse off all of the hardware before drying thoroughly with a soft cloth or paper towel afterward.
6. Polish Wood Surfaces
If your newly painted cabinets contain wooden surfaces such as shelves or drawers, then it is important to polish them using furniture polish or beeswax-based products specifically designed for wood surfaces, if available in order to keep them looking shiny and new for longer periods of time between cleanings.
Once you have applied the furniture polish, use a soft cloth or paper towel to buff out any excess product before moving on to the next step in this process.
7. Clean Glass Surfaces
If your newly painted cabinets contain glass surfaces such as doors or windows, then it is important to clean these using glass cleaner specifically designed for this purpose if available.
Spray a small amount of glass cleaner onto a lint-free microfiber cloth before wiping down each surface in circular motions until they are completely free from smudges and fingerprints., Afterwards, rinse off any excess cleaner before drying thoroughly with another lint-free microfiber cloth.
8. Remove Stains & Grease Buildup
If you find that there are stubborn stains on some of your cabinet’s surfaces that won’t come off easily then it may be necessary for you to use an all-purpose cleaner containing degreaser such as 409 All Purpose Cleaner & Degreaser.
Apply a small amount of this product directly onto each stain before scrubbing gently using an old toothbrush. Afterward, rinse off any excess product before drying thoroughly with another lint-free microfiber cloth.

9. Repair Any Damage
Once you have finished cleaning your newly painted cabinets it is important to inspect each surface closely for any damage such as scratches, chips, dents, etc.
If you find that there are damaged areas, then it may be necessary for you to repair these by sanding lightly using fine grit sandpaper followed by touch-ups using paint pens specifically designed for woodwork if available.
Once finished apply several coats of clear sealant over the top of each touch-up area in order to protect against further damage while still maintaining its original color.
10. Reassemble Cabinets
Finally, once all repairs have been completed. Reassemble each cabinet back into its original position making sure that all screws are tightened properly so no pieces become loose over time due to regular use. After completing this final step. Enjoy admiring how beautiful freshly cleaned newly painted cabinets look!
Things to Keep in Mind When Cleaning Newly Painted Cabinets
- Be gentle when cleaning newly painted cabinets. Abrasive cleaners and scrubbing can damage the finish, leaving it looking dull and scratched.
- Be sure to use only a mild cleaner – or if possible, just warm water with a few drops of dish soap. Avoid using too much liquid as this could cause paint to bubble up or peel off over time.
- Use a soft cloth or sponge when wiping the cabinets down. Even if they are painted with a glossy finish, it’s still possible to damage the surface if too much pressure is applied.
- Make sure to dry the cabinets off completely after cleaning them. Excess water left on the cabinets can cause paint and finishes to chip or peel.
- Avoid using strong or abrasive cleaners, which can also damage the cabinet’s finish and cause it to dull over time.
- Clean the cabinets in a well-ventilated area to avoid breathing in any harsh fumes from cleaning products.

Conclusion
In conclusion, newly painted cabinets can be a great way to freshen up your kitchen or bathroom. They can give you years of enjoyment if you take care of them properly.
Cleaning regularly will keep away dirt and dust buildup and help prevent staining or discoloration in the future. It’s important to use the right cleaning products when dealing with newly painted surfaces, as they need extra care and attention to stay looking their best for longer.
To sum all of this up, regular cleaning is key when it comes to how to clean newly painted cabinets. Invest in good quality supplies, use some elbow grease and your cabinets will look beautiful in no time!
Plus, with consistent upkeep over the years, you’ll be able to keep that newfound sheen for longer periods than ever before. So don’t hesitate: Get out there and get cleaning today!
Professional Focus
Angela Ervin, a former interior designer turned blogger, specializes in kitchen design and renovations. Through her website, she blends her passion for cooking with design expertise, sharing practical and creative ideas. Known for balancing functionality and beauty, Angela’s insightful content has made her a trusted voice in home design and lifestyle.
About the Author
Angela Ervin, an experienced interior designer and blogger, combines her passion for kitchen renovations with storytelling. Living in Petersburg with her family, she enjoys cooking and testing her projects firsthand. Known for her humor and relatable style, Angela shares creative, functional design insights through her content, making her a trusted voice in home design.
Education History
University: Virginia Commonwealth University
Degree: Bachelor of Fine Arts (BFA) in Interior Design
- Angela’s education at VCU focused on mastering core interior design principles, including spatial planning, color theory, materials selection, and sustainable design practices.
- She gained hands-on experience through studio projects and collaborative design exercises, which honed her ability to create functional and aesthetically pleasing environments.
- Her coursework also emphasized problem-solving and practical applications of design, preparing her for real-world projects like her self-directed kitchen renovations.
- The program’s strong foundation in both technical skills and creative expression shaped Angela’s ability to seamlessly integrate form and function in her work.