

Refinishing oak cabinets can breathe new life into a kitchen or any space, transforming outdated and worn surfaces into fresh, stylish focal points. Oak cabinets, while durable and classic, often suffer from a dated appearance over time.
Fortunately, with the right tools, techniques, and a bit of patience, redoing oak cabinets is a rewarding DIY project that can yield professional-looking results.
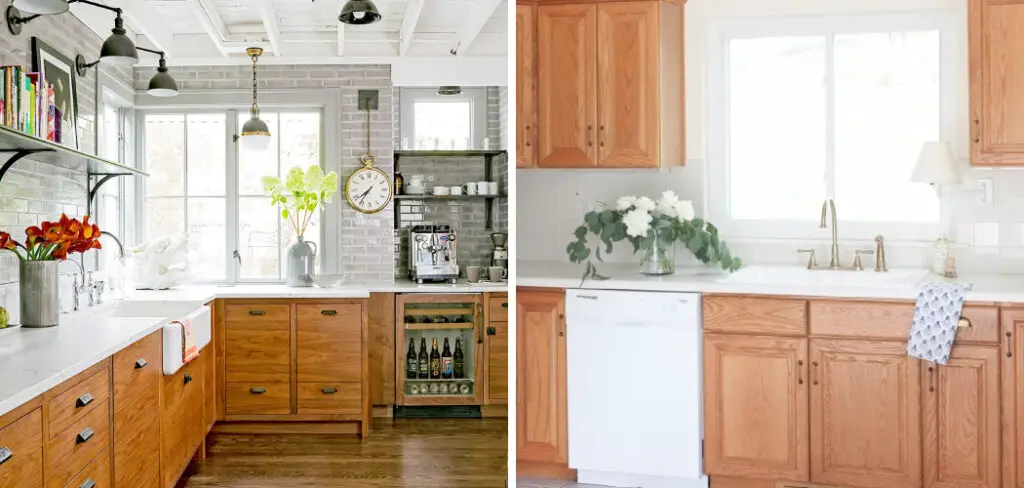
Whether aiming for a rustic, modern, or traditional aesthetic, the process involves several key steps: preparation, including thorough cleaning and sanding to ensure a smooth surface for the new finish; choosing the right stain or paint to achieve the desired look; applying multiple coats evenly for depth and durability; and finally, sealing the cabinets to protect the new finish.
With attention to detail and careful execution, homeowners can revitalize their oak cabinets, adding value and aesthetic appeal to their living spaces. In this guide, we’ll delve into each step for how to redo oak cabinets, offering tips and tricks for a successful cabinet redo.
Importance of Updating Oak Cabinets
Updating oak cabinets is more than a superficial enhancement; it’s a strategic home improvement that offers numerous benefits. Firstly, it significantly boosts the aesthetic appeal of a room, making it more inviting and contemporary.
This upgrade can transform the whole ambiance of a space, turning once dull areas into vibrant living environments. Secondly, refurbishing oak cabinets is a cost-effective alternative to a complete kitchen remodel, offering homeowners an affordable way to rejuvenate their space without the hefty price tag of new cabinetry.
Additionally, updating these fixtures can increase the overall value of a home. Potential buyers often see updated kitchens as a major selling point, meaning that the investment in refinishing cabinets can lead to a higher return when it’s time to sell.
Lastly, this process allows for customization to fit the homeowner’s unique style and functional needs, making the space more enjoyable and suited to personal tastes.
Benefits of Redoing Oak Cabinets
Redoing oak cabinets carries significant advantages beyond merely updating the appearance of a home. One of the primary benefits includes enhanced durability and longevity of the cabinets themselves.
With proper refinishing, the lifespan of oak cabinets can be substantially extended, preventing the need for costly replacements and thereby offering long-term savings. Additionally, this process provides homeowners the flexibility to customize their space according to their evolving tastes and trends.
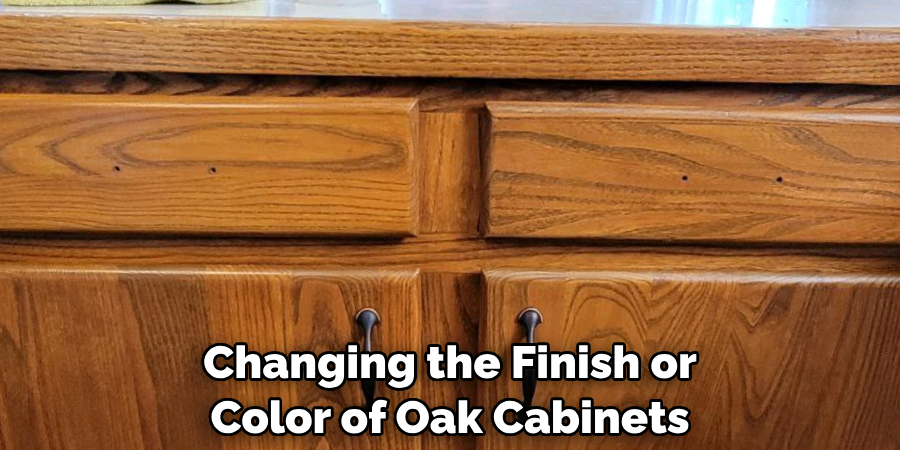
Changing the finish or color of oak cabinets can drastically alter the room’s aesthetic, from rustic warmth to sleek modernity, without altering the existing layout or undergoing a full renovation. Furthermore, this customization can also improve functionality, as changes in hardware or the addition of organizational elements during the redo can make storage more efficient and accessible.
The environmental impact is another consideration; by refinishing cabinets instead of replacing them, homeowners contribute to sustainability efforts by reducing waste and the demand for new raw materials.
Essentially, the process of redoing oak cabinets not only enhances the visual appeal and value of a home but also promotes a practical and eco-friendly approach to home improvement.
Assessing Your Oak Cabinets
Before embarking on the process of refinishing your oak cabinets, it’s crucial to assess their current condition and determine the feasibility of a successful redo.
Start by examining the structure of your cabinets for any signs of damage, such as warping, water damage, or significant wear and tear. Cabinets in good structural condition are ideal candidates for refinishing, while those with extensive damage may require more comprehensive repairs or even replacement.
Next, consider the current finish on your cabinets. Over time, oak cabinets may have been painted, stained, or sealed, and the type of finish can affect the preparation steps needed for refinishing.
For example, cabinets with a thick layer of paint may require more extensive stripping and sanding.
Also, evaluate the style of your cabinets. While the structure and finish are important, the design and layout of your cabinets should also be considered. Even with a new finish, outdated or impractical designs may not meet your current needs or aesthetic preferences.
Assessing your cabinets thoroughly will help you make an informed decision about whether refinishing is the right choice for you and what changes could be made to enhance both their form and function.
Evaluating the Current Condition
Before you start the process of refinishing your oak cabinets, a detailed evaluation of their current condition is essential. This evaluation will help you determine the scope of work required and whether refinishing is a viable option.
Begin by inspecting each cabinet for signs of structural damage such as cracks, splits, or loose joints, which may affect the integrity of the cabinetry. It’s also important to check for issues like mold or mildew, especially under the sink where moisture is common.
Take note of the surface condition of the cabinets. Look for scratches, dents, or areas where the existing finish is peeling or flaking off, as these will require particular attention during the preparation phase. If your cabinets have a previous layer of paint or varnish, assess how well it has adhered to the wood over time.

Depending on what you find, you may need to strip the old finish completely or simply sand it to create a smooth base for the new finish.
Assessing the hardware is also a crucial step. Check if hinges, handles, and knobs are in good condition or if they need replacement. Sometimes, updating the hardware alone can significantly change the cabinets’ look and functionality.
Identifying Desired Changes
Once you’ve assessed the condition of your oak cabinets, the next step is to identify the specific changes you wish to achieve through refinishing. This step is crucial for setting clear goals and ensuring that the end result aligns with your vision for the space. Begin by considering the aesthetic aspects; think about the color and finish that would best complement your kitchen’s overall design. Do you prefer a light, airy feel or a darker, more traditional look? Would a glossy finish add the right touch of modernity, or is a matte finish more in line with your style?
Functional improvements should also be taken into account. Reflect on how your current cabinets meet your storage needs. Perhaps introducing pull-out shelves, drawer organizers, or additional racks could enhance usability. Also consider the ease of maintenance associated with different finishes, especially if you’re aiming for a low-maintenance kitchen.
Don’t forget to factor in the latest trends in kitchen design, but ensure that your choices have a timeless appeal to avoid your cabinets quickly appearing dated. Balancing contemporary trends with classic elements guarantees that your refinishing project adds both value and beauty to your home.

In this phase, consulting with design professionals or leveraging interior design resources can provide inspiration and practical advice on achieving the desired changes.
Creating a mood board or collecting images of liked styles can also help articulate your vision more clearly. Identifying your desired changes in detail will streamline the refinishing process, making it easier to communicate your goals to any professionals involved and ensuring the project’s success.
Setting Realistic Expectations
When undertaking the refinishing of oak cabinets, it’s vital to set realistic expectations for both the process and the outcome. Understanding that refinishing involves multiple steps, including cleaning, sanding, repairing, and applying new finishes, helps set a timeframe that accommodates for thorough work rather than rushing through stages.
Timeframes can vary significantly based on the scale of the project, the condition of the cabinets, and whether the work is done professionally or as a DIY project.
Expect variations in the wood’s final appearance due to inherent characteristics of oak, such as its grain pattern, which can affect how stains and finishes are absorbed. Some areas might appear darker or lighter, contributing to the unique beauty of natural wood.
Additionally, consider the practicality of your aesthetic choices; for example, lighter finishes might require more maintenance to keep the cabinets looking clean.
Budgeting accurately is another crucial aspect of setting realistic expectations. Costs can escalate, especially if unexpected repairs are needed or if you decide to upgrade hardware. Allocate a contingency fund within your budget for unforeseen expenses to avoid stressful financial surprises.

Budgeting for Materials and Tools
Once you have set realistic expectations for refinishing your oak cabinets, the next critical step is to budget for the materials and tools required for the project. This involves not only factoring in the cost of paint, stains, or finishes but also considering the tools and supplies needed for preparation, application, and cleanup processes.
Begin by listing all materials such as sandpaper, primer, paint or stain, and topcoat finish, alongside any specialized tools you might need, like a sander, paintbrushes, and protective gear.
It’s advisable to do thorough market research to find the best deals without compromising on quality. For instance, higher quality brushes and rollers can provide a smoother finish and minimize the frustration of dealing with shedding bristles or uneven application.
While it might be tempting to save money by opting for cheaper alternatives, investing in quality materials can lead to a more professional-looking finish and longevity of your cabinets.
Also, consider the possibility of renting tools that you may only use once instead of purchasing them outright. This can significantly reduce your overall expenditure. Remember to include a buffer in your budget for unexpected expenses, such as additional prep work or the need for repair materials, to ensure you’re fully prepared for any surprises along the way.
10 Methods How to Redo Oak Cabinets
1. Cleaning and Preparing the Cabinets:
Before beginning any refinishing project, it’s essential to thoroughly clean the cabinets to remove grease, grime, and any residues that may have accumulated over time.
Use a mild detergent or a specialized cabinet cleaner and warm water to wipe down all surfaces. After cleaning, allow the cabinets to dry completely. Next, remove all hardware such as knobs, handles, and hinges. This will make the sanding and painting process easier and ensure a smooth finish.
2. Sanding the Surfaces:
Once the cabinets are clean and dry, it’s time to sand the surfaces to remove the existing finish and prepare them for the new one. Start by using medium-grit sandpaper (around 120-grit) to roughen up the surface and remove any glossy finish.
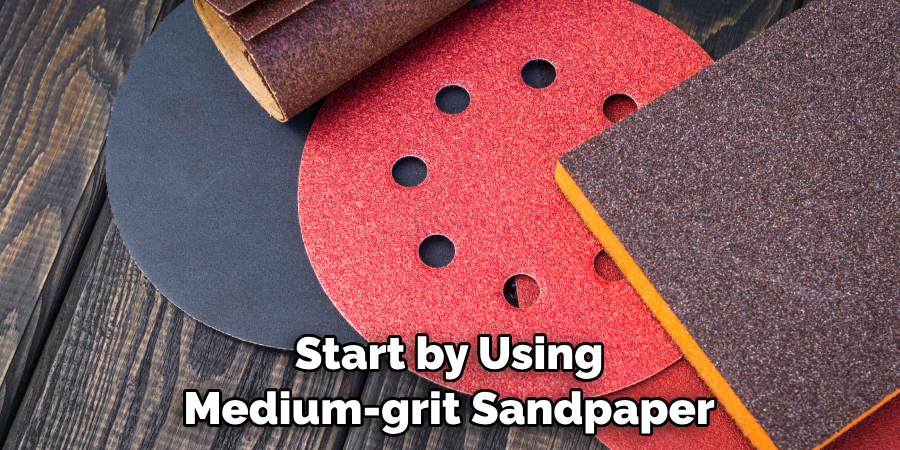
Sand in the direction of the wood grain to avoid scratching the surface. After sanding, wipe down the cabinets with a tack cloth to remove any dust or debris.
3. Filling in Imperfections:
Inspect the cabinets for any dents, scratches, or other imperfections that need to be addressed before refinishing. Use a wood filler or putty to fill in any holes or cracks, smoothing the surface with a putty knife.
Allow the filler to dry completely before sanding it down to be level with the rest of the cabinet surface. This step will ensure a smooth and flawless finish once the cabinets are painted or stained.
4. Choosing a Stain or Paint:
Decide whether you want to stain or paint your oak cabinets. Staining allows the natural beauty of the wood grain to show through while giving the cabinets a rich, warm color. Paint, on the other hand, offers endless possibilities for color and style, from classic white to bold hues.
Consider the overall aesthetic of your kitchen or space and choose a finish that complements it. Be sure to select a stain or paint specifically designed for use on wood cabinets for the best results.
5. Applying the Stain or Paint:
Once you’ve chosen your stain or paint, it’s time to apply it to the cabinets. Use a high-quality brush or sprayer for an even and smooth finish. If staining, apply the stain in the direction of the wood grain, using long, even strokes.
For painting, start with a primer to ensure proper adhesion and coverage, then apply the paint in thin, even coats. Allow each coat to dry completely before applying the next. Depending on the desired color and coverage, you may need multiple coats.
6. Adding Decorative Details:
Consider adding decorative details to your cabinets to enhance their visual appeal. This could include adding molding or trim to the doors and drawers, installing new hardware such as knobs and handles, or even incorporating glass inserts for a more open and airy look. These small details can make a big difference in the overall appearance of your cabinets and give them a custom, high-end look.

7. Sealing the Finish:
Once the stain or paint has dried completely, it’s important to seal the finish to protect it from moisture, stains, and wear and tear. Choose a high-quality polyurethane sealer for stained cabinets or a clear topcoat for painted cabinets.
Apply the sealer or topcoat in thin, even coats, following the manufacturer’s instructions. Allow each coat to dry completely before applying the next. This final step will help prolong the life of your newly refinished cabinets and keep them looking beautiful for years to come.
8. Reinstalling Hardware and Doors:
After the finish has dried and cured, reattach the hardware to the cabinets using a screwdriver or drill. Make sure all knobs, handles, and hinges are securely tightened.
If you removed the cabinet doors during the refinishing process, rehang them using the existing hinges or install new ones if needed. Take your time to ensure that the doors are properly aligned and level for a professional-looking finish.
9. Adding Finishing Touches:
Once the cabinets are back in place, take the time to add some finishing touches to complete the look. This could include installing new drawer liners, organizing and decluttering the interior of the cabinets, or adding decorative accents such as cabinet lighting or decorative knobs. These small details can help tie the room together and give your newly refinished cabinets a polished and cohesive look.
10. Maintaining Your Refinished Cabinets:
To keep your newly refinished cabinets looking their best, it’s important to maintain them properly. Clean them regularly with a mild detergent and warm water to remove any dirt or spills. Avoid using harsh chemicals or abrasive cleaners, as these can damage the finish.
Wipe down the cabinets with a soft cloth or sponge, and dry them thoroughly to prevent water damage. Additionally, be mindful of any excessive moisture in the kitchen, as this can cause the wood to warp or the finish to peel over time. With proper care and maintenance, your refinished oak cabinets will continue to enhance your space for years to come.

Conclusion
In conclusion, embarking on a project to redo oak cabinets can be both rewarding and transformative for your living space. By following the steps outlined in this guide, you can breathe new life into your cabinets and rejuvenate the entire room.
Whether you choose to stain, paint, or refinish your oak cabinets, meticulous planning, careful preparation, and attention to detail are key to achieving a stunning result.
Remember to select high-quality materials, take your time with each step, and embrace the process as an opportunity for creativity and self-expression.
With dedication and patience, you can achieve professional-looking results that reflect your personal style and enhance the aesthetic appeal of your home. So, roll up your sleeves, gather your tools, and get ready to transform your oak cabinets into stunning focal points that will be admired for years to come.
