


Are You Looking for a Way to Keep Your Cutting Board Safe and Clean? Look no further than this helpful guide on how to wrap a cutting board!
Wrapping your cutting board will keep it clean and organized while also making it easy to find. This blog post will teach you how to wrap your cutting board in just a few simple steps. So, keep reading for tips on how to wrap your cutting board like a pro!
There are many ways to wrap a cutting board, and the method you choose will depend on how often you use your board, the type of wood it is made from, and how big it is. In this article, we will share some methods that are effective and easy to do. Choose the one that works best for you and get wrapping!
Why Should You Wrap a Cutting Board?
There are many reasons why you should consider wrapping your cutting board, including the following:
1. Protection:
A cutting board can get scratched, stained, and even cracked if it is not properly wrapped. By keeping it covered when not in use, you can protect it from these common problems.
2. Organization:
If your cutting board is always on your counter, keeping your kitchen organized and tidy can be difficult. Wrapping it up when you are not using it will help you easily find a place for it, whether in a drawer or on a shelf.
3. Cleanliness:
A cutting board may look clean and shiny at first, but tiny food particles can get trapped in the cracks and crevices. By wrapping your cutting board, you can ensure that it stays clean and is easy to wipe down as needed.
So if you are looking for a simple way to keep your cutting board clean, protected, and organized, consider how to wrap a cutting board today!
What Will You Need?
To wrap a cutting board, you will need the following materials and tools:
1. Wrapping paper or plastic wrap
2. Tape or elastic bands
3. A marker or label
4. Optional: scissors, ribbon, and other decorations
With these simple tools, you can wrap up your cutting board like a pro in no time! So, start wrapping today and enjoy the benefits of this easy and effective method.
10 Easy Steps on How to Wrap a Cutting Board
1. Laying You Cutting Board:
Start by laying your cutting board flat on a clean, dry surface. Make sure to remove any debris or dust from the surface before continuing. Because you will need to wrap the entire cutting board, you may want to move it to a larger surface or use multiple pieces of paper.
2. Covering the Edges:
Next, use your marker to label or draw a line around the edges of your cutting board. This will help you to ensure that you have completely covered all sides of the board and avoid any unsightly gaps. Be careful to make the markings neat and even.
3. Wrapping the Sides:
Once you have marked the edges of your cutting board, it is time to start wrapping! Begin by taking a piece of paper or plastic wrap and covering one side at a time. Use tape, elastic bands, or other supplies as needed to keep each side securely in place.
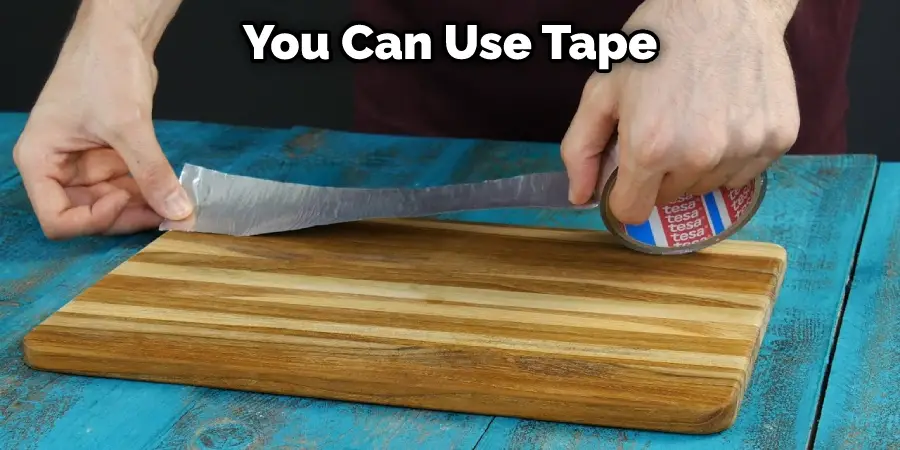
4. Securing the Surface:
Once you have wrapped all four sides of your cutting board, it is important to secure the surface so that it does not shift while you are working. You can use tape, clips, or other supplies to hold the paper in place until you have finished wrapping. Don’t forget to tape or tie up any loose ends as well.
5. Adding Decorations:
If desired, you may also choose to add decorations such as ribbons, bows, or other embellishments to your cutting board wrap. Simply cut and attach these items according to the instructions provided by the manufacturer of your supplies. It will add a nice finishing touch to your wrap!
6. Wrapping Up:
Once your cutting board is wrapped and decorated as desired, it is time to close up the package! To do this, simply use any remaining materials (like tape or elastic bands) to seal the edges of your cover securely shut.
7. Storing Your Cutting Board:
After wrapping your cutting board, you will need to find a safe place to store it. Depending on your available space, this may be a drawer, the top of your fridge, or another area in your kitchen. Make sure that the storage spot is out of direct sunlight and won’t be easily knocked over.
8. Maintaining Your Cover:
While wrapping your cutting board is an easy way to keep it clean and protected, you should also take steps to maintain your cover regularly. This might include washing and drying it after use and keeping any decorations clean and in good condition.
9. Replacing Your Cover:
Over time, even the best cutting board cover can become damaged or worn out from regular use. When this happens, you may need to replace your cover with a new one to continue protecting your cutting board. Be careful to choose a high-quality replacement that is the right fit for your board and will last many years.
10. Enjoying a Cleaner and Safer Kitchen:
By wrapping your cutting board, you can enjoy the benefits of a clean and organized kitchen for years to come. Whether you want to keep your counter free from clutter or prevent cross-contamination of food items, this simple solution will surely be a hit in any home or restaurant kitchen. Moreover, it is quick, easy, and affordable, so there’s no reason not to start wrapping your cutting board today!
Following these simple steps, you can wrap your cutting board easily. Whether you are wrapping up your own cutting board or preparing one for someone else, this method is sure to keep your kitchen clean and your food safe. So why wait? Start wrapping today and start enjoying the benefits of this easy and effective solution!
Different Methods You Can Check
1. Wrapping the Board in a Towel or Cloth:
The most common method used to wrap a cutting board is simply wrapping it with a clean, dry towel or cloth to prevent the cutting board from absorbing moisture.
2. Wrapping the Board in Plastic Wrap or Aluminum Foil:
Another way to protect your cutting board from moisture and contaminants is simply wrapping it tightly with plastic wrap or aluminum foil.
3. Storing Your Cutting Board in a Protective Case:
If you want an even more comprehensive approach, you can consider investing in a protective case for your cutting board. This will not only keep moisture out, but also prevent accidental damage and scratches that could lead to bacteria buildup over time.
No matter how you choose to protect your cutting board, the key is always to ensure that it is thoroughly clean and completely dry before storing it away. This will help preserve its quality and longevity, while helping to keep your kitchen environment safe and sanitary at all times.
5 Additional Tips and Tricks
- Wrapping your cutting board in materials that are not completely clean or dry.
- Leaving your cutting board exposed to moisture, sunlight, or other contaminants without any protective covering.
- Storing your cutting board above the stove or in other areas where it may be easily knocked over or contaminated by dust and food debris.
- Use disposable plastics or other materials for wrapping your cutting board, as these tend to accumulate bacteria more quickly than washable materials like cloths and towels.
- Neglecting to replace your cutting board cover as needed, particularly if it becomes damaged or worn out from regular use.
Whether you are wrapping a new cutting board or protecting an old one, taking the time to do it right is essential for preserving its quality and keeping your kitchen clean and safe.
Do Cutting Boards Need to Be Sealed?
There is no definitive answer to this question, as the best way to seal a cutting board will depend on your individual preferences and needs. Some people may prefer to simply wrap their board in a towel or cloth after each use, while others may opt for more comprehensive sealing methods like plastic wrap or aluminum foil.
However, regardless of how you choose to seal your cutting board, it is important to remember that how well you maintain and care for, it will have a significant impact on its lifespan and performance. This means ensuring that your board is always clean, dry, and free from any obvious damage or contaminants.
Conclusion
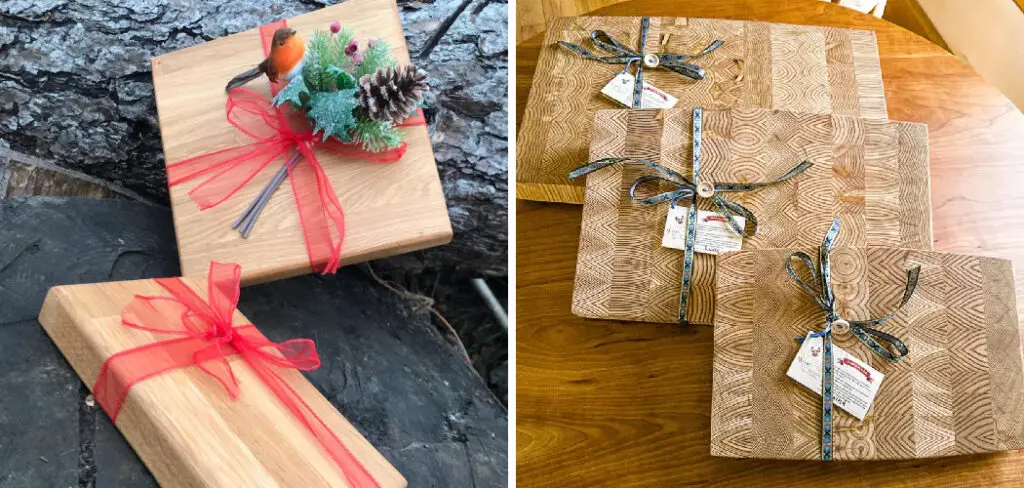
Wrapping a cutting board is easy and only takes a few minutes. With just some basic supplies, you can have your cutting board wrapped and ready for gifting in no time.
Now that you know how to wrap a cutting board, put your new skills to the test! Pick up a nice wood cutting board and some pretty wrapping paper, and get to work.
Your friends and family will be impressed by your handiwork, and they’ll love using a wrapped cutting board that’s as beautiful as it is functional.
Hopefully, with the tips and tricks provided in this guide, you can wrap your cutting board effectively and protect it from moisture, bacteria, and other contaminants.
Whether you’re wrapping a brand-new cutting board or an old favorite, remember to follow these simple steps to ensure that your kitchen stays clean and safe at all times. Good luck!
Professional Focus
Angela Ervin, a former interior designer turned blogger, specializes in kitchen design and renovations. Through her website, she blends her passion for cooking with design expertise, sharing practical and creative ideas. Known for balancing functionality and beauty, Angela’s insightful content has made her a trusted voice in home design and lifestyle.
About the Author
Angela Ervin, an experienced interior designer and blogger, combines her passion for kitchen renovations with storytelling. Living in Petersburg with her family, she enjoys cooking and testing her projects firsthand. Known for her humor and relatable style, Angela shares creative, functional design insights through her content, making her a trusted voice in home design.
Education History
University: Virginia Commonwealth University
Degree: Bachelor of Fine Arts (BFA) in Interior Design
- Angela’s education at VCU focused on mastering core interior design principles, including spatial planning, color theory, materials selection, and sustainable design practices.
- She gained hands-on experience through studio projects and collaborative design exercises, which honed her ability to create functional and aesthetically pleasing environments.
- Her coursework also emphasized problem-solving and practical applications of design, preparing her for real-world projects like her self-directed kitchen renovations.
- The program’s strong foundation in both technical skills and creative expression shaped Angela’s ability to seamlessly integrate form and function in her work.