


Are you looking for an easy and effective way to hang your cutting board on the wall? If so, read on for some simple tips and tricks that will help you get set up in no time.
It can be quite helpful to have a cutting board that is within arm’s reach while cooking. This guide will teach you how to hang cutting board on wall. You will need some basic tools and a few minutes of your time.
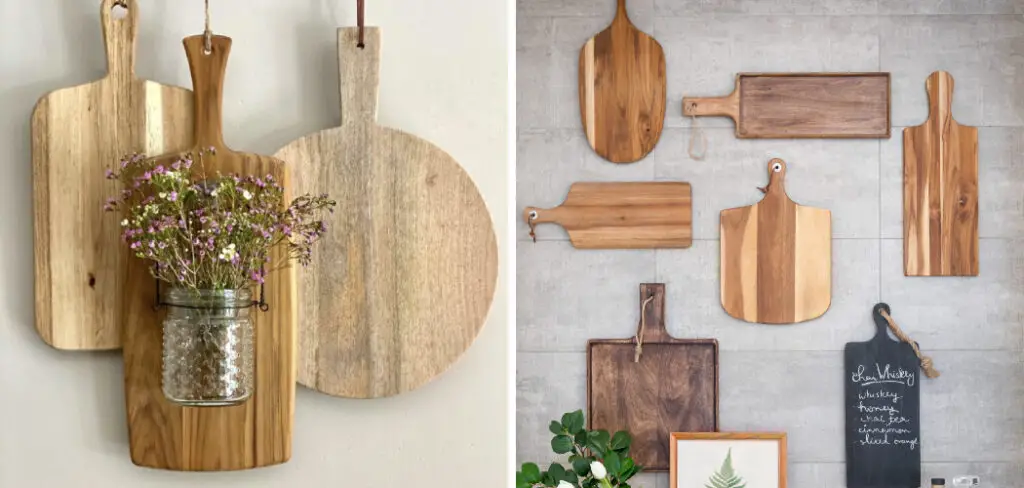
You might want to hang a cutting board on the wall for many reasons. Maybe you don’t have enough storage space for a cutting board in your kitchen, or you just like how it looks. Either way, hanging a cutting board is a quick and easy project that anyone can do. Let’s get started!
Why Should You Hang a Cutting Board?
You might want to hang your cutting board on the wall for several reasons. Perhaps you don’t have enough storage space in your kitchen, or maybe you just like how it looks.
Additionally, having a cutting board that is within arm’s reach while you’re cooking can be really convenient. It allows you to prep your ingredients quickly and efficiently, without going back and forth between the counter and stovetop.
Regardless of your reason, hanging a cutting board is an easy and effective way to keep it within arm’s reach while cooking. It can also help to save space and prevent clutter in your kitchen.
With these benefits in mind, here are some simple steps to help you hang your cutting board on the wall.
What Will You Need?
You will need a few basic tools and supplies to hang your cutting board on the wall. These include:
- A drill or screwdriver
- Wall anchors (if needed)
- Screws or nails
- Measuring tape or ruler
- Level
- Cutting board of your choice
With these tools in hand, you are ready to get started. Let’s take a look at the steps involved.
10 Easy Steps on How to Hang Cutting Board on Wall
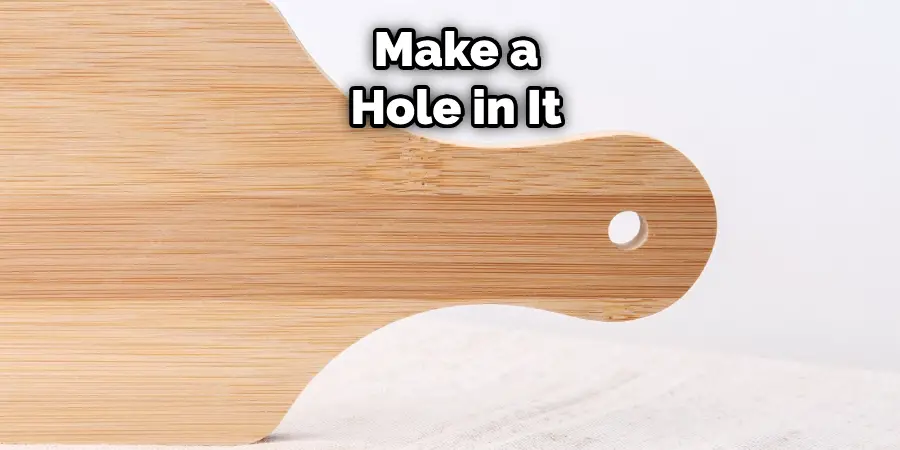
Step 1: Make a Hole in Your Cutting Board
Before you can hang your cutting board on the wall, you will need to make a hole in it. Using a drill or screwdriver and a sharp bit, carefully create a hole where you want to attach the cutting board to the wall. Be careful not to drill all the way through the cutting board, as you only need a small hole on one side.
Step 2: Measure and Mark Your Location
Next, measure the desired location for your cutting board on the wall and use a level to mark it with a vertical line. This will help you ensure that your cutting board is even and straight once you hang it up. Make sure to consider how far your arm will need to reach out when cutting or prepping ingredients on the board.
Step 3: Attach Wall Anchors, If Needed
Depending on the material of your wall, you may need to attach some wall anchors before you can safely attach your cutting board. If this is the case, use a drill or screwdriver to insert the anchors into the desired location on the wall. Don’t worry if they are not perfectly lined up with the mark you made earlier, as this can be adjusted later.
Step 4: Determine Your Fastener Type and Size
Now that you have determined how best to secure your cutting board to the wall, you will need to choose a fastener type and size based on what is recommended for your particular wall type. Common options include screws, nails, or bolts. You should also consider how much weight your chosen cutting board can support.
You Can Check It Out Wrap a Cutting Board
Step 5: Attach the Fastener
Using your chosen fastener, carefully attach it to the back of your cutting board in the hole you created. If you are using screws or nails, make sure they are long enough to go through the cutting board and into the wall anchors (if applicable). Otherwise, your cutting board may not be securely fastened and could come loose over time.

Step 6: Check Your Work
Before moving on, take a step back and check to ensure everything is level and secure. Make any necessary adjustments as needed. Such as adjusting your wall anchors if they seem loose.
Step 7: Hang Your Cutting Board
Once everything looks good, simply hang your cutting board on the wall at the marked location. Use a level to ensure that it is straight, and then tighten your fastener if needed. It will now be ready for you to use whenever you need it.
Step 8: Enjoy Your New Cutting Board!
Now that your cutting board is securely attached to the wall, you can enjoy all of the benefits that come with it. Whether you are prepping ingredients for a recipe or just hosting a casual gathering, having a cutting board in easy reach will make cooking and meal prep much simpler and more convenient.
Step 9: Maintain Your Cutting Board as Needed
To keep your cutting board looking its best for as long as possible, be sure to clean and maintain it according to the instructions provided by the manufacturer. This may include washing it regularly with soap and water, drying it thoroughly after each use, and oiling or seasoning it as needed.
Additionally, you may want to consider using a cutting board mat or tray to ensure that it doesn’t get damaged by knives, spilled ingredients, or other messes.
You Can Check It Out Wash a Charcuterie Board
Step 10: Avoid Overloading Your Cutting Board
When using your new cutting board, be sure only to load it with a reasonable amount of ingredients. This will help ensure that it does not get overloaded and fall off the wall, which could damage both the cutting board and your wall. So, always keep your cutting board in mind when planning your meals and recipes.
Following these steps will help you easily and safely hang your cutting board on the wall to enjoy this convenient and versatile kitchen tool for years to come.

Whether you are a professional chef or just a home cook looking to prep your meal prep process, having a cutting board at arm’s reach can make all the difference!
5 Additional Tips and Tricks
- Make sure that the surface on which you are hanging your cutting board is strong and secure. If you’re installing it in a kitchen, ensure that your cabinets are in good condition and can support the weight of your cutting board.
- Before you hang your cutting board, make sure to measure the space you want to install it in carefully. This will ensure that your cutting board fits properly and hangs securely on the wall.
- To hang a large or heavy cutting board on the wall, consider using anchors or other hardware to secure it. You may also want to use screws or other fasteners for added stability and security.
- If possible, avoid hanging wood cutting boards directly on drywall or plaster walls, as this can put extra strain on these surfaces and cause them to crack over time.
- To help prevent your cutting board from shifting or falling off the wall, consider installing a small rail or hook underneath it to provide extra support.
Whether you’re looking to add some extra storage space to your kitchen or simply want a unique way to display your favorite cutting boards, there are several tips and tricks that you can use to hang a cutting board on the wall with ease.
With just a few simple tools and supplies, you can create a stylish and functional space for all of your favorite cooking essentials!
Can Hanging Cutting Board Damage Wall?
There is no definitive answer to this question, as the potential for damage will largely depend on several factors, such as the type and quality of your wall surface, how heavy your cutting board is, how you install it on the wall, and how you handle and maintain it over time. That being said, some general precautions can help minimize the risk of damage to your wall when hanging a cutting board.
If possible, hang your cutting board on a surface that supports its weight without too much strain or pressure. For example, installing it in drywall may be less ideal than mounting it onto sturdy wood cabinetry or other fixed surfaces.
Additionally, using properly sized hardware or anchors can help prevent extra stress on your wall. And taking care to clean, maintain, and oil your cutting board regularly can help ensure that it doesn’t become too heavy or warped over time.
You Can Check It Out To How to Use a Wok on A Gas Stove
Conclusion
Now that you know how to hang cutting board on wall, there’s no excuse not to do it! Not only will it clear up space on your countertop, but it also makes a beautiful and unique decoration for your kitchen. Plus, it’s really easy to do so there’s no reason not to try it out.

Following these four simple steps, you can hang your cutting board on the wall as a decoration and practical storage solution. With a little bit of time and effort, you can have your cutting board securely hung on your wall, ready to use whenever you need it.
Hopefully, this information has helped you. Whether you’re looking for extra storage space or simply want to add some style to your kitchen, hanging your cutting board is a great way to accomplish both of these goals. So what are you waiting for? Get out there and start hanging your cutting board today!
You Can Check It Out To How to Clean Igloo Countertop Ice Maker
Professional Focus
Angela Ervin, a former interior designer turned blogger, specializes in kitchen design and renovations. Through her website, she blends her passion for cooking with design expertise, sharing practical and creative ideas. Known for balancing functionality and beauty, Angela’s insightful content has made her a trusted voice in home design and lifestyle.
About the Author
Angela Ervin, an experienced interior designer and blogger, combines her passion for kitchen renovations with storytelling. Living in Petersburg with her family, she enjoys cooking and testing her projects firsthand. Known for her humor and relatable style, Angela shares creative, functional design insights through her content, making her a trusted voice in home design.
Education History
University: Virginia Commonwealth University
Degree: Bachelor of Fine Arts (BFA) in Interior Design
- Angela’s education at VCU focused on mastering core interior design principles, including spatial planning, color theory, materials selection, and sustainable design practices.
- She gained hands-on experience through studio projects and collaborative design exercises, which honed her ability to create functional and aesthetically pleasing environments.
- Her coursework also emphasized problem-solving and practical applications of design, preparing her for real-world projects like her self-directed kitchen renovations.
- The program’s strong foundation in both technical skills and creative expression shaped Angela’s ability to seamlessly integrate form and function in her work.